Examples
Add role membership attributes to workflow
Administrators can add attribute fields to gather additional information about role membership. End users can add or update the attribute values by requesting a change in role membership. The following procedure describes how to update role membership attribute values using the standard Change role membership request. It assumes that roles have been defined and assigned to an end user.
Add role membership attributes
To add role membership attributes:
As a product administrator , click Manage the system > Resources > Resource attributes.
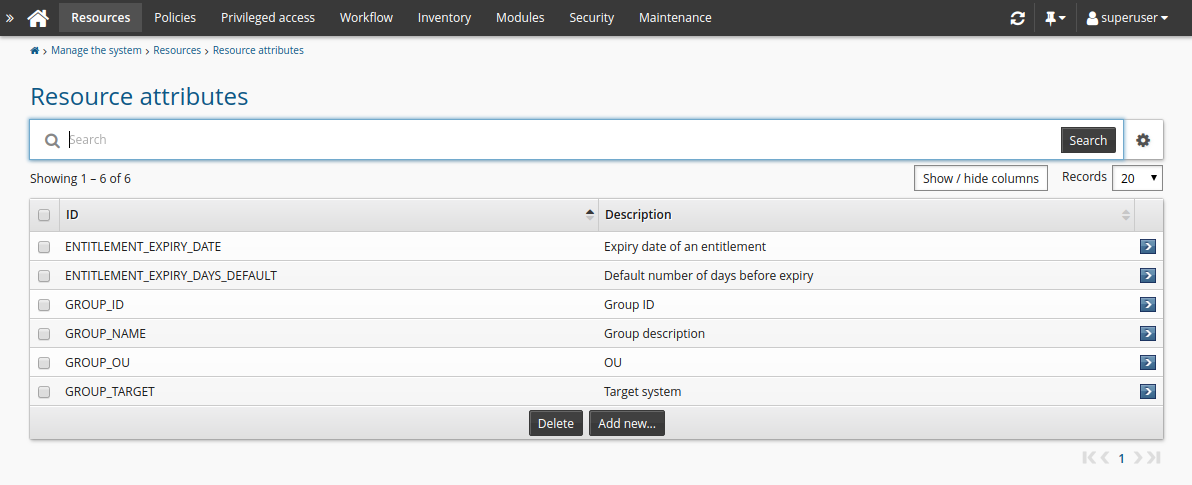
Click Add new…
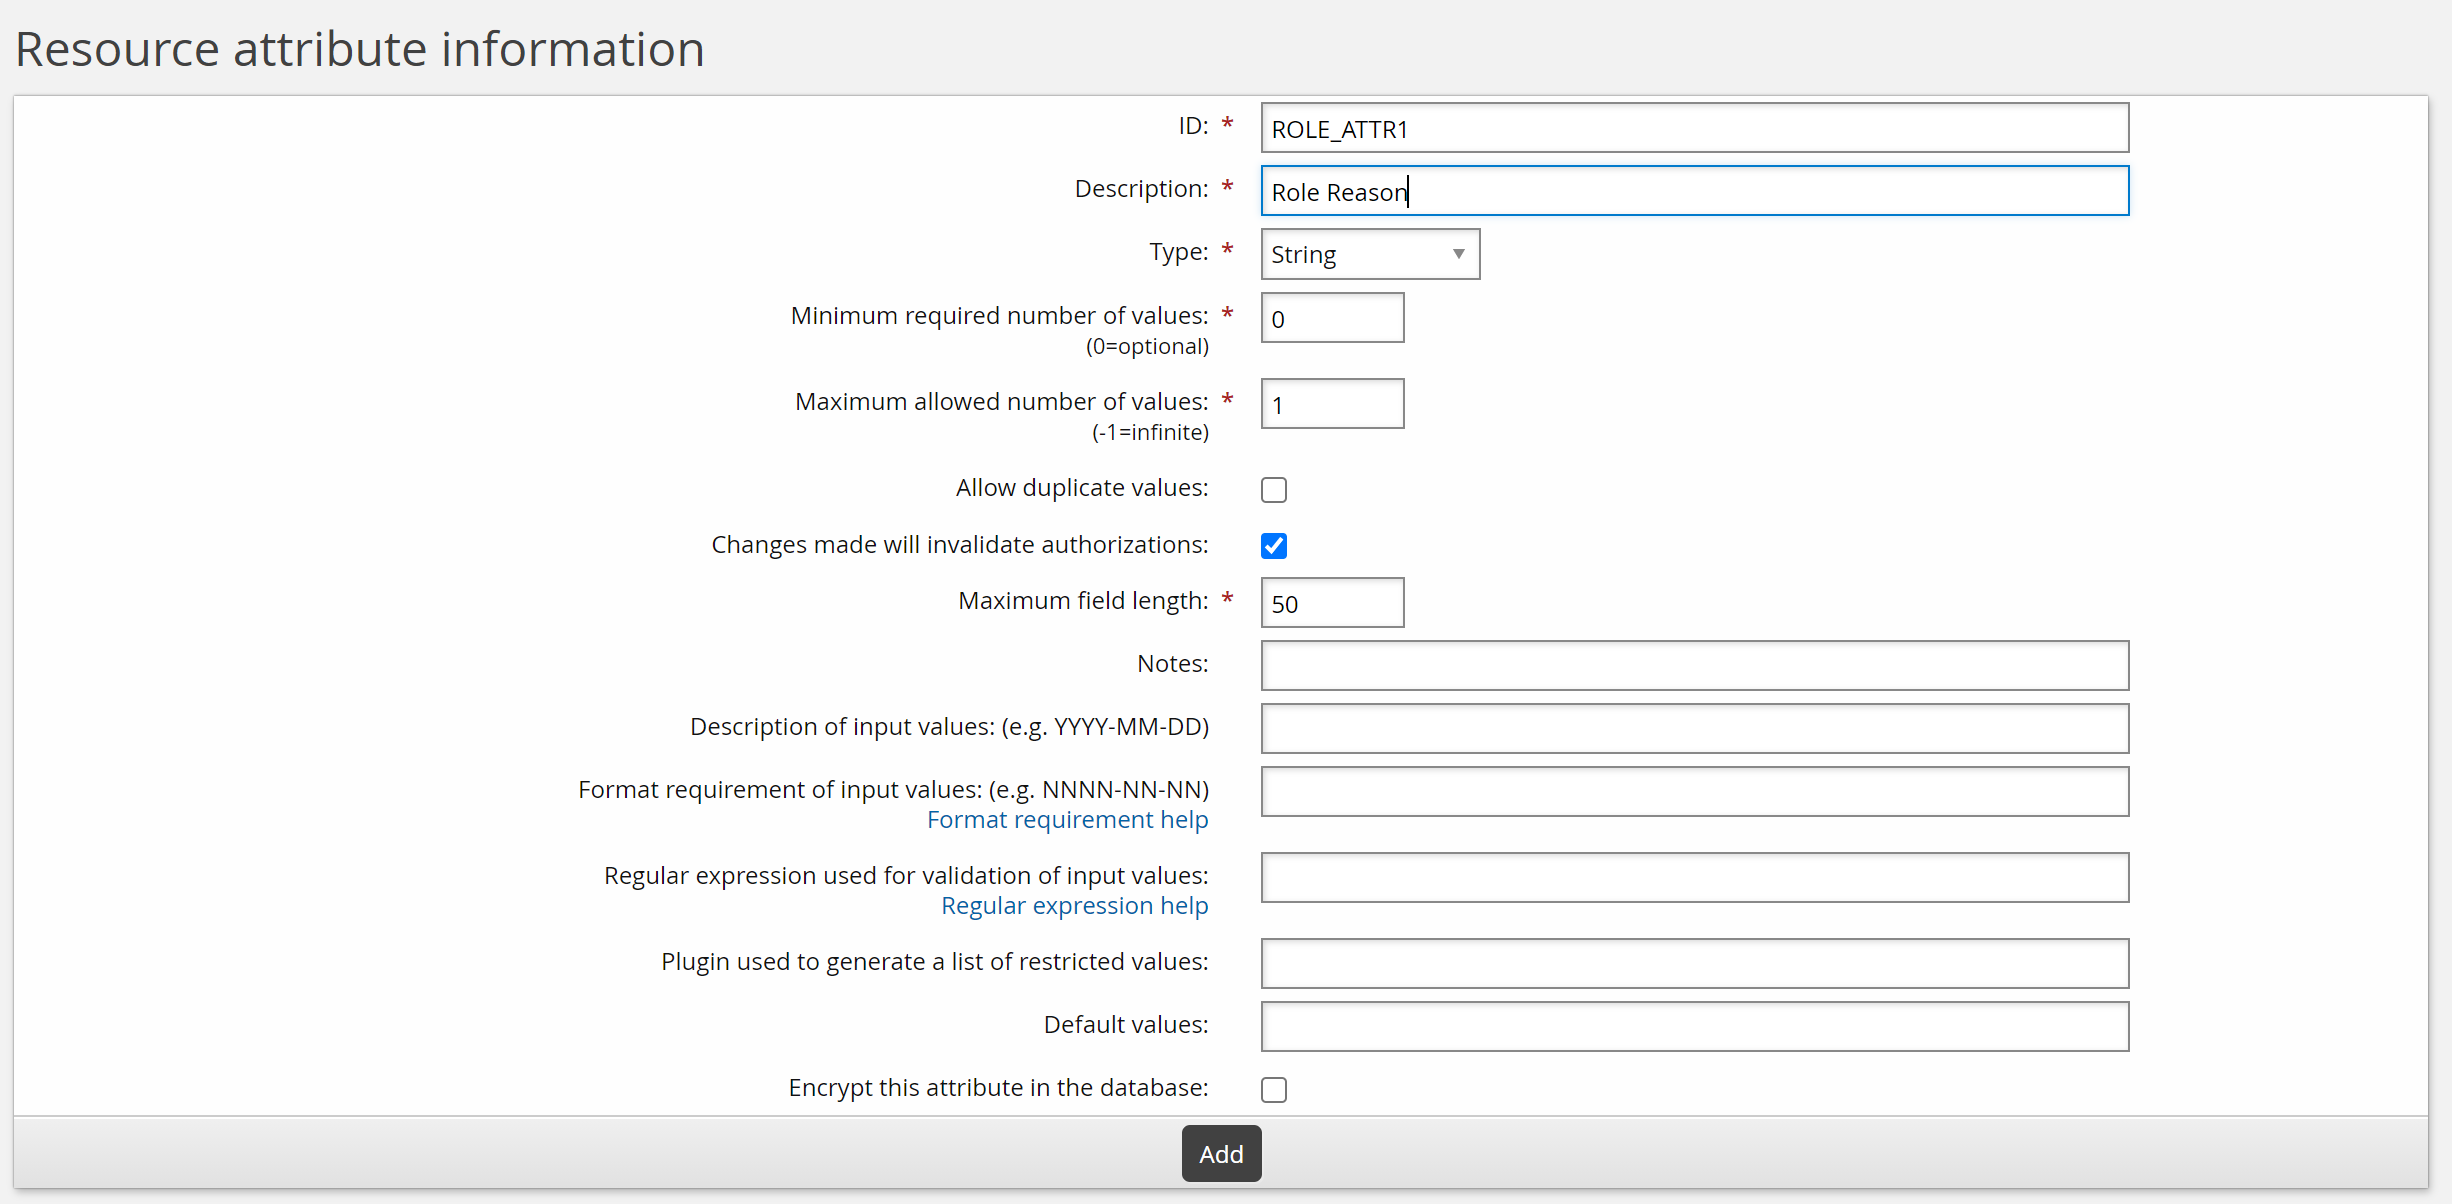
Enter values as follows:
ID: ROLE_ATTR1
Description: Role reason
Type: String
Minimum required number of values: 0
Click Add.
Click Add new… to add another attribute.
Enter values as follows:
ID: ROLE_ATTR2
Description: Role date
Type: Date/time
Minimum required number of values: 0
Click Add.
There are now two attributes that can be added to the role membership request page.
Set attribute access controls
To set access controls for the new attribute, add it to an attribute group:
As a product administrator , click Manage the system > Resources > Resource attribute groups.
Click Add new…
Enter the following values:
ID: ROLE_ATTR_GROUP
Description: Role attributes
Resource type: Role memberships

Click Add.
Click the Access control tab.
Select the checkboxes to allow the ALLUSERS group read and write permission.

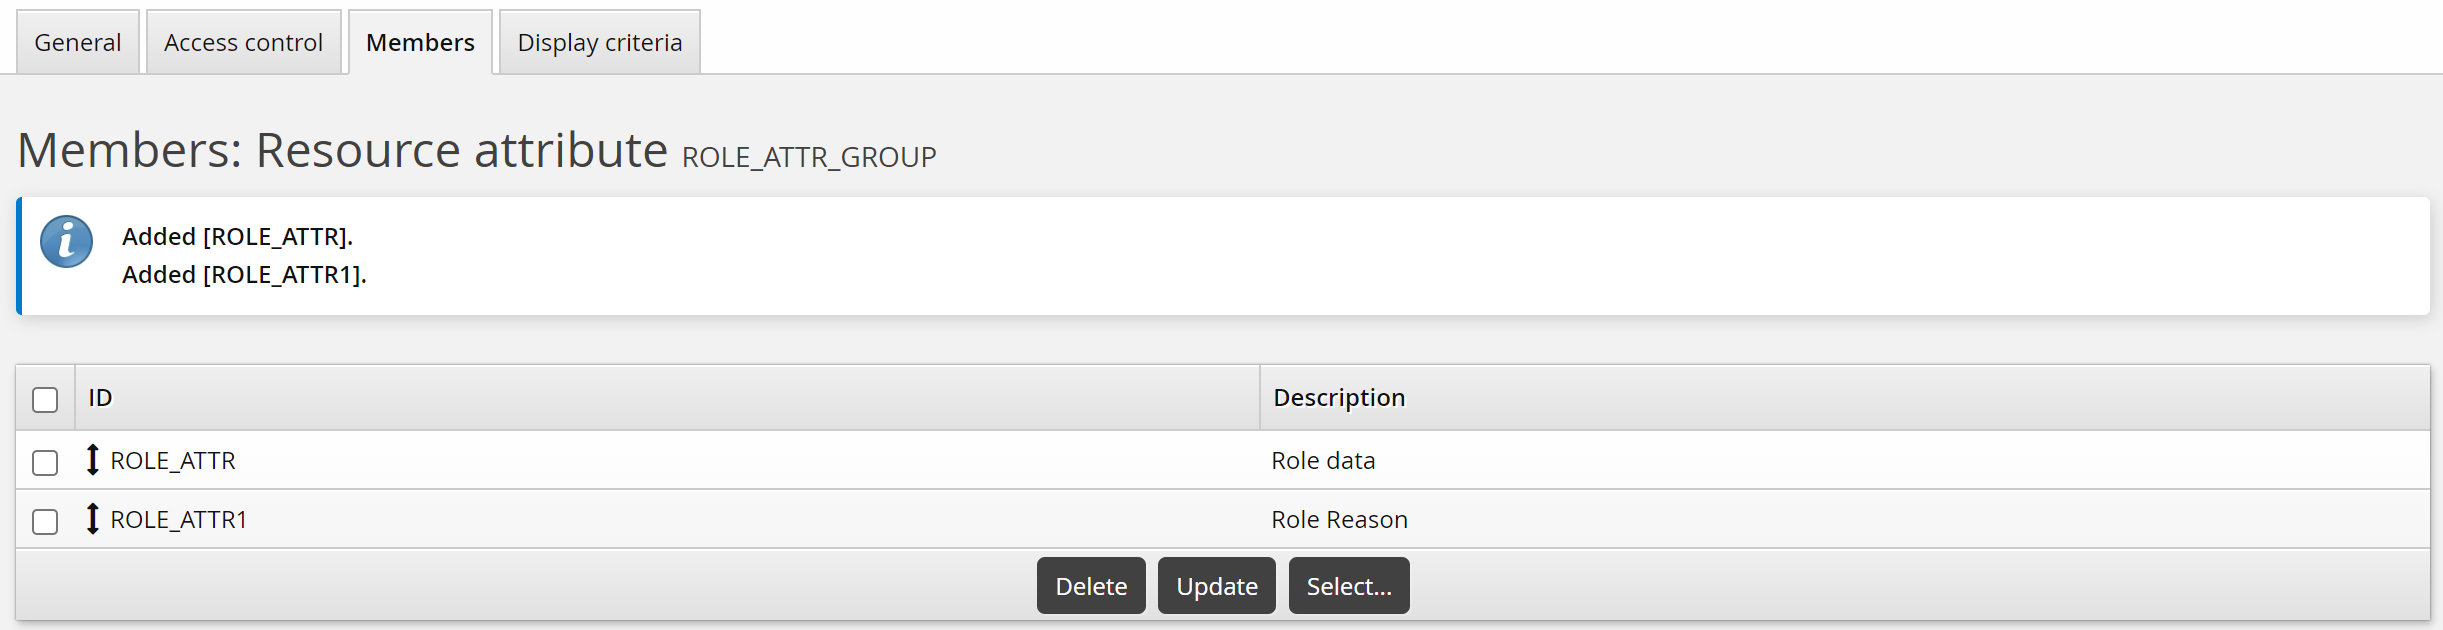
Click the Members tab.
Click Select…
Select the checkboxes for ROLE_ATTR1 and ROLE_ATTR2, then click Select.
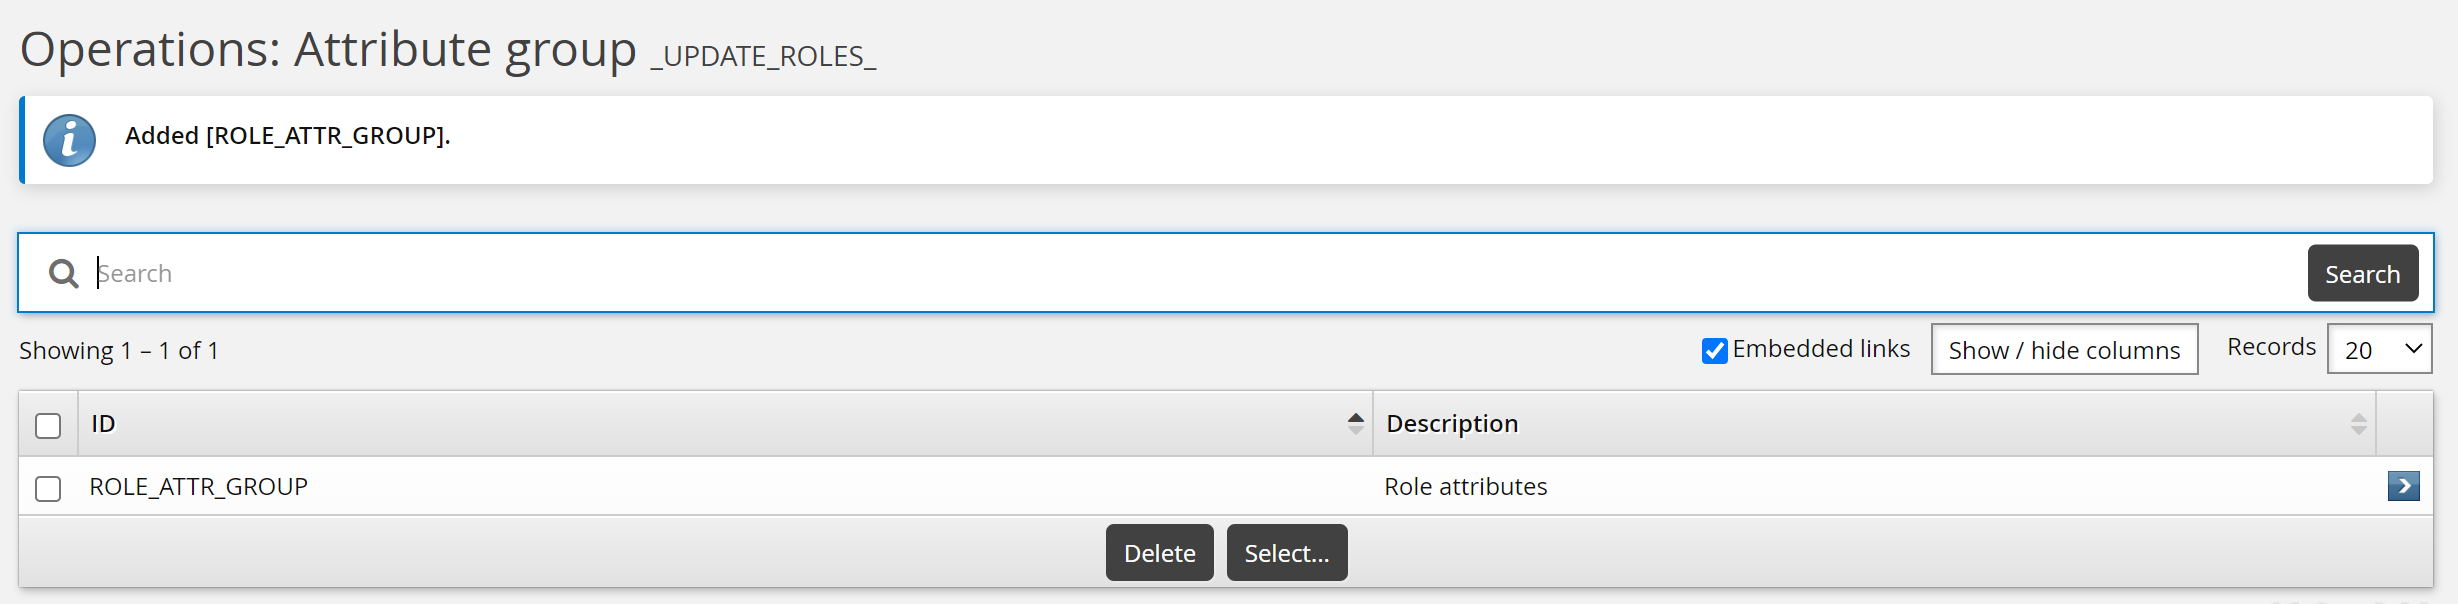
Add attributes to the pre-defined request
To add the role membership attributes to the Update role membership request:
As a product administrator , click Manage the system > Workflow > Pre-defined requests.
Select the built-in _UPDATE_ROLES_ request.
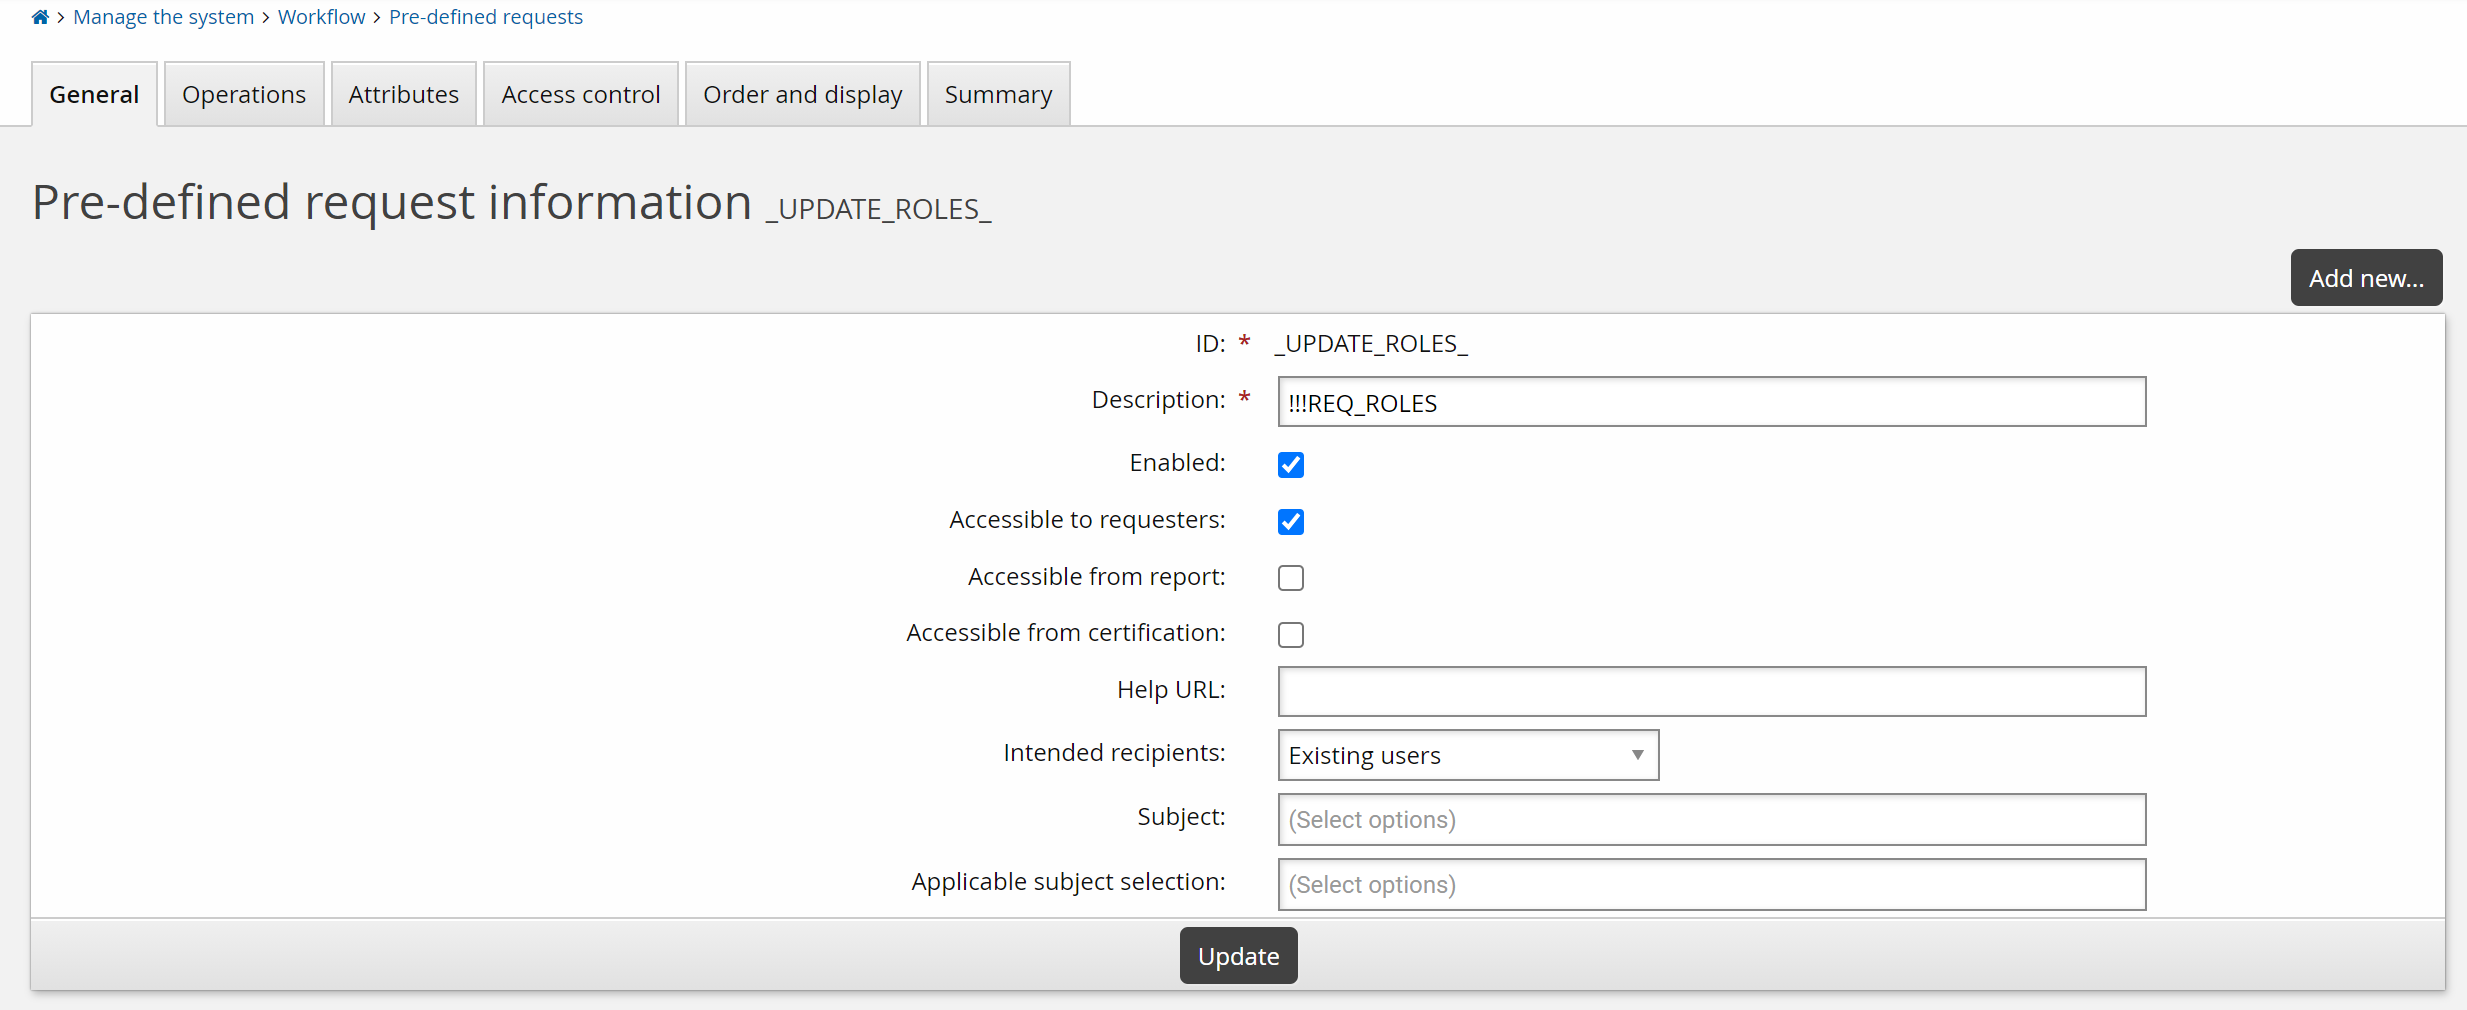
Select the Attributes tab.
Click Select…
Select the checkbox for the ROLE_ATTR_GROUP, then click Select.
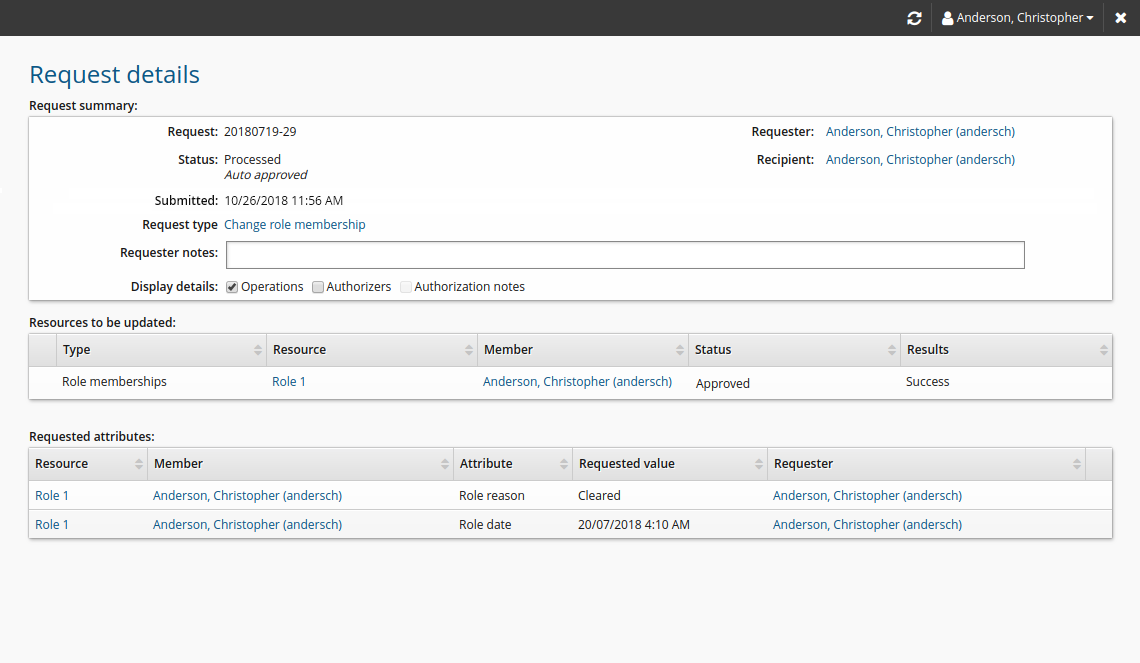
Update role attributes
To update role attributes as an end user:
Under the My profile section, click View and update profile to see the page.
Click Change role membership in the requests section.
Bravura Security Fabric displays the request wizard.
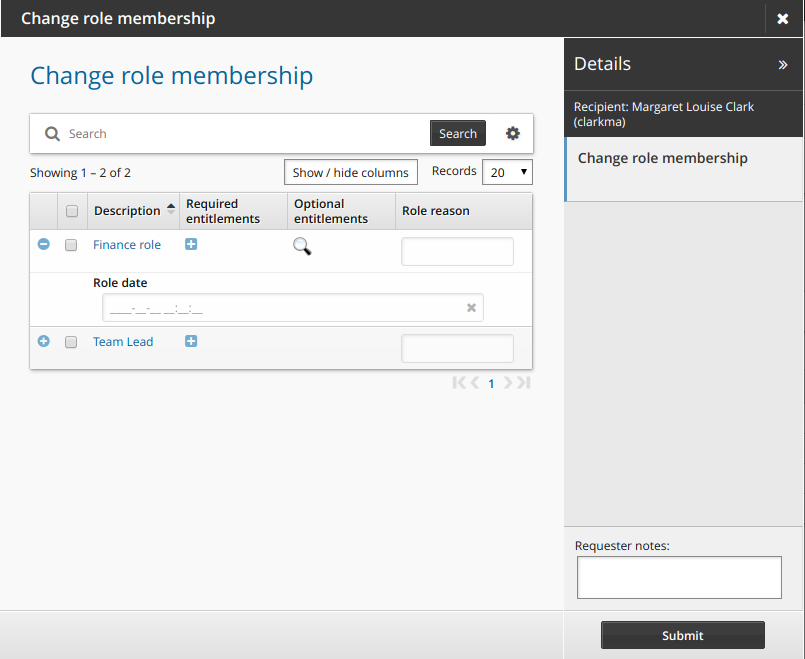
Enter values for the attributes.
Click Submit.
Relevant authorizers are notified to review the request if necessary.
Attribute values are displayed on the request details page.
Search for resources based on attributes
Some organizations have very large numbers of resources, such as target systems and managed groups. It can be difficult to find groups of resources, or resources that match specific criteria; for example, you might want to find all target systems at the organization’s New York location.
If you require each target system to set a Location resource attribute, then this attribute is available for use with the advanced search engine to find all target systems with Location set to New York. You can narrow the search results further by using additional attributes.
Use resource attributes to control plugin behavior
You can use plugins throughout Bravura Security Fabric to implement business logic, and in some cases this requires associating configuration data with resources; for example, when configuring managed group s to require serial authorization instead of having a single authorizer.
Instead of using an external CSV file to store configuration data, you can use resource attributes and associated API functions. You can configure resource attributes as required values when creating new resources, instead of having to update an external file in order for the business logic to function properly.
Use a group entitlement attribute
You can apply the built-in ENTITLEMENT_EXPIRY_DATE attribute to members of a managed group.
When the expiry date arrives, an email can be sent to prompt the removal of that user from the group.
Add a resource attribute group to allow users to update the entitlement attribute
Click Manage the system > Resources > Resource attribute groups.
Click Add new…
Enter the following information:
ID: Group_entitlements_attrs
Description: Group entitlement attributes
Resource type: Account group memberships
Click Add.
Click the Access control tab.
Select ”Allow read” and ”Allow write” for ALLUSERS.
Click Update.
Click the Members tab.
Click Select…
Select ”ENTITLEMENT_EXPIRY_DATE”.
Click Select .
Click the Display criteria tab.
Ensure the Display type is set to ”Main”.