Import rules
Import rules allow you to define custom criteria, referred to as “conditions”, to evaluate discovered objects and:
Add discovered systems as target systems using a target system import rule
Bind systems to managed system policies using a managed system import rule
Bind accounts to managed system policies using an manged account import rule
Delete systems and accounts
Unbind (offboard) managed systems and accounts
This can happen during auto discovery , at contact between the Local Workstation Service and the Bravura Privilege server or you can evaluate objects then choose to apply the results.
Import rule order
The import rules are processed by the Discovery service (iddiscover) in this order:
Target systems
Managed systems
Managed accounts
You define the order of bind vs unbind actions on the managed system and managed account import rule configuration pages. The unbind rules have to be sorted at the end of the list in order for them to act as intended.
Once a rule matches an object (system or account), that object is not available for the following rules; so, in case multiple rules match a single object, the first rule to match applies.
Once a match is made and a target is created or an object is managed or unbound, the rules will evaluate again against that object only if the rule is updated, or an attribute relevant to the rule criteria changes its value. For more details, see Re-evaluating import rules .
See also
Import rules are part of the infrastructure auto discovery feature. It is recommended that you read Implementing Infrastructure Auto Discovery before configuring these settings.
Getting started
Requirements
You require the "Manage policies administrative privilege" in order to access the Import rules menu item.
Navigation steps for target system import rules
Use the Resources tab in the Manage the system (PSA) module to add, test, and delete import rules for target systems. You can also use this page to access additional configuration settings.
To navigate to the import rules page for target systems:
Click Manage the System > Resources > Target systems> Import rules to determine which discovered systems should become managed target systems and have corresponding target systems created for them.
Click Add new… to add a new target system import rule .
Or,
Select an existing import rule to update rule settings, associate the rule with managed system policies , modify conditions, and evaluate conditions.
You can also enable, disable, delete or test rules on this page.
Navigation steps for managed system and managed account import rules
Use the Privileged access tab in the Manage the system (PSA) module to add, test, and delete import rules for managed systems and accounts. You can also use this page to access additional configuration settings.
To navigate to the import rules page for managed systems and managed accounts:
Click Manage the system > Privileged access > Import rules .
Select an import rule type:
Managed systems – to determine managed system policy membership for managed systems
Managed accounts – to determine which accounts to manage on member systems in managed system policies
Click Add new… to add a new managed system or managed account import rule .
Or,
Select an existing import rule to update rule settings, associate the rule with managed system policies , modify conditions, and evaluate conditions
You can also enable, disable, delete or test rules on this page.
Target system import rules
Using target systems import rules
Use target system import rules to determine which discovered systems should be managed and have corresponding target systems created for them.
One of the main reasons for using target system import rules is to define how the system will be connected. An important decision to make for target system import rules is choosing the source systems whose computers will be subject to the import rule.
Local service mode target systems are not connected to source systems. They still require the local service mode client to contact the server. You can also use import rules to delete target systems.
If a target system is a managed system, then deleting it removes all managed passwords from Bravura Privilege . Only systems which were discovered and managed using import rules can be deleted using import rules.
Manually defined target systems cannot be deleted using import rules.
Adding a target system import rule
To add a target systems import rule:
Click Manage the System > Resources > Target systems> Import rules.
Click Add new…
Type an ID and Description .
Enable Import all discovered objects of this type if you want all evaluated objects to automatically pass the import rule. Confirm the dialog box.
If enabled, the next step is not necessary.
Configure the import rule Combining conditions setting so that discovered objects:
Must Match all conditions to satisfy the import rule, or
Can Match any condition to satisfy the import rule.
Configure Action to perform on matching objects . Select whether to:
Manage all discovered objects that satisfy this rule, or
Delete all discovered systems that satisfy this rule.
Set the Managed systems evaluation type to the type of managed system that the import rule will be applied to - push or local service mode.
To manage target systems, set the Template target system to define target system information for new managed systems that satisfy this import rule.
For push mode, configure the Strategy for selecting source systems to:
Include all source systems, or
Include some source systems, or
Exclude some source systems.
Click
 to select source systems to include or exclude.
To manage target systems, set the New system connection credentials for the Bravura Privilege server to use to connect to new managed systems that satisfy this import rule.
If the credentials are invalid, the system will not be imported and managed by Bravura Privilege .
Click Add.
Import rules are disabled by default, and must be enabled to be applied during auto discovery . You can enable or disable an import rule on the Import rule s page and on each rule’s specific page.
Best practice
It is best practice to carry out a test or trial run before enabling this option.
Managed systems and managed accounts import rules
Use managed systems import rules to determine which systems to manage and under which policies. Use managed accounts import rules to determine which accounts to manage and under which policies.
You can also use import rules to delete managed systems and accounts.
Using managed systems import rules
Use managed systems import rules to determine policy membership; for example:
According to computer organization structure (OU, department, location, purpose, and so on)
As a condition for being put into other policies
See Defining conditions for examples using the attachedPolicies attribute.
This could be a staging requirement to put newly discovered systems into a group, before moving them to other policies.
Grouping systems that have issues with them, such as not being contactable in the past few days.
This is known as a tombstone policy .
See Defining conditions for examples using the compFailurePastThreshold attribute.
When defining managed systems import rule policies, consider the following:
What will all the managed systems in this policy have in common?
Will they all manage the same account ID?
Will they all have similar services running on them (with corresponding accounts to manage them)?
Will they have similar local privileges managed?
Managed systems with checked-out passwords cannot be unbound.
Systems can be unbound without losing managed password histories.
You must link managed systems rules to managed systems policies .
Using managed accounts import rules
Use managed accounts import rules to determine what accounts to manage. It is recommended that you set these rules only after setting up managed system policies and managed system import rules. That way, defining managed account import rules is simply a matter of setting the account ID to look for managed accounts.
Windows service accounts must be listed by Bravura Privilege before they can be managed.
Managed systems must be a member of at least one managed system policy for their accounts to be managed using import rules.
Consider:
Is an import rule needed?
If an account has identical properties and purpose for all members of a policy, for example an administrator or root account, then you can simply manually enter the account ID in the policy configuration.
Will the managed system join and leave the policy often?
If member system is removed from a policy, the managed account ID that is associated with it is automatically removed.
Managed accounts with checked-out passwords cannot be unbound.
You must link managed accounts rules to managed system policies .
Adding managed systems import rules
To add a managed systems import rule:
Click Manage the system > Privileged access > Import rules > Managed systems .
Click Add new…
Type an ID and Description .
Enable Import all discovered objects of this type if you want all evaluated objects to automatically pass the import rule. Confirm the dialog box.
If enabled, the next step is not necessary.
Configure the import rule Combining conditions setting so that discovered objects:
Must Match all conditions to satisfy the import rule, or
Can Match any condition to satisfy the import rule.
Configure Action to perform on matching objects . Select whether to:
Bind all discovered managed objects that satisfy this rule, or
Unbind all discovered managed objects that satisfy this rule.
Set the Managed systems evaluation type to the type of managed system that the import rule will be applied to - push or local service mode.
Configure the Unbind objects if they no longer satisfy this rule option to determine whether objects that previously passed the import rule should archived when they fail the import rule. Check the option to have objects unbound/archived.
If this option is not checked, no action will be performed for failed objects. You will have to manually resolve any related issues.
For push mode, configure the Strategy for selecting source systems.
Click
to select source systems to include or exclude.Click Add.
Import rules are disabled by default, and must be enabled to be applied during auto discovery . You can enable or disable an import rule on the Import rules page and on each rule’s specific page.
Best practice
It is best practice to carry out a test or trial run before enabling this option.
Adding managed accounts import rules
To add a managed accounts import rule:
Click Manage the system > Privileged access > Import rules > Managed accounts .
Click Add new…
Type an ID and Description .
Enable Import all discovered objects of this type if you want all evaluated objects to automatically pass the import rule. Confirm the dialog box.
If enabled, the next step is not necessary.
Configure the import rule Combining conditions setting so that discovered objects:
Must Match all conditions to satisfy the import rule, or
Can Match any condition to satisfy the import rule.
Configure Action to perform on matching objects . Select whether to:
Bind all discovered managed objects that satisfy this rule, or
Unbind all discovered managed objects that satisfy this rule.
Configure the Unbind objects if they no longer satisfy this rule option to determine whether objects that previously passed the import rule should archived when they fail the import rule. Check the option to have objects unbound/archived.
If this option is not checked, no action will be performed for failed objects. You will have to manually resolve any related issues.
Click Add.
Import rules are disabled by default, and must be enabled to be applied during auto discovery . You can enable or disable an import rule on the Import rules page and on each rule’s specific page.
Best practice
It is best practice to carry out a test or trial run before enabling this option.
Linking import rules to policies
Each managed systems and managed accounts import rule must be associated with at least one managed system policy. To link import rules to managed system policies:
Navigate to the Import rules page for a managed system or managed account.
Click Policies .
Select the policies with which you want to associate the rule.
Click Update.
You can also link rules to policies on the page (Manage the system > Privileged access > Managed system policies > <policy> ).
To unlink an import rule from a managed system policy, all objects that were added by the import rule must first be removed from the policy.
Offboarding managed accounts and systems with import rules
Managed account import rules can be used to unbind managed accounts from specific Managed System Policies (MSPs). This process is referred to as "offboarding" the managed account. When a managed account is offboarded by a managed account import rule:
If the managed account password has not yet been modified within Bravura Privilege (randomized / overridden / etc)
The managed account is removed from the MSPs specified by the rule configurations.
Resource attributes for the managed account are deleted.
If the managed account password has been modified within Bravura Privilege :
The managed account is removed from the MSPs specified by the rule configurations and then placed into the HISTORICAL_DATA_GRP policy.
The managed system for the account:
Will be added to the HISTORICAL_DATA_GRP policy
Will be removed from the MSP the account was unbound from given the system has no other managed account assigned to that MSP.
Resource attributes for the managed account are deleted.
The MSP assignment of a managed system is derived from the MSP assignment of its managed accounts. For example, if a managed system has Account1 on Policy1 and Account2 on Policy2 then the managed system belongs to Policy1 and Policy2. Policy1 and Policy2 can be any MSP including HISTORICAL_DATA_GRP. Managed accounts at any given time can only belong to one MSP.
Managed system import rules can be used to unbind managed systems from specific MSPs. This process is referred to as "offboarding" the managed system. When a managed system is offboarded by a managed system import rule:
If the managed system has no managed accounts with passwords modified by Bravura Privilege (randomized / overridden / etc):
Both the managed system and its managed accounts will be removed from the MSP specified by the rule configurations.
Resource attributes for the managed system are deleted. Resource attributes for this system’s managed accounts are deleted.
If the managed system has managed accounts with passwords modified by Bravura Privilege :
Both the managed system and its managed accounts will be removed from the MSP specified by the rule configurations and then placed into the HISTORICAL_DATA_GRP policy.
Resource attributes for the managed system are deleted. Resource attributes for this system’s managed accounts are deleted.
Passwords for managed accounts that get placed in HISTORICAL_DATA_GRP are still accessible, but the passwords can not be randomized.
Managed account/system import rules can offboard a managed account/system in one of two ways:
The object is offboarded when it no longer matches the conditions of the bind rule that managed it.
This happens for import rules which have option Unbind objects if they no longer satisfy this rule enabled in the General tab of the import rule configurations. This type of bind rule should only offboard and remove resource attributes for systems/accounts it originally bound.
The Policies tab shows the MSPs this import rule is acting on behalf of.
The object is offboarded when it matches the conditions of an unbind rule
A managed system/account unbind rule is an import rule that sets Action to perform on matching objects = Unbind all discovered objects that satisfy this rule in the General tab.
The Policies tab shows the MSPs this import rule is acting on behalf of.
Teams are assigned by resource attributes in Bravura Privilege . When resource attributes are removed due to a managed system / managed account offboard via import rules they are offboarded from the team to which they are assigned.
An offboard on either a managed account that is checked out or a managed system with checked out accounts is not possible. The managed account must first be checked in and the unbind will be re-attempted the next time the import rules are evaluated.
Take care when configuring an unbind rule to prevent misconfigurations. See Considerations when configuring import rules to offboard or delete managed objects for more information.
Deleting systems and accounts from Bravura Privilege using import rules
Target system import rules can be used to delete a system and its accounts from Bravura Privilege . When a delete is processed by a target system import rule the following happens:
The managed system and its managed accounts will be removed from all managed system policies they are bound on.
The system and accounts are removed from all policies (including HISTORICAL_DATA_GRP) and are then deleted from Bravura Privilege . Passwords will no longer be accessible.
Resource attributes for the managed system are deleted. Resource attributes for this system’s managed accounts are deleted.
Other information associated with the system and accounts (e.g. password history, etc) will also get deleted.
Target system import rules will delete system and accounts when it matches the conditions of a delete rule:
A target system delete rule is an import rule that sets Action to perform on matching objects = Delete all discovered objects that satisfy this rule in the General Tab.
Teams are assigned by resource attributes in Bravura Privilege . When resource attributes are removed due to target system delete via import rules they are offboarded from the team to which they are assigned.
The target system delete rule will be unable to perform the deletion if active checkouts exist on the managed accounts. The managed accounts must first be checked in and the deletion will be re-attempted the next time the delete rule is evaluated.
If the system is deleted directly from Active Directory the Bravura Privilege discovered system (from which the import rule evaluates conditions against) remains unchanged and the system will not be deleted unless handled manually or explicitly by a target system import rule.
Delete rule configuration example
To delete a push type system that can no longer be contacted by the Bravura Security Fabric server, create a target system delete rule. For example, you could configure the rule with one of the following conditions :
The number of days since the system was last discovered is greater than 100:
Set the PUSH COMP NOT DISCOVERED THRESHOLD system variable to 100.
Configure a condition containing:
Type: Attribute
Attribute: compNotDiscoveredPastThreshold
Comparison Method: equals
Value type: Number
Value: 1
The number of days since the last successful connection to the system is greater than 100:
Set the PUSH COMP NOT CONNECTED THRESHOLD system variable to 100.
Configure a condition containing:
Type: Attribute
Attribute: compNotConnectedPastThreshold
Comparison Method: equals
Value type : Number
Value: 1
The number of days since the last successful agent interaction (e.g. connection / randomization / listing / etc) with the system is greater than 100:
Set the COMP FAILURE THRESHOLD system variable to 100.
Configure a condition containing:
Type: Attribute
Attribute: compFailurePastThreshold
Comparison Method: equals
Value type: Number
Value: 1
Take care when configuring an unbind rule to prevent misconfigurations. See Considerations when configuring import rules to offboard or delete managed objects for more information.
Considerations when configuring import rules to offboard or delete managed objects
When configuring import rules to offboard objects (such as accounts or systems) or delete systems careful consideration and review should be taken. The planned offboard/delete should be reviewed against:
All existing managed account / managed system / target system bind rules to ensure no conflicts with those rules.
The current solution design to see if the offboard or delete use case is already handled; for example if you are planning to offboard a managed object by attribute, are there already business requirements and/or rules which will offboard the object by time (such as how long the system is offline)
Lack of proper review may result in a misconfiguration. Common misconfiguration issues include:
Unintentional offboard or deletion of a managed object
When creating an unbind or delete rule it will be able to offboard/delete an object originally bound by any of the defined bind rules. If the conditions of your unbind rule are not specific enough you may offboard or delete an object you were originally not intending to.
Misconfiguration example
Managed System Bind Rule 1:
(Condition 1) "Name" contains "UAT"
(Condition 2) "DistinguishedName" contains "DC=mydomain, DC=com"
Managed System Bind Rule 2:
(General) "Unbind objects if they no longer satisfy this rule" enabled
(Condition 1) "Name" contains "UAT"
(Condition 2) "DistinguishedName" contains "DC=mydomain2, DC=com"
(Condition 3) "compNotDiscoveredPastThreshold" = "0" (assume PUSH COMP NOT DISCOVERED THRESHOLD = 60)
Managed System Unbind Rule:
(Intended Use Case) Offboard all UAT systems that are offline for 30 days or more.
(Condition 1) "Name" contains "UAT"
(Condition 2) "compNotDiscoveredDays" >= 30.
In the above example the Unbind rule could unintentionally offboard systems bound by “Managed System Bind Rule 2” earlier (30 days) than they were meant to be (60 days).
Rule definitions which can repeatedly offboard/bind an object or delete/add a system
If the conditions defined by an account/system bind and unbind rule or target system bind and delete rule both match an object it can cause the object to be repeatedly processed by those rules every time they are evaluated.
Referring back to the misconfiguration example above, assume a system named UAT2 in "DC=mydomain2,DC=com". When UAT2 is offline for between 30 to 60 days it will pass the conditions for `Managed System Bind Rule 2` and `Managed System Unbind Rule`. On every iteration of import rule evaluation the system will be onboarded and offboarded.
Defining conditions
Discovered objects are compared against import rule conditions to determine which systems or accounts satisfy the import rule.
These comparisons use:
Simple attribute matching that return either true or false
PSLang expressions that return either true or false
Discovered computer attributes and account attributes can be used in the expressions.
A plugin copied into the plugin directory
On the Import rules page, you determine whether discovered objects:
Must Match all conditions to satisfy the import rule.
Or,
Can Match any condition to satisfy the import rule.
Setting the order of conditions
If an import rule has more than one conditions defined, then you can configure the order in which conditions are compared against objects. The conditions are compared in descending order.
To move a condition up or down the list, use the arrows 
 in the Order column.
Using threshold attributes
"PastThreshold" attributes should be used for import rule comparisons over the similar "Days" counterparts for performance purposes; for example CompNotDiscoveredPastThreshold (0/1 comparison) should be used instead of CompNotDiscoveredDays (a regularly changing number) to avoid the import rule re-checks.
Defining conditions based on attributes
To add an import rule condition based on attributes:
Navigate to the Import rules page for a managed system or managed account.
Select the Conditions tab.
Click Add new…
Enter an ID and optionally a Description.
Enable the condition for this import rule by checking the box, or leave it unchecked to exclude the condition.
Set the condition Type to ”Attribute”.
Select the attribute that the condition will evaluate.
The attribute must be discovered by Bravura Security Fabric before it can be used in an evaluation.
Choose an Attribute type :
Computer: the attribute comes from discovered systems.
Account: the attribute comes from discovered accounts.
Account attributes are only available for managed account import rules.
Choose a Comparison method that will be used to compare the value with the system attributes.
When comparing against all items in a multi-valued attribute, using 'does not' comparison methods behaves differently from negating the comparison. For example, if using the ’does not contain’ comparison method, this would only check if any of the items lack the value. If using the ’contains’ method with the condition negated, this would check if no items contain the value.
Select the Value type.
Select Case sensitive comparison if needed.
Select Negate condition to negate the comparison if needed.
Specify the Value used to compare with the system attributes.
Click Add.
Defining conditions using PSLang expressions
You can write PSLang expressions to define import rule conditions, based on the attributes of discovered objects. You can use any of the listed attributes as variables for comparison.
To add an import rule condition based on a PSLang expression:
Navigate to the Import rules page for a managed system or managed account.
Select the Conditions tab.
Click Add new…
Enter an ID and optionally a Description.
Enable the condition for this import rule by checking the box, or leave it unchecked to exclude the condition.
Set the condition Type to "PSLang Expression".
Enter expressions you want evaluated.
Click Add.
For example, the following values are extracted while discovering systems during auto discovery :
 computer "" = {
      cn = <cn>;
      name = <name>;
      operatingSystem = "<operatingSystem>";
      ADsPath = "<ADsPath>";
   }
To access attributes discovered from computer objects, you need to define variables like this:
comp["<attribute name>;"][n]where n may be either 0 or a number, depending on whether the attribute has single or multiple values.To access attributes discovered for accounts, you need to define variables like this:
acct["<attribute name>"][n]where n may be either 0 or a number, depending on whether the attribute has single or multiple values.
The PSLang expression must be 256 characters or less. For larger expressions, you must use a plugin instead.
Viewing system and account attributes
You can view discovered system and account attributes and values via the Manage the system > Resources > Discovered objects menu. Click on the object ID to view attributes.
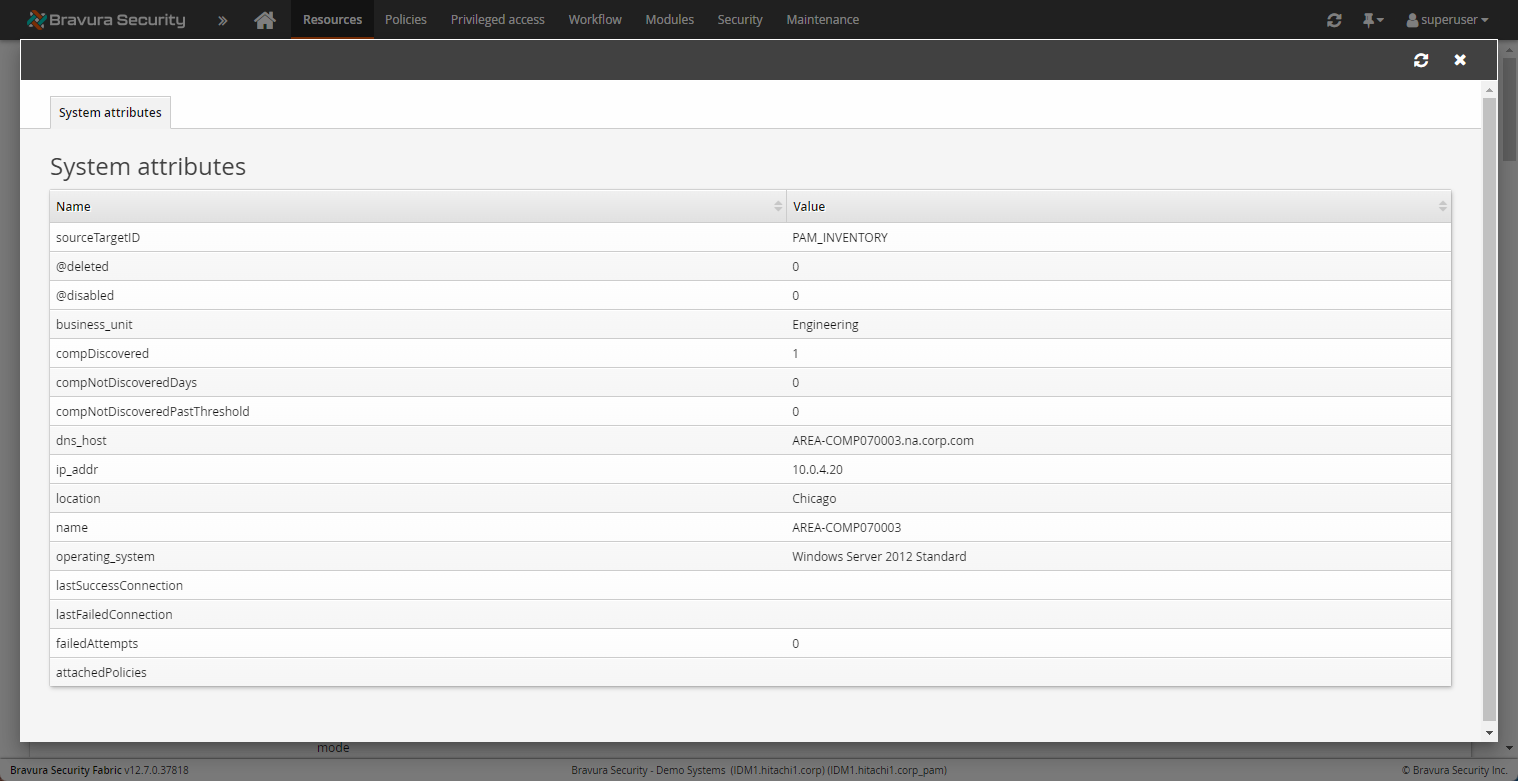
Systems pages display all discovered attributes and their values, both single and multi-valued. Accounts pages display certain attributes, discovered services, tasks, IIS and DCOM objects.
Attributes defined with Bravura Privilege may also be displayed here, though some are not displayed until they are set. For example:
The attachedPolicies attribute is blank by default: comp["attachedPolicies"][0]=""
Managed systems and managed accounts import rules which are set to use the attachedPolicies attribute will only work if the managed system is a member of the policy before the import rule is evaluated.
If a member system is placed into a policy by an import rule during auto discovery , this information will not be made available until the next time the import rule is evaluated.
If the discovered system no longer appears on the discovered system list files, the compDiscovered attribute will be set to 0; otherwise it will be set to 1.
The compNotDiscoveredDays attribute will be incremented for every day the discovered computer has not appeared in the system list files.
Use PSW CLEAN DELETED WSTN DELAY and PSW CLEAN NEVER MANAGED LWS DELAY (Manage the system > Modules > Privileged access) to control when the Bravura Security Fabric will permanently remove discovered systems from the database.
The compNotDiscoveredPastThreshold attribute will be set to true if the threshold is reached for the number of days the discovered computer has not been discovered (as defined in attribute compNotDiscoveredDays).
The compNotConnectedPastThreshold attribute will be set to true if the threshold is reached for the number of days since the last successful connection to the discovered computer (as defined in attribute compNotConnectoredIntervals).
The compFailurePastThreshold attribute will be set to true if the threshold is reached for the number of days the discovered computer has uninterrupted failures of a password randomization or list operation.
The compNotConnectedIntervals attribute is incremented by 1 for every 10 day period since the last successful connection to the discovered computer.
When choosing which computer attributes to use, note how often the attributes change. Each time they change, the rule is evaluated during the daily auto discovery (psupdate) process and several entries are added to several historical tables. Whenever possible, choose threshold attributes, such as compNotDiscoveredPastThreshold for push mode systems and compFailurePastThreshold for local service mode systems, over their non-threshold counterparts.
Push mode system threshold values
You can set the following variables on Import rules tab at Manage the system > Resources > Options , or Manage the system > Privileged access > Options to set thresholds for push mode systems.
PUSH COMP NOT DISCOVERED THRESHOLD sets the threshold value that determines the compNotDiscoveredPastThreshold attribute for push mode discovered systems. The default threshold value is 7 days.
PUSH COMP NOT CONNECTED THRESHOLD sets the threshold value that determines the compNotConnectedPastThreshold attribute for push mode discovered systems. The default number of days is 30.
COMP FAILURE THRESHOLD sets the threshold value that determines the compFailurePastThreshold attribute. The default number of days is 30. For push mode systems, the threshold is the number of days of uninterrupted randomization or listing failures.
Local workstation service mode threshold variables
You can set the following variables on Import rules tab at Manage the system > Resources > Options , or Manage the system > Privileged access > Options to set thresholds for local workstation mode systems.
LWS COMP NOT DISCOVERED THRESHOLD system variable to set the threshold valuethat determines the compNotDiscoveredPastThreshold attribute for local service mode discovered systems. The default threshold value is 7 days for both system variables.
COMP FAILURE THRESHOLD sets the threshold value that determines the compFailurePastThreshold attribute. The default number of days is 30. For Local service mode systems, the threshold is the number of days since the system’s last contact with the server.
Condition examples using expressions
The computer name must match the string “user1-ws”:
$comp["name"][0]=="user1-ws"
The string “OU=Domain control” must exist within the value of the variable $ADsPath:
%strlen(strstr($ADsPath,"OU=Domain Control"))>0
strcontains($comp["ADsPath"][0],"OU=Domain Control")
If the length of the computer name is greater than 5 characters and its operatingSystem is Microsoft Windows Server 2008, then return true, otherwise return false:
iif(((strlen($comp["name"][0])>5)&&($comp["operatingSystem"][0] == "Windows Server 2008")),"true","false")
This expression is useful for moving managed systems that are already known to be a member of another policy:
function MV() {for (var $i=0; $i< size($comp["attachedPolicies"][0]); $i++) {if($comp["attachedPolicies"][$i]=="<managed system ID>") { return 1;}} return 0; } MV();This rule must be evaluated twice in order for the necessary information to be gathered.
This expression would be useful, for example, in cases where systems must be placed in a default policy, or if a system is a member of a tombstone policy (grouping non-contactable systems) and should not be a member of any other policy.
To detect systems that Bravura Privilege has not been able to contact for the set time period:
Configure the COMP FAILURE THRESHOLD system variable to <N> (where N = number of days)
$comp["compFailurePastThtreshold"][0] == 1
To detect systems that Bravura Privilege has not been able to contact since a specified period (in this example, 2 months) past a certain date based on their last successful connection time:
function dateComparison() { var $certainDate; var $attributeDate; var $period = P2M; toDate($attributeDate, $comp["lastSuccessConnection"][0]); toDate($certainDate, "2012-07-15 13:48:00 (GMT-07:00)"); if($attributeDate > ($certainDate + $period)) { return 1;} return 0; } dateComparison();To detect previously-discovered systems that Bravura Privilege has not been able to discover from the domain:
$comp["compDiscovered"][0] == 0
To detect the number managed systems that have not been discovered by Bravura Privilege in the last 10 days:
$comp[compNotDiscovered][0] > 10
This expression allows you to create import rules based on Active Directory structures, and place managed systems into dedicated managed system policies for structures like location or department:
strcontains(($comp["ADsPath"][0]|$comp["distinguishedName"][0]), <AD object organization object such as CN values, or OU>)
Or,
strlen(strstr(($comp["ADsPath"][0]|$comp["distinguishedName"][0]), <AD object organization object such as CN values, or OU>))>0
To determine if a discovered account is a domain account or not:
$acct["accountDomain"][0] == "<domain>"
If you are manually providing computer list files, you can also provide custom attributes:
$comp["<custom attribute>"][0] == "<custom value>"
To determine whether an attribute exists on a discovered object:
compAttrExists("<attribute_name>" , "<optional attribute value>" , "<1|0 multi-value or not>");If the attribute value is empty, the expression simply determines whether the attribute exists or not. If the value is included, the attribute must exists and have the same value.
This expression is particularly useful when providing custom attributes for a set of specific discovered objects.
Conditions may also contain logical statements; for example:
(<condition 1>) && (<condition 2>) && (<condition 3>) && ...
(<condition 1>) || (<condition 2>) || (<condition 3>) || ...
These are useful when working with either a smaller set or conditions for specific systems, or if you want to add exceptions to the condition.
Defining conditions using plugins
You can write a plugin to define import rule conditions. All plugins have access to the data stored in the variables for PSLang expressions . Scripts that are not written in PSLang need to be wrapped in a PSLang script to access these variables.
To add an import rule condition using a plugin:
Navigate to the page for a managed system or managed account.
Select the Conditions tab.
Click Add new…
Enter an ID and optionally a Description.
Enable the condition for this import rule by checking the box, or leave it unchecked to exclude the condition.
Set the condition Type to ”Plugin”.
Select Used attributes you want to have passed into the plugin.
Click Add.
Input
There are two options for input:
In-process PSLang with direct variable references for the managed system/object
External process with standard input/ouput
The following is an example of a PSLang plugin script for import rule requirements:
function main()
{
     var $outkvg = kvgCreate( "", "" );
     if ($name=="user1-ws") || ($comp["name"][0] == "user1-ws")
     {
          kvgAddValue( $outkvg, "retval", "0" );
          return $outkvg;
          # or return 1;
     }
     else
     {
          kvgAddValue( $outkvg, "retval", "1" );
          kvgAddValue( $outkvg, "errmsg", "server name does not match");
          return $outkvg;
          # or return 0;
     }
}
If an external interpreter is used (set in PLUGIN PROGRAM), then the following input is passed into the external call:
 "" "" = {
  "<system/account attribute>" = "<value>" # one or more
         }
Output
The following is an example of output from a plugin script for import rule requirements:
"" "" = {
    "retval" = "1"
    "errmsg" = "Defining requirements has failed."
}
Where:
retval is zero on success or non-zero on failure.
errmsg is an optional failure message that can be displayed.
See more information on writing PSLang expressions.
Define requirements for multi-valued attributes using plugins
To define a requirement for multi-valued attributes, you must use functions:
function <name>() {
         for (var $i = 0; $i < size(<multi-value-attribute>); $i++) {
                  if (condition on <multi-value-attribute>[$i]) {
                  return 1;
                  }
         }
         return 0;
}
<name>();
Examples
If the discovered system is a member of "Domain Computers":
function membership() {
         for (var $i = 0; $i < size($comp["memberOf"]); $i++) {
                  if ($comp["memberOf"][$i] == "CN=Domain Computers,CN=Users,DC=domain,DC=com") {
                  return 1;
                  }
         }
         return 0;
}
membership();
If the first listed IP address of the discovered system is 10.0.1.199:
 function firstIP() {
                  if ($comp["ip"][0] == "10.0.1.199") {
                  return 1;
         }
         return 0;
}
firstIP()
If the discovered system has an IP address within the 10.0.1.0 to 10.0.1.9 range:
function iprange() {
         var $i = 0;
         for($i = 0; $i < size($comp["ip"]); $i++) {
                   var $j = 0;
                   for ($j = 0; $j < 10; $j++) {
                   log ("Comparing: 10.0.1."+$j + " with " + $comp["ip][$i]);
                            if ($comp["ip"][$i] == "10.0.1."+$j) {
                                           return 1}
                                               }
                   }
                   return 0;
}
iprange();
Defining source systems
Source systems are manually-defined systems from which systems are listed. These are usually domain target systems that are configured to list computer server objects and computer workstation objects on the domain.
For push mode target system and managed system import rules, you can:
Include all source systems
Include some source systems
Exclude some source systems
In the initial phase of deployment, it is recommended that you start small with a small set of machines. The Active Directory connector is capable of discovering all computers in a domain; however this may take a long time. You may want to start by targeting a specific segment of the domain; for example:
<domain>/basedn=OU=<org structure on domain>
In large deployments, it is recommended that you import systems in batches. This will allow you to adjust the import rules as necessary for each new batch of systems being added.
Defining connection methods
When adding target system import rules or manually managing discovered systems, you must define which credentials the Bravura Privilege server uses when it attempts to connect to the systems. A discovered system will only pass a target system import rule once it has valid credentials.
There are five methods for defining connection credentials:
Using no credentials (local service mode systems only)
Using credentials from a source system (push mode systems only)
Push mode systems
For push mode target systems, these credentials are evaluated immediately, and if they are not valid, the target system will be removed and re-evaluated.
Local service mode systems
For local service mode target systems, this evaluation may take a few polls to confirm – one to receive the information on the administrative credential (either verify or create), and one to report back the results.
To view the status of these confirmations, go to Manage the system > Resources > Discovered objects > Systems > Local service mode systems and view the Admin ID status column.
During the time that Bravura Security Fabric attempts to verify valid administrator credentials based on a discovered system, the Admin ID status of the discovered system is set to Pending. The managed system will have limited capabilities. Once the administrator credentials have been verified the Admin ID status of the discovered system is set to Verified, and the managed system will be ready for use.
If the administrator credentials are not verified, then depending on the LWS RESVALID ADMIN CREDENTIAL setting, the following will occur:
If the setting is
Disabled, the system will be a managed system but the administrator credentials will be shown asFailed. Warning messages will inform product administrators which systems have failed to verify administrator credentials.The managed system will have limited capabilities. Product administrators can manually provide credentials for the discovered target system.
Even if product administrators manually provide credentials for the discovered target system, the status for its administrator ID will still be shown as Failed to mark that it had failed during the creation process.
If the setting is
Enabled, the automatically discovered target system will be deleted.The discovered system will attempt to validate against the next local service mode target system import rule until all rules have been evaluated. Once that occurs, the discovered system will remain unmanaged.
Set the LWS RES VALID ADMIN CREDENTIAL option at Manage the system > Modules > Privileged access .
Using no credentials
For local service mode systems, Bravura Privilege does not require credentials to be specified.
Using a plugin to get credentials
To configure Bravura Privilege to use pre-existing administrator credentials on a managed discovered system using a plugin, type the name of the plugin in the Plugin to get credentials field.
Alternatively, you can define a default plugin in IMPORT ADMIN CRED DEFAULTPLUGIN in Manage the system > Resources > Options . This pre-populates the Plugin to get credentials field when creating target system import rules.
The plugin will receive as input, the computer attributes. You can view the available attributes by going to Manage the system > Resources > Discovered objects > Systems , and clicking on the system.
The plugin, in the form of a KVGroup should look like:
"" "" = {
    "ead_computer_attributes" "" = {
        "sv_attributes" "" = {
            #...single-valued attributes go here...
        }
        "mv_attributes" "" = {
            #...multi-valued attributes go here...
        }
    }
    "sessionid" = "< session id>" # The session ID
}
The expected output of the plugin is an account and unencrypted password:
 "" "" = {
       "admin" = "<account name>";
       "adminPW" = "<unencrypted password>";
       "isSysPWD" = "[true | false]"; //optional
       "isConnPWD" = "[true | false]"; //optional
       "isUpdByPAM" = "[true | false]"; //optional
       "retval" = "0"
   }
Alternatively, the output of the plugin can be a managed account:
 "" "" = {
       "admin" = "<managed account ID>";
       "adminPW" = "";
       "resourceid" = "<managed system ID>";
       "accountID" = "<managed account ID>";
       "isSysPWD" = "[true | false]"; //optional
       "isConnPWD" = "[true | false]"; //optional
       "isUpdByPAM" = "[true | false]"; //optional
       "retval" = "0"
   }
Multiple credentials can be created using the following format:
 "" "" = {
      "version" = "2"
      "resultgroup" "" = {
         "credential" "" = {
            "admin" = "<account name>";
            "adminPW" = "<unencrypted password>";
            "isConnPWD" = "[true | false]"; //optional
            "isUpdByPAM" = "[true | false]"; //optional
         }
         "credential" "" = {
            "admin" = "<account name>";
            "adminPW" = "<unencrypted password>";
            "isConnPWD" = "[true | false]"; //optional
            "isUpdByPAM" = "[true | false]"; //optional
            //To create a system credential add the following kvg group to
            //a credential
            "sys" "" = {
               "admin" = "<sys account name>";
               "adminPW" = "<unencrypted password>";
               "isConnPWD" = "[true | false]"; //optional
               "isUpdByPAM" = "[true | false]"; //optional
            }
         }
      }
      "retval" = "0"
   }
Add ”switch_strategies” in the output KVGroup to switch between using credentials from the plugin or discovery template:
"switch_strategies" = "true"will use credentials from the discovery template"switch_strategies" = "false"or not present will use credentials from the plugin output.
Creating new credentials on a managed system
Configure Bravura Privilege to create new credentials on a managed discovered system by setting the options defined in Table 1, “Options for creating new credentials on discovered systems”.
When Bravura Privilege creates the new credentials, it uses the default global password policy. The description for created accounts notes that the account was created by Bravura Privilege , and states which rule (if any) was used to create it.
If account creation fails on the discovered system, then the system is not managed by Bravura Privilege . If evaluated against an import rule:
For push mode, the system will be re-evaluated on the next run and Bravura Privilege will attempt to create the administrator account on the system again.
For local workstation mode, Bravura Privilege will attempt to create the administrator account again according to the RES ADMIN CREATE RETRY INTERVAL (default 1440 minutes).
If Bravura Privilege fails to add the new account to any of the selected administrator groups, then the system is not managed. However, the account remains in the groups that were joined successfully. If this occurs, either fix or remove the incorrect/missing group ID.
Option | Description |
|---|---|
Initial credentials to use when creating new local account | This applies to push mode systems only. Select:
|
Login ID type | Set this to define what to use as the administrator ID:
|
Security group type | Define permissions for the new account:
|
Reuse existing account if found | Enable this option to reuse the ID if it already exists on the discovered system. |
The plugin will receive as input the computer attributes. You can view the available attributes by going to Manage the system > Resources > Discovered objects > Systems, and clicking on the system.
The plugin, in the form of a KVGroup should look like:
"" "" = {
    "resource" "" = {
        #...single-valued attributes go here...
    }
    "sessionid" = "<session id>" # The session ID
}
The expected output from the plugin:
 "" "" = {
       "admin" = "...";
       "adminPW" = "<unencrypted password>";
       "return" = "0";
   }
Using valid credentials from a template target system
Configure Bravura Privilege to test and copy administrator credentials from the target system template if you have groups of systems using the same set of credentials. This way, you can select which administrator credentials to use based on the target system template selected.
This is also useful if the administrator accounts are unique on each system; for example, IDs that use the format Admin_<computer name>. In this case, the passwords must be identical.
If the credentials are invalid, then the system is not imported or managed by Bravura Privilege . Target systems that require a system password only have the administrator credential validated, not the system credential. If the system is imported and managed by Bravura Privilege , then the system password is copied. If multiple system passwords are configured, then the first alphabetically-sorted password is copied.
Using credentials from a source system
Copy administrator credentials from the source system if you intend to use a domain administrator account to manage all discovered systems. This setting applies to push mode systems only. It is recommended that the administrator ID on the source system follows the format <adminid>@<domain>. Bravura Security Fabric does not verify whether the source system credentials are valid.
If the credentials change on the source system, then Bravura Privilege automatically propagates the new credentials to the managed systems that are using them. However, if the imported credentials get removed from the managed system, then Bravura Privilege stops propagating source system changes to that system.
Evaluating import rules
It is highly recommended that you test import rules before running auto discovery to ensure that they are configured correctly.
Import rules can be manually evaluated against one or more discovered objects (systems or accounts). You can evaluate:
You can then choose to apply the evaluation results to manage systems that pass all the conditions.
You can set all enabled import rules to be re-evaluated and applied on the next auto discovery , by clicking Force a re-evaluation of all enabled import rules on the next auto discovery on the Import rules page.
You can also carry out a trial run to evaluate an import rule against all discovered objects.
Managed system and Managed account import rules must be associated with at least one managed system policy before they can be tested.
Ensure that discovered systems have already been configured and that accounts have been listed before evaluating import rules.
Evaluating one import rule
You can evaluate one import rule against discovered objects; Target system and Managed system rules are evaluated against computers, and Managed account rules are evaluated against accounts.
To evaluate a single import rule against discovered objects:
Navigate to the page.
In the Test conditions section, select which objects to evaluate:
Leave the field blank to evaluate all discovered objects.
You can override the TEST IMPORT RULE MAX LENGTH by entering a value in the Maximum number of systems to run the test against field.
Click the search icon, select the objects to evaluate, and click Select... .
Type a space-delimited list of discovered object names.
Click Test .
Optionally, you can manage objects that passed all conditions .
The evaluation only runs if there is at least one enabled condition for the rule being evaluated.
Evaluating multiple import rules
You can evaluate multiple import rules and their conditions simultaneously. You can evaluate all import rules to simulate all rules running automatically during auto discovery .
To evaluate multiple import rules:
Navigate to the page.
Enable the checkboxes for the rules you want to evaluate.
Click Test.
Optionally, you can manage objects that passed all conditions .
Applying evaluation results
After an evaluation is complete Bravura Security Fabric displays the results including which objects (systems and accounts) have passed all the conditions, and which objects have failed. If they failed, Bravura Security Fabric indicates which conditions caused them to fail; however, if an import rule’s conditions is set to “Match any expression”, then the results cannot include an explanation of why an object failed the evaluation.
On production systems, or with a large set of test matches, run auto discovery to process discovered objects and make them into managed systems and managed accounts.
Alternatively, on a test system, you can click Apply on the Import rules page to make all objects that passed all conditions into managed systems and managed accounts.
Warning
It is not recommended to use the Apply button with production systems, or with a large set of Test matches. It is intended only for testing.
Once an import rule has processed all discovered objects, either by running auto discovery or by evaluating the rule and clicking Apply, then those objects are not re-evaluated against the same import rule again. This includes both passed and failed results.
Discovered systems which pass all conditions for a target systems import rule but fail to obtain valid credentials on subsequent connections are re-evaluated against the import rule, unless they pass and obtain valid credentials from another rule. This process for local service mode discovered systems will occur over a few intervals where the client connects to the server.
Use the TEST IMPORT RULE MAX LENGTH system variable (Manage the system > Resources> Options, or from the Import rules tab in Manage the system > Privileged access > Options) to limit the number of computers or accounts to evaluate a rule against. The default number of objects is 10. You can increase this value to evaluate the import rules on more discovered objects.
On the test section of each import rule you can override the TEST IMPORT RULE MAX LENGTH value by entering a new value in the Maximum number of systems to run test rule against field.
Executing a trial run
You can execute a trial run to test all objects that have not already been evaluated against a rule. The difference between a test and a trial run is that:
A trial run is run against all objects, regardless of the TEST IMPORT RULE MAX LENGTH value.
A report on a trial run is emailed to a designated address.
To execute a trial run on an import rule:
Navigate to the Import rules page .
Select the Trial run tab.
Type an email address to receive results of the test.
Click Trial run.
To cancel a trial run, click Cancel on the Import rule < rule type > page for the rule. You can only cancel a trial run from the instance on which it was started.
Import rule events
The following options can be accessed from Manage the system > Maintenance > System variables , Manage the system > Resources> Options, or from the Import rules tab in Manage the system > Privileged access > Options:
Option | Description |
|---|---|
IMPORT RULE TRIAL RUN BEGIN | An import rule trial starts. |
IMPORT RULE TRIAL RUN END | An import rule trial ends. |
Re-evaluating import rules
Import rules are only run once on each discovered object. They are not re-run on objects that have already been evaluated.
If the import rule changes, or if the attributes being used in an import rule are changed, then the import rule is re-evaluated against the discovered objects. You can also manually re-evaluate an import rule by clicking Update on the Import rules < rule type > page. This resets the rule and re-evaluates all discovered objects.
Discovered objects can be re-evaluated manually through the import rules test page or when changes are detected during an auto discovery . Local service mode discovered objects can also be re-evaluated when they connect to the Bravura Security Fabric server after it has detected a change in an attribute used by an import rule.
The behavior when re-evaluating import rules is different for each rule type:
Target systems import rules
Discovered systems that satisfy Target systems import rules and become managed systems are not re-evaluated by any import rules, regardless of changes to the managed systems or import rules.
To modify the settings for a managed system, you can:
Click Manage the System > Resources > Target systems > Automatically discovered and manually change settings.
Or,
Delete the target system (manually or with an import rule), then re-evaluate it.
Managed systems import rules
Managed system import rules are re-evaluated against managed systems whenever a change is detected in the managed system during auto discovery , or when the import rules have changed.
If a change is made to a managed system that causes the system to fail the import rule, depending on the configuration of the managed system import rule, it may archive the system. If there are managed accounts on this system, the password changes no longer occur, but regular users can still request access to these accounts, and product administrators can still access them.
Managed accounts import rules
Managed accounts import rules are re-evaluated against discovered accounts whenever a change is detected:
In the accounts during auto discovery
In member system attributes that were used to define conditions
In the import rules, such as:
Services, tasks, IIS, or DCOM objects that have been added, removed, or set up for use by a new user
Modifications to attributes that are being used by managed accounts import rules
Modifications to conditions and associated policies on managed accounts import rules
All accounts managed by a managed system policy are evaluated, including discovered accounts that were manually added to the policy and those added to the policy by an import rule.
If a change is made to a managed account that causes the account to fail the import rule, depending on the configuration of the managed account import rule, it may archive the account. If this account’s password is being managed, the password changes no longer occur, but regular users can still request access to this account, and product administrators can still access it. If the managed system is removed from the policy the system’s managed account passwords are archived.