Access disclosure plugins
Bravura Privilege uses access disclosure plugins to permit secure access to a password for a privileged account. In addition to disclosing the password, some controls can automatically authenticate into systems, programs and websites.
You configure managed system policies to use access disclosure plugins to allow product administrators and end users to access the privileged accounts. By default, new managed system policies do not have any access disclosure plugins configured. Depending on the authentication types defined for the managed system policy, only applicable disclosure plugins can be added to the policy. You can configure any number of controls to allow users to access current privileged passwords, SSH keys, and group sets. You can configure only one control to disclose old passwords.
See also
Privileged access management options for information about other privileged access management options.
Defining access disclosure plugins to learn how to select access disclosure plugins at the managed system policy level and override global settings.
Types of access disclosure plugins
There are several types of access disclosure plugins:
Native access disclosure plugins: These are Javascript controls that can be installed on users’ workstations prior to disclosing passwords. Alternatively, a one-time disclosure method can be used to access the plugins.
Guacamole access disclosure plugins: Unlike native access disclosure plugins, these are controls that are viewed directly from a web browser and do not require installation of plugins or client software. These controls work on any browser that supports HTML5. A Guacamole gateway is required in order to use it.
Website access disclosure plugins: These controls launches either a browser tab or a secure browser window and automatically logs into a website using a configuration defined in a JSON file. Installation of a browser extension or client software is required in order to use it.
Bravura Privilege ships with the following native access disclosure plugins:
Run command: pswcmdrun is used with account set access requests. It allows users to run commands or scripts on multiple managed systems using managed account credentials.
When a user checks out an account set, Bravura Security Fabric displays a command execution window if any of the member systems support the run command operation.
Command prompt: pswxcmd provides users with access to managed systems by executing an external program and providing credentials.
There are three types of command prompt controls; one is specifically for accessing managed accounts, and the other two are for temporary group membership, where the password can either be passed onto the command line, or specified upon connection to the remote server.
This plugin is compatible with session recording.
This is a preconfigured
pswxcmdaccess disclosure plugin used for accessing managed accounts with SSH keys instead of passwords.This plugin is compatible with session recording.
Copy: pswxcopy provides users with access to a password by copying it into the clipboard of the client workstation.
Remote desktop / Remote APP RDP: pswxtsvc provides users with access to Windows server or client managed systems and RemoteApp programs using Remote Desktop Connection (RDC). The plugin provides automatic connection to the managed system without the need to enter the administrative credentials for the managed account.
This plugin is compatible with session recording.
Display: pswxview provides users with access to a password by displaying it within the browser.
When the secure method is enabled, Bravura Security Fabric uses JavaScript to decrypt the privileged password embedded in the page.
If the insecure method is enabled, the browser can store passwords in plain text in the page source, and users can access the accounts in browsers that do not have JavaScript enabled. Users access the managed system by hovering their cursor over the View button.
Bravura Privilege ships with the following Guacamole access disclosure plugins:
In-browser RDP: guacamole-rdp provides users with access to Windows server or client managed systems using Remote Desktop Connection (RDC).
In-browser Remote App: guacamole-remote-app provides users with access to a remote application (RemoteApp) hosted on a Windows server or client managed systems.
In-browser SSH: guacamole-ssh . provides users with remote access to a server using Secure Shell (SSH).
In-browser Telnet: guacamole-telnet provides users with remote access to a server using Telnet.
In-browser VNC: guacamole-vnc provides users with remote access to a managed system with Virtual Network Computing (VNC) enabled.
All Guacamole access disclosure plugins provide automatic connection to the managed system without the need to enter the administrative credentials for the managed account and are compatible with session recording.
A Guacamole gateway is required in order to use Guacamole access disclosure plugins. See Installing and configuring Guacamole on how to set up a Guacamole gateway and configure the controls to use it.
Bravura Privilege ships with the following website access disclosure plugins:
Secure browser: securebrowser launches a dedicated program that automatically logs into a website using a configuration defined in a JSON file. This is compatible with session recording.
Requires installation of the Bravura Security Secure Browser program.
Web app privileged sign-on: pswxwebapp launches a separate browser tab that automatically logs into a website using a configuration defined in a JSON file. Requires installation of the Bravura Security browser extension.
Native access disclosure plugins
Run command: pswcmdrun
The pswcmdrun access disclosure plugin is used with account set access requests. It allows users to run commands or scripts on multiple managed systems using managed account credentials.
When a user checks out an account set, Bravura Privilege displays a command execution window if any of the member systems support the run command operation.
Currently the following target systems support the run command operation:
Windows NT Server
Secure Shell (SSHD Host)
Telnet target system
Python Script
Oracle Database
Microsoft SQL Server
Sybase AES Database
Console Script
Additional preparation is required before pswcmdrun can run PowerShell commands on a Windows Server / workstation target. See Windows Server in the Connector Pack documentation for details.
If the plugin is enabled but an account set contains no managed system that supports the run command operation, Bravura Privilege displays the following message upon check-out:
"None of the checked out systems support command execution operation. Command execution interface is not available."
You can modify the following default attributes to control the behavior of pswcmdrun :
| The command to run. |
| Delete command output after expiration. |
| Retry failed commands run via Transaction Monitor Service. |
| Allow users to save commands. |
| Retrieve command output and save on server. |
Command attribute
| %command% |
| By default, the command or script that the user specifies in an account set request will be used to populate the command execution window upon check-out. If you customize this value, the customized value (command or script) will be used to populate the command execution window. It overrides any command or script specified in the request. |
Command prompt: pswxcmd
The pswxcmd access disclosure plugin provides users with access to managed systems by executing an external program and providing credentials. The default program is PuTTY.exe, which opens an ssh/telnet terminal to a Windows machine. The external program must meet the following requirements:
User credentials must be accepted as part of the arguments
Connection details must be accepted as part of the arguments
The program must be installed on the user workstation
The program must either exist on the full path specified as part of the “program” attribute; or if no path has been specified, the external program must be specified on the workstation system path
SMON HTTP URL must resolve to the server from client workstations
There are three types of command prompt controls; one is specifically for managed accounts, and the other two are for temporary group membership, where the password can either be passed onto the command line, or specified upon connection to the remote server.
You can modify the following default attributes to control the behavior of pswxcmd :
| Arguments to supply to the external program. See Arguments attribute for details. |
| If set to true, the external program closes when the user’s access checkout expires. |
| If set to true, a user is prompted for a user name and password. They are made available for arguments as %curruser% and %currpwd% . This is enabled for use with unmanaged passwords, where the user will be prompted for a password that wil be passed on the command line to the command. |
| Set the letter key for the escalation hotkey. When used with the escalation hotkey modifier, the escalation sequence is inserted.See Inserting an escalation sequence for more details. |
| Set the modifier for the escalation hotkey. There are three options: ’Ctrl’, ’Alt’, and ’Middle click’. When used with the escalation hotkey key, the escalation sequence is inserted. See Inserting an escalation sequence for more details. |
| The text to automatically type into the application. |
| If this window name is detected, the escalation sequence is inserted into the program. See Inserting an escalation sequence for more details. |
| The IP or DNS of server. See Domain and host values for further information about using an alternative attribute value. |
| Set the impersonation level of the process. This is set to ’none’ by default. See Impersonating the checked-out account for more details. |
| External program (including full path) to execute. |
| If true, the command is executed within a display window. If false, the command is executed without a display window. |
Arguments attribute
The arguments provide substitution of the password, user name, host, and other custom plugin attributes. The substitutions are as follows:
| %host% |
| The domain managed system member is on, without any optional parameters. |
| %username% |
| The account ID for the privileged password being disclosed. |
| %password% |
| The password being disclosed. |
| %<custom attribute>% |
| If there is a “custom attribute” defined for the plugin, the value of the attribute is used. |
Using custom attributes provides control over the arguments attribute. You can enable the user to override the custom attribute only, while leaving the arguments locked or hidden.
The following are examples of customizations using the pswxcmd access disclosure plugin.
Allow optional arguments
The default settings for pswxcmd execute PuTTY and connect using the privileged password. This example shows how you can add a custom attribute to allow the user to specify the port:
Create an attribute named port with the following settings:
Integer type
Allow the port attribute to be overridden by the users
Set the minimum value to 1
Set the default value to 22
Set the port attribute to be non-empty
Set the arguments attribute value to:
-ssh %host% -l %username% -pw %password% -P %port%
Insert an escalation sequence
You can allow users to insert an escalation sequence into a program (such as PuTTY.exe) using a hotkey or window name.
When a user presses the escalation hotkey, the escalation sequence is automatically typed into the program. By default, the escalation hotkey is Ctrl + K.
To configure the escalation hotkey:
Set the escalation sequence attribute to the text to insert into the program.
Set the escalation hotkey modifier attribute to:
Ctrl – Pressing the Ctrl key with the escalation hotkey key automatically types the sequence. This is the default setting.
Alt – Pressing the Alt key with the escalation hotkey key automatically types the sequence.
Middle click – Middle-clicking automatically types the sequence. The escalation hotkey key attribute is ignored for this option.
If using the Ctrl key or Alt key for the modifier, set a letter key (A-Z) for the escalation hotkey key attribute.
When the window name is detected, the escalation sequence is automatically typed into the program.
To configure the escalation window name:
Set the escalation sequence attribute to the text to insert into the program.
Set the escalation window name attribute for the window where the escalation sequence will be inserted.
Users will not be able to use the escalation hotkey when the escalation window name attribute is defined.
Impersonating the checked-out account
You can allow the requester to run a program (such as cmd.exe) with the permissions of the checked-out account. This will essentially simulate the runas command.
Set the impersonate attribute to:
none – No impersonation will be performed. This is the default setting.
withoutprofile – Attempt to impersonate without loading the user’s profile.
withprofile – Attempt to impersonate and load the user’s profile.
netonly – Do not impersonate locally, but present the managed credentials for network authentication only.
Executing a shell script
This example shows how you can configure pswxcmd to execute a shell script:
Set the program attribute to:
C:\windows\system32\cmd.exe.Set the arguments attribute to:
/C X:\ITApps\runapp.cmd %host% %password% %username%
Executing SQL*Plus
This example shows how you can configure pswxcmd to execute SQL*Plus:
Set the program attribute to:
C:\oracle\product\10.1.0\client _1\bin\sqlplus.exeSet the arguments attribute to:
%username%/%password%@%host%
Changing the message to users on failure
You can change the message displayed to users in the event that the external program fails to launch by modifying the RES CONNECTION TO SERVER FAILED MSG setting in the global or managed system policy Account access request options.
PuTTY over SSH: pswxcmd
This is a preconfigured pswxcmd access disclosure plugin specifically for managed accounts. By default, this plugin is configured to execute PuTTY and connect using the user’s SSH keys instead of the privileged password.
The following requirements must be met:
Connection details must be accepted as part of the arguments
The program must be installed on the user workstation
The user’s private key must already be configured on the workstation
The program must either exist on the full path specified as part of the “program” attribute; or if no path has been specified, the external program must be specified on the workstation system path
SMON HTTP URL must resolve to the server from client workstations
The following attributes are available:
| Arguments to supply to the external program, the %password% argument is not used. |
| This is set to true, the external program closes when the user’s access checkout expires. |
| This is set to false, users are not prompted to enter their credentials. |
| The IP or DNS of server. |
| External program (including full path) to execute. This is set to putty.exe by default. |
| This is set to true, the command is executed within a display window. |
See Command prompt: pswxcmd for more information on modifying these attributes.
Copy: pswxcopy
The pswxcopy access disclosure plugin provides users with access to a password by copying it into the clipboard of the client workstation. By default, it is configured to clear the clipboard if the browser is closed or if the default 30 seconds expiry time for the plugin has passed.
You can modify the following default attributes to control the behavior of pswxcopy :
| If false, the clipboard is not cleared. If true, the clipboard is cleared after the time expires or the browser is closed. |
| This controls how long before the clipboard is cleared. |
Remote desktop / Remote APP RDP: pswxtsvc
The pswxtsvc access disclosure plugin provides users with access to Windows server or client managed systems and RemoteApp programs using Remote Desktop Connection (RDC). The plugin provides automatic connection to the managed system without requiring the entry of administrative credentials for the managed account. You can also connect to the remote server when accessing group sets. This access disclosure plugin supports Network Level Authentication (NLA) and session monitoring.
There are two versions of the pswxtsvc access disclosure plugin:
Remote desktop, for remote access to a managed system’s desktop environment.
Remote APP RDP, for remote access to one of the managed system’s programs that can be run directly on the client’s workstation. RemoteApp must already be configured on the managed system.
Remote APP RDP type disclosures are used for launching applications such as ssms.exe on Server X and providing users with a SQL Server Management window on their desktop that "looks local", but in fact is running on Server X.
The plugin requires the following:
Microsoft terminal services client (mstsc.exe) installed on the user’s workstation.
Terminal service enabled on the client workstation or server.
Firewalls configured to allow RDC (default port 3389/tcp) from user’s workstation to managed system.
The managed account has remote terminal service access to log on under remote terminal services.
SMON HTTP URL must resolve to the server from client workstations
You can modify the following default attributes to control the behavior of pswxtsvc :
| If set to true, the remote desktop application closes when the user’s access checkout expires. |
| Preferred color depth (value must be 8, 15, 16 or 24 bits per pixel). |
| Domain of the user account that the control will connect with. The default is %host% . |
| The IP or DNS of server. |
| If set to true, will enable searching on attribute ”host” when override is allowed for ”host”. |
| Apply Windows key combinations to the remote connection:
|
| Display login button in list of access disclosure plugins when editable attributes exist. If set to false, the login ability is moved to the override page. |
| If set to true, the screen mode will be full screen and extended to all monitors, provided there is more than one monitor. |
| The port to use when connecting to the host. |
| If set to true, will enable redirecting of the clipboard. |
| If set to true, will enable redirecting of devices. |
| If set to true, will enable redirecting of local disk drives. |
| If set to true, will enable redirecting of local ports. |
| If set to true, will enable redirecting of Point of Service devices. |
| If set to true, will enable redirecting of printers. |
| If set to true, will enable redirecting of smart cards. |
The following disclosure attributes are applicable to the Remote desktop access disclosure plugin only:
| If set to true, will connect to the server for remote administration. |
| If set to true, the screen mode will be full screen. If set to false, the screen mode will be windowed. |
| The desktop height used when using windowed mode. |
| Idle time before auto logoff. |
| If set to true, the screen mode will be full screen and extended to all monitors, provided there is more than one monitor. |
| If set to true, will enable the client computer to scale content to fit the window size. |
| An overridable attribute with support for the special value %shortid% , which retrieves the managed account’s shortid. Add this attribute manually through UI. |
| The desktop width used when using windowed mode. |
The following disclosure attributes are applicable to the Remote APP RDP disclosure plugin only. You can obtain these values by viewing the contents of the RemoteApp’s .rdp file.
| If set to true, the server should expand environment variables in the command line arguments. This is set to false by default. |
| If set to true, the server should expand environment variables in the working directory path. This is set to false by default. |
| The command line arguments for the RemoteApp program, if applicable. |
| The RemoteApp program name. |
| The RemoteApp program alias. (ex. —— <program> ) |
| The working directory on the server for the RemoteApp program. |
Domain and host values
The domain and host values are used to connect to the remote system. Their values may depend on how the managed system is set up, and whether it is push or local service mode, manually or automatically discovered.
The domain must be the DNS Domain Name or NetBIOS name. It should not be an IP address. The reason is that the Windows logon requires the account ID and the context (domain/local machine) to identify the administrative user. If an IP address is used in place of a proper name, the connection will fail.
Bravura Privilege gets the replacement value for %host% from the managed system’s address, or the ’name’ attribute for discovered systems. You could choose to leave the value as an IP address. Windows Server 2008 and above supports an IP address for the host.
If the address does not contain the DNS name (for example, if it is an IP address) and you want it to, you have several options:
If the system is local service mode, use one of the substitution values
%NETBIOS%,%DNSHostname%, or%NetbiosDomain%depending on the type of account. Default is %NETBIOS% .If the system is push mode, and if using the Windows NT connector, enable WINNT_EMIT_INFO and use
%DNSHostname%. This allows the Windows NT connector to return the IP and DNS hostname on the reset operation.If the system is push mode, and if using a scripted connector (
agtssh,agtdos,agttelnet), configure the PSLang script to return the IP address and DNS hostname on the reset operation.Use a managed system attribute set by the API Service
ManageSystemAttrAddfunction. The key-values set for the managed system can then be used for the host/domain settings.Use a hardcoded value.
Let the user override the value.
When an user checks out a domain account, the user has the option to select from a list of domain member computers to connect to. To enable this, the ”host” attribute must have the ability to be overridden by the user, and the ”host search” attribute is set to true. As well, discovered systems must be listed from the Active Directory target.
Local service managed system values
The terminal services plugin connects to the domain set in the managed system’s address field by default.
When you install the Bravura Privilege local service, it transmits the information about the workstation, including:
DNS Domain name
NetBIOS domain name
Fully qualified DNS name
NetBIOS name
Physical DNS domain name
Physical fully qualified DNS name
Physical DNS host name
Physical NetBIOS name
You can view the information for a workstation by clicking Manage the system > Privileged access > Managed systems > < Workstation ID > , then scrolling down to the information table below the account table.
The attribute names can be used to substitute values for the domain and host attributes for the pswxtsvc ; for example you can set the domain value to %NETBIOS%, %DNSHostname%, or %NetbiosDomain%.
Changing the failure message to users
You can change the message displayed to users in the event that the external program fails to launch by modifying the RES PROGRAM PATH INVALID MSG setting in the global or managed system policy Account access request options.
Authentication prompting
If the managed system you are connecting to is configured to include a prompt for password upon connection, you may notice that the password field is already filled in. You can proceed by clicking OK ; you do not need to specify any additional information.
The password is passed from the disclosure plugin to the RDP client via Windows UI Automation (MSAA).
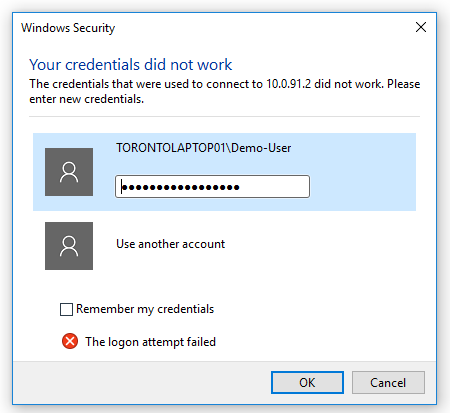
If you receive a similar error and the password is not populated at all, it's possible that Windows changed the RDP dialog. If you are using a supported version of Bravura Security Fabric
Bravura Security Fabric , contact support so they can look for a possible patch.
Single sign-on authentication
You can configure SSO (single sign-on) authentication so that domain users requesting access to group sets can bypass the authentication prompt when running the pswxtsvc access disclosure plugin. SSO is implemented by using the pre-established credentials used to log onto a client computer and sending it to the remote server directly. This allows the user to access the remote server without needing to enter the password multiple times.
In order for SSO to be in effect, the client computer must be on the same domain as the remote server, and the user must log onto the client computer with their domain account.
To order to accommodate single sign-on authentication, you must configure settings on both the remote server and the client. Remote Server
The remote server must be Windows 2008/Vista or above, and it must allow connections from computers running Network Level Authentication.
To allow connections from computers running Network Level Authentication:
Go to Start menu and right click on Computer.
Click Properties.
Click Remote settings.
Select Allow connections only from computers running Remote Desktop with Network Level Authentication.
Click Select Users...
Click Add... to include users that will be requesting group set access to ensure they can remotely log onto the server.
Click OK.
Click OK again to close the system properties.
Remote Client
The remote client must be Windows XP SP3 or above, and support Network Level Authentication.
For Windows 2008/Vista+ Clients:
Go to Start menu, type
gpedit.mscin the search box, and click on the program to access the Local Group Policy Editor.Expand Computer Configuration \ Administrative Templates \ System \ Credentials Delegation.
Double click on Allow Delegating Default Credentials.
Set this object to Enabled.
Click the Show... button to add servers to the list.
Configure a list of trusted remote servers for SSO.
For each server, enter a new value of TERMSRV/ < hostname > where < hostname > is the address that the
pswxtsvcaccess disclosure plugin will use to connect to the remote server. Typically, this will be the fully qualified DNS name of the server.You can also simply type in TERMSRV/. < domain > to include all servers in < domain > .
For Windows XP SP3 Clients:
Go to the Start menu, type
regeditin the search box, and click on the program to access the Registry Editor.Ensure that you are comfortable and knowledgeable in the mechanics of the registry before you attempt to change any configuration settings. Contact support@bravurasecurity.com if in doubt.
In HKLM \ SOFTWARE \ Policies \ Microsoft \ Windows, create a new key called
CredentialsDelegation.In the newly created CredentialsDelegation key, create a DWORD value called
AllowDefaultCredentialsand set its value to 1.Create a new key under
CredentialsDelegationcalledAllowDefaultCredentials.In the newly created
AllowDefaultCredentialskey, create a new string value.Set the name of this to some unique identifier; you may wish to simply use ”1”, ”2”, ”3”, and so on. Set the value to
TERMSRV/ < hostname >, similar to above.Repeat this step for each server you want to enable SSO for.
Go to HKLM \ SYSTEM \ CurrentControlSet \ Control \ Lsa and modify Security Packages by appending
tspkgto it.Go to HKLM \ SYSTEM \ CurrentControlSet \ Control \ SecurityProviders and modify SecurityProviders by appending
credssp.dllto it.
Display: pswxview
The pswxview access disclosure plugin provides users with access to a password by displaying it within the browser. When the secure method is enabled, Bravura Privilege uses JavaScript to decrypt the privileged password embedded in the page. If the insecure method is enabled, the browser can store passwords in plain text in the page source, and users can view the password in browsers that do not have JavaScript enabled.
You can modify the following default attributes to control the behavior of pswxview :
| If true, the password is only disclosed if the browser has JavaScript enabled, and the password is not selectable. If false, the password is available in plaintext for browsers without JavaScript. |
| This controls how long the privileged password is shown. |
| Allows the password to be split amongst multiple viewers so that no single viewer sees the entire password. |
Changing default font and size of viewable passwords
You modify the default font and size of viewable passwords by opening the following files:
<instance>\skin\widgets \ pluginctrl-end.html
<instance>\skin\widgets \ ie \ pluginctrl-end.html
and editing the following lines:
passFontFamily: ‘<font_name>'
passFontSize: <font_size>
If the ie directory exists, the file in it will override the global file outside of it.
Split password view
You can split up a password amongst multiple viewers by specifying the pwd split attribute. This takes the form ”n/m” where m is the number of pieces to split the password into, and n is the number of the piece that this instance of the control should display.
For example, 1/2 will display the first half of the password, while 2/2 will display the second half. You can configure a plugin to determine what part of the password a viewer will see. See Using a plugin to define access disclosure plugin . If you don’t intend to use password splitting, you can safely delete the default pwd split attribute.
Browser driver: pswxdom
Use an alternative disclosure plugin, such as Website access disclosure plugins , as Internet Explorer is no longer a supported browser. For information about pswxdom see documentation for 12.5 or older.
Installing native access disclosure plugins
Native access disclosure plugins can be used with the following browsers:
Microsoft Edge
Mozilla Firefox
Google Chrome
If access to the password includes insecure access to the password with pswxview , then deploying access disclosure plugins is not required.
Native access disclosure plugins only work on Windows. Mac OSX and other operating systems are not supported.
Mozilla Firefox
On Firefox access disclosure plugins can be installed by:
Allowing users to install both the Bravura Security browser add-on and
firefox-extension-x64.msiat the time of check outThe native extension,
firefox-extension-x64.msican be deployed using a Group Policy or a System Center Configuration Manager (SMS)
Use Case: Firefox
This use case demonstrates the typical workflow a user will experience the first time a native access disclosure plugin is used in Firefox.
This use case assumes firefox-extension-x64.msi has not been deployed using a Group Policy or system Center Configuration Manager (SMS)
Check out an and click on the disclosure (copy or display).
Click Install firefox add-on.
Click Continue to Installation when prompted to install add-on.
Click Add when prompted to add Bravura Security browser add-on.
The Bravura Security browser add-on should be added, as indicated by the icon on address bar.
Return to the check- out screen and Install native add-on should be displayed. This may require refreshing the screen.
Click Install native add-on.
Save
firefox-extension-x64.msi.Run the MSI installer.
After the extension is installed, restart the browser.
Return to the check-out page and the disclosure should be launched when you click it.
Google Chrome and Microsoft Edge
On Google Chrome and Microsoft Edge access disclosure plugins can be installed by:
Allowing users to install both the Bravura Security browser extension and
browser-extension-win-x86.msiat the time of check outThe native extension,
browser-extension-win-x86.msican be deployed using a Group Policy or a System Center Configuration Manager (SMS)The Bravura Security browser extension is available from the Chrome web store
Use Case: Check out an account in Chrome or Edge
This use case demonstrates the typical workflow a user will experience the first time a native access disclosure plugin is used in Chrome or Edge.
This use case assumes browser-extension-win-x64.msi has not been deployed using a Group Policy or system Center Configuration Manager (SMS).
Check out a vault account and click on the disclosure (copy or display).
Click Install Chrome extension.
A new browser tab with the Bravura Security browser extension in the Chrome Web store is opened.
Click Add to Chrome.
Click Add when prompted to add Bravura Security browser extension.
The Browser Extension should be added, as indicated by the icon on address bar.
When you return the check-out page, Install native extension should be displayed . This may require refreshing the screen.
Click Install native extension. You may be prompted to save
browser-extension-win-x86.msi, or it will be automatically saved.Run the MSI installer.
After the extension is installed, restart the browser.
Return to the check-out page, and the disclosure should launch when you click on it.
Installing ActiveX controls with ppm-activex-controls.msi
Installing ActiveX controls is no longer a supported method. See documentation for Bravura Security Fabric version 12.5 or older if you need information about this feature..
Installing JavaScript controls with MSI installers
An MSI installer is available for download when users attempt to access a password without installing the browser extension first:
browser-extension-win-x86.msifor Chromefirefox-extension-win-x64.msifor Firefox browsers on a Windows 32-bit workstationfirefox-extension-win-x64.msifor Firefox browsers on a Windows 64-bit workstation
These MSI installers are also available on the Bravura Security Fabric server in the addons\idarchive directory.
If a previous version of native extensions for Firefox is already installed on the workstation (11.1.x or older) you must uninstall and install the current version.
Disclosure plugins are not supported for Mac OS.
To manually install the browser extension:
Launch the Windows Installer package.
Click Next .
Read and accept the Bravura Security Fabric license.
Click Next .
Select an installation scope (if options are available).
If you are logged in as an administrator, you can choose to install the browser extension for yourself or for all users on the workstation.
Click Next .
Click:
Typical to install all browser extension modules.
or
Custom to select modules.
It is recommended that you do not change the installation directory.
Click Install to start the installation. The installer begins copying files to your computer. The Installation Complete dialog appears after the browser extension has been successfully installed.
Click Finish to exit.
One-time disclosure plugin
You can launch access disclosure plugins using the one-time disclosure method. These plugins have the same functionality as the native access disclosure plugins and do not require additional software, however they are good for one-time use only. The one-time disclosure is available as an executable that can be run directly or downloaded to be run on a different workstation. A new executable needs to be generated in order to view the access disclosure plugin again.
You can configure messages to display to users how much check-out time is remaining and that the check-out time has expired.
When a one-time disclosure plug-in is downloaded and executed, the plug-in will check with Bravura Privilege to determine how much time is left in the checkout, or if the authorized interval has expired. This also applies to one-time plug-ins that have been saved for future use.
The one-time disclosure option is enabled by default. End-users may be able to see this option if the native access disclosure plugins are not yet installed or are disabled. When the one-time disclosure option is disabled, the option will be grayed out.
To disable one-time disclosures:
Go to Manage the system > Modules > Privileged access .
Set PAM ALLOW ONE TIME DISCLOSURE to
Disabled.Click Update.
Troubleshooting native access disclosure plugins
Users on a Windows workstation are prevented from installing browser extensions
To allow users to install the browser extensions, enable and modify the following group policy setting:
Go to Start menu, type gpedit.msc in the search box, and click on the program to access the Local Group Policy Editor.
Expand Computer Configuration > Administrative Templates > Windows Components > Windows Installer.
Right-click Turn off Windows Installer , select Edit .
Older versions of Windows refer to this setting as Disable Windows Installer.
Select Enabled .
Under Disable Windows Installer , select Never .
Click OK.
Administrators on a Windows workstation cannot install browser extensions for all users
If administrators are unable to select an installation scope option, disable the following in the Local Group Policy Editor:
Computer Configuration > Windows Settings > Security Settings > Local Policies > Security Options > User Account Control: Run all administrators in Admin Approval Mode
Computer Configuration > Windows Settings > Security Settings > Local Policies > Security Options > User Account Control: Admin Approval Mode for the built-in Administrator account
Guacamole access disclosure plugins
In-browser RDP: guacamole-rdp
The guacamole-rdp Guacamole access disclosure plugin provides users with remote access to Windows server or client managed systems using Remote Desktop Connection (RDC). This control provides automatic connection to the managed system without the need to enter the administrative credentials for the managed account and is compatible with session recording.
You can modify the following default attributes to control the behavior of guacamole-rdp :
| Set the preferred color depth of the display in bits per pixel. Available values are 8, 16, 24 and 32. |
| Connect to the server as a console (admin) session. This is set to false by default. |
| Disable audio driver. This reduces the bandwidth of the session. This is set to true by default. |
| Set the domain the user account is a member of. This is set to See Domain and host values for further information. |
| Enable printing to a virtual PDF printer. This is set to false by default. |
| Set the URL of the Guacamole service. The format is |
| Set the height of the RDP window. |
| Set the IP or DNS of the server. This is set to See Domain and host values for further information. |
| If set to true, will enable searching on attribute ”host” when override is allowed for ”host”. This is set to false by default. |
| Ignore certificate from the RDP server. This is set to false by default. |
| Set the connection port of the server. |
| Set the security mode for the connection. This is set to |
| Set the width of the RDP window. |
Domain and host values
The domain and host values are used to connect to the remote system. Their values may depend on how the managed system is set up, and whether it is push or local service mode, manually or automatically discovered.
The domain must be the DNS Domain Name or NetBIOS name. It should not be an IP address. The reason is that the Windows logon requires the account ID and the context (domain/local machine) to identify the administrative user. If an IP address is used in place of a proper name, the connection will fail.
Bravura Privilege gets the replacement value for %host% from the managed system’s address, or the ’name’ attribute for discovered systems. You could choose to leave the value as an IP address. Windows Server 2008 and above supports an IP address for the host.
If the address does not contain the DNS name (for example, if it is an IP address) and you want it to, you have several options:
If the system is local service mode, use one of the substitution values
%NETBIOS%,%DNSHostname%, or%NetbiosDomain%depending on the type of account. Default is %NETBIOS% .If the system is push mode, and if using the Windows NT connector, enable WINNT_EMIT_INFO and use
%DNSHostname%. This allows the Windows NT connector to return the IP and DNS hostname on the reset operation.If the system is push mode, and if using a scripted connector (
agtssh,agtdos,agttelnet), configure the PSLang script to return the IP address and DNS hostname on the reset operation.Use a managed system attribute set by the API Service
ManageSystemAttrAddfunction. The key-values set for the managed system can then be used for the host/domain settings.Use a hardcoded value.
Let the user override the value.
When an user checks out a domain account, the user has the option to select from a list of domain member computers to connect to. To enable this, the ”host” attribute must have the ability to be overridden by the user, and the ”host search” attribute is set to true. As well, discovered systems must be listed from the Active Directory target.
Local service managed system values
The terminal services plugin connects to the domain set in the managed system’s address field by default.
When you install the Bravura Privilege local service, it transmits the information about the workstation, including:
DNS Domain name
NetBIOS domain name
Fully qualified DNS name
NetBIOS name
Physical DNS domain name
Physical fully qualified DNS name
Physical DNS host name
Physical NetBIOS name
You can view the information for a workstation by clicking Manage the system > Privileged access > Managed systems > < Workstation ID > , then scrolling down to the information table below the account table.
The attribute names can be used to substitute values for the domain and host attributes for the pswxtsvc ; for example you can set the domain value to %NETBIOS%, %DNSHostname%, or %NetbiosDomain%.
In-browser Remote App: guacamole-remote-app
The guacamole-remote-app Guacamole access disclosure plugin provides users with remote access to applications hosted on a Windows server or client managed system using Remote Desktop Connection (RDC). This control provides automatic connection to the managed system without the need to enter the administrative credentials for the managed account and is compatible with session recording.
You can modify the following default attributes to control the behavior of guacamole-remote-app :
| Set the preferred color depth of the display in bits per pixel. Available values are 8, 16, 24 and 32. |
| Disable audio driver. This reduces the bandwidth of the session. This is set to true by default. |
| Set the domain the user account is a member of. This is set to See Domain and host values for further information. |
| Enable printing to a virtual PDF printer. This is set to false by default. |
| Set the URL of the Guacamole service. The format is |
| Set the height of the RDP window. |
| Set the IP or DNS of the server. This is set to %server% by default. |
| Ignore certificate from the RDP server. This is set to False by default. |
| Set the connection port of the server. |
| Define the RemoteApp program. This should be in the format |
| Set the command line arguments of the RemoteApp program. |
| Set the working directory of the RemoteApp program. |
| Set the security mode for the connection. This is set to |
| Set the width of the RDP window. |
In-browser SSH: guacamole-ssh
The guacamole-ssh Guacamole access disclosure plugin provides users with remote access to a server using Secure Shell (SSH). This control provides automatic connection to the managed system without the need to enter the administrative credentials for the managed account and is compatible with session recording.
You can modify the following default attributes to control the behavior of guacamole-ssh :
| Set the color scheme to use for the terminal emulator. |
| Name of font to render on the terminal emulator. By default, a monospace font will be used. |
| Size of font to render on the terminal emulator. By default, the font will be set to size 12. |
| Set the url of the Guacamole service. The format is ’ <address> : <port> / <webappname> ’. |
| Set the IP or DNS of the server. This is set to %server% by default. See Domain and host values for further information. |
| Set the passphrase to use with a private key, if required. |
| Set the connection port of the server. |
| Set the private key to use when connecting, if required. |
In-browser Telnet: guacamole-telnet
The guacamole-telnet Guacamole access disclosure plugin provides users with remote access to a server using Telnet. This control provides automatic connection to the managed system without the need to enter the administrative credentials for the managed account and is compatible with session recording.
To use this control, Telnet must be installed and enabled on the managed system.
You can modify the following default attributes to control the behavior of guacamole-telnet :
| Set the color scheme to use for the terminal emulator. |
| Name of font to render on the terminal emulator. By default, a monospace font will be used. |
| Size of font to render on the terminal emulator. By default, the font will be set to size 12. |
| Set the URL of the Guacamole service. The format is ’ |
| Set the IP or DNS of the server. This is set to %server% by default. See Domain and host values for further information. |
| The regular expression to use when searching for where to enter the managed account password. By default, this is set to [Pp]assword: . If unspecified, Guacamole will use a reasonable default value. |
| Set the connection port of the server. |
| The regular expression to use when searching for where to enter the managed account username. By default, this is set to [Ll]ogin: . If unspecified, Guacamole will use a reasonable default value. |
In-browser VNC: guacamole-vnc
The guacamole-vnc Guacamole access disclosure plugin provides users with remote access to a server using Virtual Network Computing (VNC). This control provides automatic connection to the managed system without the need to enter the administrative credentials for the managed account and is compatible with session recording.
In order to use this control, VNC must be installed and enabled on the managed system.
You can modify the following default attributes to control the behavior of guacamole-vnc :
autoretry | Set the number of times to retry connection before failing. This is set to 0 by default. |
color-depth | Set the preferred color depth of the display in bits per pixel. Available values are 8, 16, 24 and 32. |
cursor | Set whether to render a mouse cursor locally or remotely. This is set to local by default. |
encodings | Space-delimited list of encoding to use by libvncclient. Guacamole will use supported encodings by default. |
guacamole-url | Set the url of the Guacamole service. The format is ’ <address> : <port> / <webappname> ’. |
hostname | Set the IP or DNS of the server. This is set to %server% by default. See Domain and host values for further information. |
port | Set the connection port of the server. |
read-only | Allows the user to view the display but not make any modifications. This is set to false by default. |
swap-red-blue | Swaps colors of red and blue, used to correct incorrect displays. This is set to false by default. |
Guacamole integration details
Bravura Privilege can provide access to remote systems using access disclosure plugins for Guacamole. Guacamole is a third-party remote desktop gateway that supports standard protocols including RDP, SSH, VNC, and Telnet. It is clientless, which means there are no additional software or drivers needed to view the access disclosure plugins on your workstation; all that is required is a dedicated Linux-based system to act as the Guacamole remote desktop gateway. The access disclosure plugins can then displayed on an HTML5-supported web browser.
There are two main pieces of software that run on the Guacamole gateway:
The
guacdservice, which is a server package that acts as a proxy that connects to the managed system;The
guacamolepackage, a Java web applet that runs on Apache Tomcat,guacamoleacts as client to theguacdservice and as server to the user's browserIt also acts as client to the Bravura Privilege
sessmoncCGI to which it sends session monitoring data if that feature is configured.
Guacamole access disclosure plugins have similar functionality as the native access disclosure plugins, but instead of having to manage a diverse set of local programs for remote access to target systems, provides a convenient, centrally-configured thin client. It also completely hides the password from the target system administrators (unlike native disclosures, which normally provide the password in plain text on the command line which is captured in the admin's workstation Task Manager process and in the Windows Event log.)
The plugin controls contain default attributes to customize behavior, and are compatible with session recording.
The only drawback of the Guacamole disclosures is the need to install and maintain the third-party Guacamole services on Linux proxy systems, and to calculate how many such systems are required for the amount of users who can disclose access at the same time.
How it works
A user checks out a single account or account set and accesses a Guacamole disclosure plugin. This redirects the user to a specific URL on the Guacamole gateway.
The URL opens a browser window that contains specific information about the managed account checked out, including the checkout ID, account ID, and the type of access disclosure plugin requested.
The Guacamole gateway contacts the Bravura Privilege server using the CheckoutStatusGet and CheckoutParamsGet API calls to get information about the status and validity of the account checked out.
If the check-out is deemed valid, the Guacamole gateway initiates the disclosure session to the managed system and shows the resulting screen in the browser window.
The user can now interact with the managed system from that browser window.
The Guacamole gateway contacts the Bravura Privilege server using the CheckoutStatusGet API call periodically until the checkout is no longer valid or until the user closes the disclosure session.
There is greater flexibility when using Guacamole access disclosure plugins. It can be viewed on commonly used browsers such as Google Chrome and Microsoft Edge. Unlike native access disclosure plugins which are limited to Windows, you can view Guacamole access disclosure plugins on other operating systems such as Linux, provided that it has a HTML5-compatible browser. Guacamole access disclosure plugins can also be viewed on mobile devices such as smart phones and tablets.
Guacamole access disclosure plugins have similar functionality as the native access disclosure plugins. The controls contain default attributes to customize behavior, and are compatible with session recording.
Prepare for Guacamole setup
This section outlines the steps for setting up Guacamole. In sequence, you will need to:
Decide which CentOS/RHEL version will be used as the Guacamole server.
The following versions are supported:
Centos 8 Stream / RHEL 8 64-bit
Centos 9 Stream / RHEL 9 64-bit
View the Guacamole benchmarking metrics to determine the optimal system requirements for the Guacamole server.
Configure proxy server settings for the Guacamole server. To do this, edit the
/etc/profilefile (as root user):vi /etc/profile
For example, add the following lines to the bottom of the file:
PROXY_URL="http://<proxyaddress>:<port>/"

export http_proxy="$PROXY_URL"
export https_proxy="$PROXY_URL"
export ftp_proxy="$PROXY_URL"
export no_proxy="127.0.0.1,localhost"

# For curl

export HTTP_PROXY="$PROXY_URL"
export HTTPS_PROXY="$PROXY_URL"
export FTP_PROXY="$PROXY_URL"
export NO_PROXY="127.0.0.1,localhost"
Replace <proxyaddress> and <port> with the IP address and port number of the proxy server, respectively. Note that this is based on a proxy server using HTTP protocol; further modifications are required if the proxy server uses HTTPS.
Save the file.
Source the file to start using the proxy settings:
source /etc/profile
Ensure the Guacamole server is up to date.
For Centos 8 / RHEL 8 or newer:
dnf update
(Optional) Secure Guacamole connections using SSL
Important
It is highly recommended that you follow the above steps in sequence, otherwise you may encounter configuration issues.
Before editing any file mentioned in this documentation, it is recommended to make a backup of that file first.
If you encounter issues at any point, check out the Troubleshoot configuration problems section.
Configure Guacamole remote desktop gateway
There are a couple methods of installing the Guacamole remote desktop gateway:
Using Docker : Docker is a daemon that runs applications with all of the required dependencies and libraries that are bundled into one package, or ”container”. Docker is open-source and can be installed on many platforms including Windows, Linux and Mac OS.
Using Podman : As of CentOS 8/RHEL 8, Docker support has been dropped in favor of a similar container engine called Podman. Podman is daemonless and can run multiple containers in “pods”.
Install Guacamole using Docker
The following steps are based on a CentOS 7 64-bit distribution. All steps performed on the Guacamole server should be performed as root user.
Obtain the idmunix-rhel-el8.x64.tar.gz or idmunix-rhel-el9.x64.tar.gz file from <instancedir>\addon\idmunix on the Bravura Privilege server and copy it into the Guacamole server under the /root directory.
Navigate to the root directory:
cd /root
Unzip the idmunix-rhel-el8.x64.tar.gz file:
tar -xf idmunix-rhel-el8.x64.tar.gz
If the Guacamole server will use a proxy server, update the Dockerfile for the guacamole container.
Navigate to the idmunix-rhel-el8.x64/docker/guacamole directory:
cd /root/idmunix-rhel-el8.x64/docker/guacamole
Modify the DockerFile by uncommenting one of the following lines according to your configuration:
For HTTPS proxy only:
ENV CATALINA_OPTS -Dhttps.proxyHost=<proxyhost> -Dhttps.proxyPort=<proxyport> -Dhttps.nonProxyHosts=\"localhost|127.0.0.1|192.168.0.1\"
For HTTP proxy only:
ENV CATALINA_OPTS -Dhttp.proxyHost=<proxyhost> -Dhttp.proxyPort=<proxyport> -Dhttp.nonProxyHosts=\"localhost|127.0.0.1|192.168.0.1\"
For both HTTP and HTTPS proxy :
ENV CATALINA_OPTS -Dhttps.proxyHost=<proxyhost> -Dhttps.proxyPort=<proxyport> -Dhttps.nonProxyHosts=\"localhost|127.0.0.1|192.168.0.1\" -Dhttp.proxyHost=<proxyhost> -Dhttp.proxyPort=<proxyport> -Dhttp.nonProxyHosts=\"localhost|127.0.0.1|192.168.0.1\"
Replace <proxyhost> and <proxyport> with the IP address and port number of the proxy server, respectively.
Save the file.
Navigate to the idmunix-rhel-el8.x64/docker directory:
cd /root/idmunix-rhel-el8.x64/docker/
Build the Docker image:
docker compose build
Create and start the Docker container:
docker compose up -d
If using Version 1 of the Docker Compose repository, the command is
docker-compose.Open a browser window on a server or workstation that can access the Guacamole server using port 8080, and provide the following URL:
http://<DNSName-of-guacamole-server>:8080/pam-guacamole
A black screen with the following message will be displayed, however this is expected at the setup stage:
Stopping the container
To stop the Docker container run:
docker compose down
Starting the container
To start the Docker container; for example, after restarting the Guacamole server, run:
docker compose up -d
Running the Docker container as a service
Docker containers can be controlled using systemd . This is useful when you want to start Guacamole automatically upon reboot of the Guacamole server.
Create a service called guacamole.service:
sudo nano /etc/systemd/system/guacamole.service
In Edit mode, insert the following into guacamole.service:
[Unit]
Description=Guacamole service
Requires=docker.service
After=network.target
[Service]
Type=oneshot
RemainAfterExit=yes
ExecStart=/usr/local/bin/docker-compose -f /root/idmunix-rhel-el8.x64/docker/docker-compose.yml
            up -d

ExecStop=/usr/local/bin/docker-compose -f /root/idmunix-rhel-el8.x64/docker/docker-compose.yml
            down

[Install]
WantedBy=multi-user.target
Modify the path to the
docker-compose.ymlfile should you move this to a different directory.Save the file.
Reload systemd files:
systemctl daemon-reload
Enable guacamole.service to run at boot:
systemctl enable guacamole.service
Ensure no errors are returned. If so, view the status of the service by running:
systemctl status guacamole.service
Start the Guacamole service by running:
systemctl start guacamole.service
Stop the Guacamole service by running:
systemctl stop guacamole.service
Logging
Tail the logs for the running containers with the following commands:
docker logs -f guacd
docker logs -f guacamole
Install Guacamole using Podman
The following steps are based on a CentOS 8 and Centos 9 Stream 64-bit distribution. All steps performed on the Guacamole server should be performed as root user.
Install the EPEL repo.
dnf -y install epel-release
Install podman-compose.
dnf -y install podman-compose
Obtain the
idmunix-rhel-el8.tar.gzoridmunix-rhel-el9.x64.tar.gzfile from <instancedir>\addon\idmunix on the Bravura Privilege server and copy it into the Guacamole server under the /root directory.Navigate to the root directory:
cd /root
Unzip the idmunix-rhel-el8.x64.tar.gz file:
tar -xf idmunix-rhel-el8.x64.tar.gz
If the Guacamole server will use a proxy server, update the Dockerfile for the guacamole container.
Navigate to the idmunix-rhel-el8.x64/docker/guacamole directory:
cd /root/idmunix-rhel-el8.x64/docker/guacamole
Modify the DockerFile by uncommenting one of the following lines according to your configuration:
For HTTPS proxy only:
ENV CATALINA_OPTS -Dhttps.proxyHost=<proxyhost> -Dhttps.proxyPort=<proxyport> -Dhttps.nonProxyHosts=\"localhost|127.0.0.1|192.168.0.1\"
For HTTP proxy only:
ENV CATALINA_OPTS -Dhttp.proxyHost=<proxyhost> -Dhttp.proxyPort=<proxyport> -Dhttp.nonProxyHosts=\"localhost|127.0.0.1|192.168.0.1\"
For both HTTP and HTTPS proxy :
ENV CATALINA_OPTS -Dhttps.proxyHost=<proxyhost> -Dhttps.proxyPort=<proxyport> -Dhttps.nonProxyHosts=\"localhost|127.0.0.1|192.168.0.1\"
                  -Dhttp.proxyHost=<proxyhost> -Dhttp.proxyPort=<proxyport> -Dhttp.nonProxyHosts=\"localhost|127.0.0.1|192.168.0.1\"
Replace <proxyhost> and <proxyport> with the IP address and port number of the proxy server, respectively.
Save the file.
Navigate to the idmunix-rhel-el8.x64/docker directory:
cd /root/idmunix-rhel-el8.x64/docker/
Build the Docker image using podman-compose:
podman-compose build
Create and start the Docker container:
podman-compose up -d
When prompted to select an image, choose docker.io/guacamole/guacd:1.5.3
Open a browser window on a server or workstation that can access the Guacamole server using port 8080, and provide the following URL:
http://<DNSName-of-guacamole-server>:8080/pam-guacamole
A black screen with the following message will be displayed, however this is expected at the setup stage:
Stopping the container
To stop the Docker container run:
podman-compose down
Starting the container
Navigate to the idmunix-rhel-el8.x64/docker directory:
cd /root/idmunix-rhel-el8.x64/docker/
Start the Docker container using podman-compose:
podman-compose up -d
Running the Docker container as a service
Docker containers can be controlled using systemd . This is useful when you want to start Guacamole automatically upon reboot of the Guacamole server.
Create a service called guacamole.service:
sudo nano /etc/systemd/system/guacamole.service
In Edit mode, insert the following into guacamole.service:
[Unit]
Description=Guacamole service
Requires=podman.socket
After=network.target
[Service]
Type=oneshot
RemainAfterExit=yes
ExecStart=podman-compose -f /root/idmunix-rhel-el8.x64/docker/docker-compose.yml up
            -d

ExecStop=podman-compose -f /root/idmunix-rhel-el8.x64/docker/docker-compose.yml down
[Install]
WantedBy=multi-user.target
Modify the path to the
docker-compose.ymlfile should you move this to a different directory.Save the file.
Reload systemd files:
systemctl daemon-reload
Enable guacamole.service to run at boot:
systemctl enable guacamole.service
Ensure no errors are returned. If so, view the status of the service by running:
systemctl status guacamole.service
Start the Guacamole service by running:
systemctl start guacamole.service
Stop the Guacamole service by running:
systemctl stop guacamole.service
Logging
Tail the logs for the running containers with the following commands:
podman logs -f guacd
podman logs -f guacamole
Configure Guacamole access disclosure plugins
At a minimum, to use Guacamole access disclosure plugins, the URL of the Guacamole service must be set. To do this:
Log in to the Bravura Privilege instance as superuser.
Click Manage the system > Privileged access > Access disclosure plugins.
Select a Guacamole access disclosure plugin. See Types of access disclosure plugins for a list of available plugins.
Set
guacamole-url. It must be set using the following format:<address>:<port>/<webappname>address: The IP address or server name of the Guacamole remote desktop gateway. This must begin withhttp://orhttps://, depending on your configuration.port: The port number the Guacamole service is listening on. This should either be set to8080or8443, depending on your configuration.webappname: The web application name. This should be set topam-guacamole.For example:
http://linux1.bravura1.corp:8080/pam-guacamole
https://linux1.bravura1.corp:8443/pam-guacamole
Click Update.
Update the
guacamole-urlfor each In-Browser disclosure plugin you wish to use.Click Next.
Click Finish.
Secure Guacamole connections using SSL
In order to secure Guacamole connections using SSL, please ensure the following have been created before proceeding:
An SSL certificate for the Bravura Fabric server (we will use
bravuracert.ceras an example)An SSL certificate for the Guacamole server (we will use
guacamole.ceras an example)A keystore for guacamole.cer on the Guacamole server (we will use
keystore.jksas an example)
It is assumed the reader knows how to generate these items, otherwise contact support@bravurasecurity.com for assistance.
Note
keytool is a certificate management utility will be used to import the Bravura Fabric server SSL certificate into a truststore. If your version of CentOS/RHEL does not have this installed, you need to install java. For example as root user, run yum install java or dnf install java depending on your CentOS/RHEL version.
On the Guacamole server, navigate to the /root directory:
cd /root
Create a new directory called certificates :
mkdir certificates
Place
keystore.jksinto the certificates directory.Copy
bravuracert.cerfrom the Bravura Security Fabric server to the Guacamole server and place it in the certificates directory.Navigate to the certificates directory.
cd /root/certificates
Run keytool to import the
bravuracert.cercertificate to a truststore:keytool -import -v -trustcacerts -alias <alias> -file bravuracert.cer -keystore truststore.jks
Replace <alias> with a unique ID (ie. bravurainst)
It will ask for a truststore password, and prompt you to trust the certificate:
[root@bravura-guacamole certificates]# keytool -import -v -trustcacerts -alias bravurainst
            -file bravuracert.cer -keystore truststore.jks

Enter keystore password:
Re-enter new password:
Owner: CN=fabric-svr1.bravura1.corp
Issuer: CN=fabric-svr1.bravura1.corp
Serial number: 16c6fd2eaee998ac4d24e204b4e035ee
Valid from: Fri Feb 10 16:32:44 MST 2023 until: Sat Feb 10 16:52:44 MST 2024
Certificate fingerprints:
         SHA1: E8:F4:C7:BC:CE:05:BD:B1:A3:B6:9D:33:28:B8:D6:41:5B:AC:F0:D4
         SHA256: 6F:C7:29:03:7B:24:2E:98:E1:B4:4A:E8:9C:C7:A7:86:16:87:D6:71:98:23:22:32:30:2F:83:6C:E5:BC:92:AD


Signature algorithm name: SHA256withRSA
Subject Public Key Algorithm: 2048-bit RSA key
Version: 3

Extensions:

#1: ObjectId: 2.5.29.37 Criticality=false
ExtendedKeyUsages [
  clientAuth
  serverAuth
]

#2: ObjectId: 2.5.29.15 Criticality=true
KeyUsage [
  DigitalSignature
  Key_Encipherment
]
#3: ObjectId: 2.5.29.17 Criticality=false
SubjectAlternativeName [
  DNSName: fabric-svr1.bravura1.corp
]
#4: ObjectId: 2.5.29.14 Criticality=false
SubjectKeyIdentifier [
KeyIdentifier [
0000: E0 94 85 4D C7 03 D4 E5   95 EC 11 8F 7B D5 4A CB  ...M..........J.
0010: 0E A4 77 99                                        ..w.
]
]
Trust this certificate? [no]:  y
Certificate was added to keystore
[Storing truststore.jks]
Next steps
Deploy SSL certificates for the Guacamole server (for self-signed certificates only)
Configure Guacamole with SSL using Docker (if Docker installation method was used)
Configure Guacamole with SSL using Podman (if Podman installation method was used)
Self-signed certificates
If you are using self-signed SSL certificates for the Guacamole server, you will need to deploy these certificates on any system that will be used to launch Guacamole sessions. If not installed, web browsers will return a ERR_CERT_AUTHORITY_INVALID error message because it cannot validate the site’s SSL certificate.
Perform the following steps as a user with administrative permissions, for each system that will be used to launch Guacamole sessions. This is based on a Windows environment.
For each system that will be used to launch Guacamole sessions, create a new directory to store the Guacamole certificate. (ie. C:\guacamole_certificates)
Copy over the
guacamole.cerfile from the Guacamole server to the directory specified in the previous step.Close any open web browser windows.
From the directory where the
guacamole.cercertificate is located, double click on the file.Click Install Certificate…
Choose the Store Location (default Current User)
It is recommended that the store location be set to Local Machine, otherwise each individual user on the system will need to install the certificate.
Click Next
Select Place all certificates in the following store
Click Browse…
Select Trusted Root Certification Authorities.
Click OK.
Click Next.
Click Finish.
Click Yes to accept the security warning.
Click OK to close the import wizard.
Open a web browser, and specify the DNS name of the Guacamole server in the address bar:
https://<DNSName-of-guacamole-server>
You should no longer see the ERR_CERT_AUTHORITY_INVALID error message.
Configure Guacamole with SSL using Docker
The following steps are based on a Guacamole installation using Docker . All steps performed on the Guacamole server will be done as root user.
Navigate to the idmunix-rhel-el8.x64/docker or idmunix-rhel-el9.x64/docker directory.
cd /root/idmunix-rhel-el8.x64/docker/
Start the Docker container if not already done so:
docker compose up -d
From the same directory, modify docker-compose.yml , by adding port 8443 to the list of ports. The file should look like this:
version: "3"
services:
  guacd:
    build:
      context: ./guacd
    image: guacd
    container_name: guacd
    deploy:
      replicas: 1
      restart_policy:
        condition: on-failure
    networks:
      - guac
  guacamole:
    build:
      context: ./guacamole
    image: guacamole
    container_name: guacamole
    deploy:
      replicas: 1
      restart_policy:
        condition: on-failure
    ports:
      - "8080:8080"
      - "8443:8443"
    networks:
      - guac
networks:
  guac:
Save the file.
From the docker directory, navigate to the guacamole directory.
cd /root/idmunix-rhel-el8.x64/docker/guacamole
Modify Dockerfile , by exposing port 8443. The file should look like this:
# Use args for Tomcat image label to allow image builder to choose alternatives
# such as `--build-arg TOMCAT_JRE=jre8-alpine`
#
ARG TOMCAT_VERSION=9
ARG TOMCAT_JRE=jre8

FROM tomcat:${TOMCAT_VERSION}-${TOMCAT_JRE}

COPY . /

EXPOSE 8080
EXPOSE 8443

ENV GUACAMOLE_HOME /etc/guacamole/
CMD ["catalina.sh", "run"]
Save the file.
Navigate to the idmunix-rhel-el8.x64/docker/guacamole/usr/local/tomcat directory:
cd /root/idmunix-rhel-el8.x64/docker/guacamole/usr/local/tomcat
Create 2 directories called conf and ssl :
mkdir conf
mkdir ssl
Copy over keystore.jks and truststore.jks to the ssl directory.
cp /root/certificates/truststore.jks /root/idmunix-rhel-el8.x64/docker/guacamole/usr/local/tomcat/ssl/
cp /root/certificates/keystore.jks /root/idmunix-rhel-el8.x64/docker/guacamole/usr/local/tomcat/ssl/
From the tomcat directory, navigate to the bin directory.
cd /root/idmunix-rhel-el8.x64/docker/guacamole/usr/local/tomcat/bin
Modify setenv.sh , by adding a line to include a line to the path of the truststore file and password:
export JAVA_OPTS="$JAVA_OPTS -Djavax.net.ssl.trustStore=/usr/local/tomcat/ssl/truststore.jks -Djavax.net.ssl.trustStorePassword=<password>"trustStoreis the full path to thetruststore.jksfiletrustStorePasswordis the password you provided for thetruststore.jksfile. (replace <password>)Save the file.
Enter the guacamole container context:
docker exec -it guacamole /bin/bash
To confirm that you are in the guacamole container context, you will see:
root@<containerid>:/usr/local/tomcat#
Where <containerid> is the Guacamole container ID.
You will need to install a text editor to be able to edit the file from within the container; for example nano :
apt-get update
apt-get install nano
Open server.xml in the conf directory using nano :
nano conf/server.xml
Modify
server.xml, by adding the connector definition for enabling SSL protocol; for example:<Connector protocol="org.apache.coyote.http11.Http11NioProtocol" port="8443" maxThreads="200" scheme="https" secure="true" SSLEnabled="true" keystoreFile="ssl/keystore.jks" keystorePass="<password>" clientAuth="false" sslProtocol="TLS"/>
keystoreFileis the location of thekeystore.jksfile within the guacamole container context.keystorePassis the password you provided for thekeystore.jksfile (replace <password> )The file should look something like this:
...
    <Connector port="8080" protocol="HTTP/1.1"
               connectionTimeout="20000"
               redirectPort="8443" />
    <!-- A "Connector" using the shared thread pool-->
    <!--
    <Connector executor="tomcatThreadPool"
               port="8080" protocol="HTTP/1.1"
               connectionTimeout="20000"
               redirectPort="8443" />
    -->
    <!-- Define an SSL/TLS HTTP/1.1 Connector on port 8443
         This connector uses the NIO implementation. The default
         SSLImplementation will depend on the presence of the APR/native
         library and the useOpenSSL attribute of the AprLifecycleListener.
         Either JSSE or OpenSSL style configuration may be used regardless of
         the SSLImplementation selected. JSSE style configuration is used below.
    -->
    <Connector protocol="org.apache.coyote.http11.Http11NioProtocol"
                port="8443" maxThreads="200"
                scheme="https" secure="true" SSLEnabled="true"
                keystoreFile="ssl/keystore.jks" keystorePass="password123"
                clientAuth="false" sslProtocol="TLS"/>
    <!--
    <Connector port="8443" protocol="org.apache.coyote.http11.Http11NioProtocol"
               maxThreads="150" SSLEnabled="true">
        <SSLHostConfig>
            <Certificate certificateKeystoreFile="conf/localhost-rsa.jks"
                         type="RSA" />
        </SSLHostConfig>
    </Connector>
    -->
...
Save the file.
Type
exitto leave the guacamole container context.Navigate to the idmunix-rhel-el8.x64/docker directory.
cd /root/idmunix-rhel-el8.x64/docker/
Copy
server.xml from the guacamole container. This will prevent the file from being overwritten every time the guacamole container is built:docker cp guacamole:/usr/local/tomcat/conf/server.xml guacamole/usr/local/tomcat/conf/
For future updates to the server.xml file, edit the file from guacamole/usr/local/tomcat/conf/ instead of going into the container context. The latter will be overwritten should you rebuild the guacamole container.
Stop the Docker container.
docker-compose down
Rebuild the Docker containers and image.
docker-compose up --force-recreate --build -d
Open a browser window on a system where the Guacamole server SSL certificate is installed, and access the Guacamole server using https and port 8443; for example:
https://<DNSName-of-guacamole-server>:8443/pam-guacamole
Confirm that the Guacamole server is secured, as indicated by the lock on the address bar.
A black screen with the following message will be displayed, however this is expected at the setup stage:
Update the guacamole-url for Guacamole access disclosure plugins to use port 8443.
Configure Guacamole with SSL using Podman
The following steps are based on a Guacamole installation using Podman . All steps performed on the Guacamole server will be done as root user.
Navigate to theidmunix-rhel-el8.x64/docker or idmunix-rhel-el9.x64/docker directory.
cd /root/idmunix-rhel-el8.x64/docker/
Start the Docker container if not already done so:
podman-compose up -d
From the same directory, modify
docker-compose.yml, by adding port 8443 to the list of ports. The file should look like this:version: "3" services: guacd: build: context: ./guacd image: guacd container_name: guacd deploy: replicas: 1 restart_policy: condition: on-failure networks: - guac guacamole: build: context: ./guacamole image: guacamole container_name: guacamole deploy: replicas: 1 restart_policy: condition: on-failure ports: - "8080:8080" - "8443:8443" networks: - guac networks: guac:Save the file.
From the docker directory, navigate to the guacamole directory.
cd /root/idmunix-rhel-el8.x64/docker/guacamole
Modify
Dockerfile, by exposing port 8443. The file should look like this:# Use args for Tomcat image label to allow image builder to choose alternatives # such as `--build-arg TOMCAT_JRE=jre8-alpine` # ARG TOMCAT_VERSION=9 ARG TOMCAT_JRE=jre8 FROM tomcat:${TOMCAT_VERSION}-${TOMCAT_JRE} COPY . / EXPOSE 8080 EXPOSE 8443 ENV GUACAMOLE_HOME /etc/guacamole/ CMD ["catalina.sh", "run"]Save the file.
Navigate to the idmunix-rhel-el8.x64/docker/guacamole/usr/local/tomcat directory:
cd /root/idmunix-rhel-el8.x64/docker/guacamole/usr/local/tomcat
Create two directories called conf and ssl :
mkdir conf
mkdir ssl
Copy over keystore.jks and truststore.jks to the ssl directory.
cp /root/certificates/truststore.jks /root/idmunix-rhel-el8.x64/docker/guacamole/usr/local/tomcat/ssl/
cp /root/certificates/keystore.jks /root/idmunix-rhel-el8.x64/docker/guacamole/usr/local/tomcat/ssl/
From the tomcat directory, navigate to the bin directory.
cd /root/idmunix-rhel-el8.x64/docker/guacamole/usr/local/tomcat/bin
Modify
setenv.shby adding a line to include a line to the path of the truststore file and password:export JAVA_OPTS="$JAVA_OPTS -Djavax.net.ssl.trustStore=/usr/local/tomcat/ssl/truststore.jks -Djavax.net.ssl.trustStorePassword=<password>"
trustStoreis the full path to the truststore.jks filetrustStorePasswordis the password you provided for the truststore.jks file. (replace <password> )Save the file.
Enter the guacamole container context:
podman exec -it guacamole /bin/bash
To confirm that you are in the guacamole container context, you will see:
root@guac:/usr/local/tomcat#
You will need to install a text editor to be able to edit the file from within the container; for example nano :
apt-get update
apt-get install nano
Open
server.xmlin the conf directory using nano :nano conf/server.xml
Modify
server.xmlby adding the connector definition for enabling SSL protocol; for example:<Connector protocol="org.apache.coyote.http11.Http11NioProtocol" port="8443" maxThreads="200" scheme="https" secure="true" SSLEnabled="true" keystoreFile="ssl/keystore.jks" keystorePass="<password>" clientAuth="false" sslProtocol="TLS"/>
keystoreFileis the location of thekeystore.jksfile within the guacamole container context.keystorePassis the password you provided for thekeystore.jksfile (replace <password> )The file should look something like this:
...
    <Connector port="8080" protocol="HTTP/1.1"
               connectionTimeout="20000"
               redirectPort="8443" />
    <!-- A "Connector" using the shared thread pool-->
    <!--
    <Connector executor="tomcatThreadPool"
               port="8080" protocol="HTTP/1.1"
               connectionTimeout="20000"
               redirectPort="8443" />
    -->
    <!-- Define an SSL/TLS HTTP/1.1 Connector on port 8443
         This connector uses the NIO implementation. The default
         SSLImplementation will depend on the presence of the APR/native
         library and the useOpenSSL attribute of the AprLifecycleListener.
         Either JSSE or OpenSSL style configuration may be used regardless of
         the SSLImplementation selected. JSSE style configuration is used below.
    -->
    <Connector protocol="org.apache.coyote.http11.Http11NioProtocol"
                port="8443" maxThreads="200"
                scheme="https" secure="true" SSLEnabled="true"
                keystoreFile="ssl/keystore.jks" keystorePass="password123"
                clientAuth="false" sslProtocol="TLS"/>
    <!--
    <Connector port="8443" protocol="org.apache.coyote.http11.Http11NioProtocol"
               maxThreads="150" SSLEnabled="true">
        <SSLHostConfig>
            <Certificate certificateKeystoreFile="conf/localhost-rsa.jks"
                         type="RSA" />
        </SSLHostConfig>
    </Connector>
    -->
...
Save the file.
Type
exitto leave the guacamole container context.Copy
server.xmlfrom the guacamole container. This will prevent the file from being overwritten every time the guacamole container is built:podman cp guacamole:/usr/local/tomcat/conf/server.xml guacamole/usr/local/tomcat/conf/
For future updates to the
server.xmlfile, edit the file located at guacamole/usr/local/tomcat/conf/ instead of accessing the container context. The latter will be overwritten should you rebuild the guacamole container.Stop the Docker container.
podman-compose down
Rebuild the Docker containers and image.
podman-compose up --force-recreate --build -d
Open a browser window on a system where the Guacamole server SSL certificate is installed, and access the Guacamole server using https and port 8443, for example:
https://<DNSName-of-guacamole-server>:8443/pam-guacamole
Confirm that the Guacamole server is secured, as indicated by the lock on the address bar.
A black screen with the following message will be displayed, however this is expected at the setup stage:
Update the guacamole-url for Guacamole access disclosure plugins to use port
8443.
Troubleshoot configuration problems
If you cannot download packages, try restarting the network or restarting the system.
If you are unable to install any of the RPMs and/or their dependencies, run the following command and try to install the RPMs again.
yum clean all
If the Guacamole gateway is behind a firewall and cannot install packages using yum due to connection issues, add the proxy to the yum config file. To do this, edit the yum.conf file:
vi /etc/yum.conf
Add a new line at the bottom of the file with the proxy address:
proxy=<proxy address>
If you are launching a Guacamole disclosure plugin but it gives a connection error:
Ensure that the guacd proxy and web application service are running.
Test the connection from within the Guacamole server:
Using curl:
curl -L --noproxy '*' localhost:<port>/pam-guacamole | less
Using wget:
wget --no-proxy localhost:<port>/pam-guacamole
Ensure the firewall on the Guacamole server is not blocking port 8080 (or 8443 for SSL connections)
Ensure that the Guacamole gateway can ping the Bravura Privilege server and managed systems prior to connecting via access disclosure plugin, using the IP address, then the hostname. If the systems can be reached by IP address but not the hostname, add the hostname and corresponding IP address to the /etc/hosts file. If using Docker or Podman, you may need to add a hostname mapping to the docker-compose file.
Ensure that the Guacamole gateway can reach the Bravura Privilege server using port 80 (or 443 for SSL connections)
For In-Browser RDP, ensure that the managed account that is used to launch the Guacamole session has remote access to the managed system. This can be verified by manually opening up a Remote Desktop Connection session, or by using Remote Desktop disclosure (
pswxtsvc) and logging in as the managed account.Ensure that the security protocol is correct for the managed system you are trying to connect to. As of Guacamole 1.3, ‘any’ should automatically choose the correct protocol.
If you’re trying to connect to a Windows system older than Windows 10, ensure that the proper lines are uncommented in the guacd 's Dockerfile. Refer back to installation steps for Docker or Podman
If text is not displayed properly using Telnet or SSH, install a monospace font package for Telnet and SSH such as
gnu-free-mono-fonts.If clipboard capture is not working for session monitoring, a required dependency may be missing. Ensure that
freerdp-pluginsis installed.You may find logging to be helpful in diagnosing Guacamole connection problems.
Log files on a Docker-installed environment can be viewed by running:
docker logs guacd
docker logs guacamole
Log files on a Podman-installed environment can be viewed by running:
podman logs guacd
podman logs guacamole
Log files on a CentOS/RHEL environment where Guacamole RPM packages are installed manually are located in:
/var/log/tomcat
/var/log/messages
You may encounter the following error, despite connecting with the correct security type:
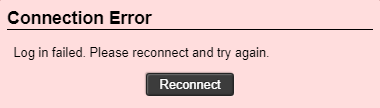
This could be the result of connecting to a managed system that does not require a proxy. If a proxy is not required to access the managed system, modify the no_proxy list in /etc/profile to include the managed system. You will need to source the file again or log off and log back in to the Guacamole server for the proxy changes to take effect. Alternatively, add --http-proxy=false to the podman run commands. For example:
podman run -d --pod guac --name guacd --http-proxy=false guacd
podman run -d --pod guac --name guacamole --http-proxy=false guacamole
Ensure that the
/bin/ setenv.shfile contains the correct truststore, path and password.Ensure that the
/conf/ server.xmlfile contains the correct keystore, path and password.Ensure that the passwords for the
keystore.jksandtruststore.jksfiles are correct.keytool -list -v -keystore <pathOfStoreFile>/<storeFileName>.jks
If you update /conf/ server.xml from within the guacamole container context, ensure that you copied it outside of the container or you will lose your changes if you rebuild the container.
You must access the instance using the DNS name you provided in the SSL certificates. Accessing it using localhost, or an IP address will result in warnings.
Ensure that the guacamole-url for the Guacamole access disclosure plugin contains the exact DNS name you provided for the Guacamole server SSL certificate.
If you continue to receive security warnings when accessing the Guacamole server, ensure that you have installed the SSL certificate in the correct location (Trusted Root Certification Authorities).
If you are using self-signed certificates, ensure that it is deployed on the system that will launch Guacamole sessions .
For self-signed certificates, you may need to update the Guacamole access disclosure plugins to ignore the SSL certificate. (set the
ignore-certdisclosure attribute to True)
Benchmarking metrics for Guacamole
Several factors can affect the reliability of Guacamole. One of the major factors is memory usage on the Guacamole server. However, it can be challenging to determine the amount of memory Guacamole consumes. A single Guacamole session can initiate multiple guacd threads; each thread using varying amounts of memory. Plus, the amount of memory initially consumed by a Guacamole session will gradually increase as the session persists. Additionally, the tasks performed on the remote desktop screen can also impact memory consumption, as well as the display settings for the remote desktop screen. Furthermore, RDP sessions consume more memory than SSH sessions.
The following shows how to determine:
To determine the maximum number of concurrent Guacamole sessions based on the amount of memory (RAM) allocated on the Guacamole gateway in the worst case.
To determine the amount of memory (RAM) to be allocated on the Guacamole gateway for a given number of concurrent Guacamole sessions in the worst case.
To make things simple and consistent, 40 concurrent In-Browser RDP sessions will be launched. Each session will RDP to the same managed system using the same managed account, with the default display resolution of 1024x768 at 96 DPI (dots per inch), and will open a command line window upon login that covers most of the Remote Desktop screen, which will ping 3 reachable IP addresses every 2 seconds. This will simulate constant movement on the screen, which ideally would result in a more realistic worst-case scenario. It is assumed that in a normal case, users will periodically use Guacamole sessions throughout the checkout duration, rather than regularly.
The terms “memory” and “RAM” will be used interchangeably.
To get an idea of how much memory is consumed per Guacamole session, you need to determine the following metrics at each stage:
The total RAM used on the Guacamole server before starting Guacamole
The total RAM used on the Guacamole server after starting Guacamole
The total RAM used on the Guacamole server after initiating a single Guacamole session and leave it running for at least 15-20 minutes – the longer the duration, the better
The total RAM used on the Guacamole server after ending the active Guacamole session (this number will be different than stage 2)
The memory allocated when launching the initial Guacamole session is typically larger than subsequent Guacamole sessions. This is because some guacd processes will remain active even if all Guacamole sessions have terminated. Thus, the total RAM used at Stage 4 will differ from Stage 2. However, the memory consumed upon launching subsequent Guacamole sessions will be relatively consistent.
A useful tool to measure this information is htop , which can be installed on the Guacamole server using dnf install htop (or yum install htop). You can find more info at https://htop.dev
A minimum 4 core processor is recommended for the Guacamole server. On htop , you can determine the CPU usage based on the “Load average” metric. There are 3 values: the first value is the per minute average; the second value is the 5 minute average; and the third value is the 15 minute average. A value of 4.0 for a 4-core CPU would mean 100% utilization. If the Load Average consistently exceeds this number, it is an indication that additional cores need to be allocated to the Guacamole server based on the load.
Session monitoring is not included in this test. Based on Guacamole benchmarking tests conducted previously, there does not appear to be any noticeable increase in memory usage when Session Monitor is enabled (screenshots, keystrokes and clipboard capture)
Other Guacamole disclosure plugins such as In-Browser SSH, In-Browser VNC, In-Browser RemoteApp and In-Browser Telnet will not be included in this test. In-Browser VNC and In-Browser Remote App should have similar memory requirements as In-Browser RDP; and In-Browser SSH and In-Browser Telnet should both be comparable but use considerably less memory than In-Browser RDP.
Guacamole server
OS: CentOS 8 Stream 64-bit (virtual machine)
Internal memory: 6 GB RAM (recognized on system as 5.41 GB)
Processor: Intel Core i7-4790 @3.60GHz (4 processors)
Hard Drive: 12 GB
Guacamole version: 1.3
Installed using podman
SSL enabled
Bravura Privilege instance server
OS: Windows 2022 64-bit (virtual machine)
Internal Memory: 5GB RAM
Processor: Intel Core i7-4790 @3.60GHz (2 processors)
Hard Drive: 50 GB
Privilege version: 12.3.5 (build 32487)
Managed system
OS: Windows 2022 64-bit (virtual machine)
Internal Memory: 6 GB RAM
Processor: Intel Core i7-4790 @3.60GHz (4 processors)
Hard Drive: 50 GB
Remote Desktop Services (Terminal Services) installed
Remote Desktop session host configured to allow an unlimited number of concurrent connections
At least one user is part of the Remote Desktop Users group
The following test was performed:
40 concurrent Guacamole In-Browser RDP sessions were launched
Each RDP session runs the same scheduled task upon login to the managed system
A scheduled task opens a command line window, set to the following:
Font : Size: 28 ; Font: MS Gothic
Layout : Screen Buffer Size: 65x9001 ; Window Size: 65x24 ; Window Position: 10x10
Colors (Screen Background): Selected Color Values: Red: 242 ; Green: 242 ; Blue: 242; Opacity: 86%
The scheduled task executes a batch script that pings 3 different IP addresses; 1 IP address is pinged every 2 seconds
The Guacamole sessions were left running for an 12 hour period, to ensure that no Guacamole sessions unexpectedly terminated based on the environment specifications given
The total memory usage for 40 Guacamole sessions was obtained after the 12 hour period had elapsed
The memory usage per Guacamole session is based on the difference of the total memory usage before a Guacamole session is closed and after the Guacamole session is closed
Stage | Description | Total Memory Usage (GB) | Total Memory Usage (MB) |
|---|---|---|---|
1 | The total RAM used on the Guacamole server before starting Guacamole | 0.557 | 557 |
2 | The total RAM used on the Guacamole server after starting Guacamole | 0.677 | 677 |
The difference in total RAM used between Stage 1 and Stage 2 | 0.12 | 120 | |
3 | The total RAM used on the Guacamole server after initiating a single Guacamole session and leave it running for 15-20 minutes | 0.926 | 926 |
4 | The total RAM used on the Guacamole server after ending the initial Guacamole session | 0.81 | 810 |
The difference between the total RAM used after initiating and terminating the initial Guacamole session (Stage 4) and starting the Guacamole service (Stage 2) | 0.249 | 249 |
The total memory usage was gathered after all 40 sessions were initiated and left running for more than 12 hours. One-by-one, each Guacamole session was terminated, and the updated total memory usage per x number of sessions was obtained. This is a more accurate measure of memory usage per Guacamole session instead of obtaining it immediately after the Guacamole session is launched because the memory usage can still fluctuate as time goes on.
Average memory usage per Guacamole session (GB) | Minimum memory usage per Guacamole session (GB) | Maximum memory usage per Guacamole session (GB) |
0.0975 | 0.074 | 0.116 |
Average memory usage per Guacamole session (MB) | Minimum memory usage per Guacamole session (MB) | Maximum memory usage per Guacamole session (MB) |
97.5 | 74 | 116 |
The maximum memory usage for a Guacamole session will be used to calculate the worst case, in this case, 116 MB.
To get the minimum amount of RAM in GB for y number of sessions:
z = (557 + 249 + xy) * 0.01
Where :
x = Amount of memory per Guacamole session (MB)
y = Total amount of sessions
z = Total memory (GB)
557: The total RAM (MB) used in megabytes before starting Guacamole on the Guacamole server
249: The additional RAM (MB) needed to start the Guacamole service and the memory that remains after terminating the initial Guacamole session (difference between Stage 4 and Stage 2)
xy: The amount of RAM allocated per Guacamole session, multiplied by the number of active sessions
1GB = 1000 MB
For 10 Guacamole sessions:
z = (557 + 249 + 116x) * 0.01
z = (806 + 116(10)) * 0.01
z = (806 + 1160)) * 0.01
z = 1966  * 0.01
z = 1.97 GB
For 50 Guacamole sessions:
z = (557 + 249 + 116x) * 0.01
z = (806 + 116(50)) * 0.01
z = (806 + 5800)) * 0.01
z = 6606 * 0.01
z = 6.61 GB
For 100 Guacamole sessions:
z = (557 + 249 + 116x) * 0.01
z = (806 + 116(100)) * 0.01
z = (806 + 11600)) * 0.01
z = 12406 * 0.01
z = 12.41 GB
For 200 Guacamole sessions:
z = (557 + 249 + 116x) * 0.01
z = (806 + 116(200)) * 0.01
z = (806 + 23200)) * 0.01
z = 24006 * 0.01
z = 24.01 GB
To get the maximum number of Guacamole sessions for y GB of RAM allocated to the Guacamole server:
x = floor((y – 557 – 249) / z)
Where :
x = Total amount of sessions
y = Free memory (GB)
z = Amount of memory per Guacamole session (MB)
1GB = 1000 MB
Examples
For 5GB of memory:
x = floor((y - 557 - 249) / 116))
x = floor((y - 308) / 116)
x = floor((5000 - 308) / 116)
x = floor(4692 / 116)
x = 40.44 sessions or 40 sessions.
For 12 GB of memory:
x = floor((y - 557 - 249) / 116)
x = floor((y - 308) / 116)
x = floor((12000 - 308) / 116)
x = floor(11898 / 116)
x = 102.57 sessions or 102 sessions.
For 20 GB of memory:
x = floor((y - 557 - 249) / 116)
x = floor((y - 308) / 116)
x = floor((20000 - 308) / 116)
x = floor(19692 / 116)
x = 169.76 sessions or 169 sessions.
Network latency : Depending on the network connection, it’s possible that sessions may terminate if the network is extremely slow (ie. latency is greater than 3000ms)
CPU : It is best to continuously monitor the CPU usage on the Guacamole server. If you periodically notice some sessions terminating unexpectedly, especially when there is a lot of active Guacamole sessions, ensure that the Load average has not been exceeded based on the number of CPU cores allocated for the Guacamole server.
Screen resolution size : Setting a larger display resolution size for the Guacamole window will increase the memory usage, especially when work is being performed on the majority of the remote desktop screen.
By default, Mozilla Firefox, Microsoft Edge Chromium, and Google Chrome automatically puts idle browser tabs to sleep to reduce memory usage. If a Guacamole session terminates unexpectedly, it may be because the browser itself has not replied back to the Guacamole server in a sufficient amount of time.
Website access disclosure plugins
Secure browser plugin: securebrowser
The securebrowser access disclosure plugin provides users with brokered access to a website without the need to enter the administrative credentials for the managed account and is compatible with session recording.
This requires installation of the Secure Browser app.
The securebrowser plugin is primarily used in conjunction with team management .
You can modify the following default attributes to control the behavior of securebrowser :
configuration_fileThe configuration file in JSON format.webappjson_createIf enabled, the user checking out the managed account can upload their own website applications. This is disabled by default.webappjson_searchBy default, the user checking out the managed account has the ability to search and select a desired website application.
Collecting logs when the secure browser disclosure has issues
The secure browser extension uses a different technology to the native plugins and doesn't provide logging data to the logutil tool that is normally used for troubleshooting.
You can instead compare server logs for a successful attempt with those for a failed attempt, and try to identify the difference.
Determine a way to get all user HTTP calls to the same server for testing.
Increase logging to only the smonotu binary to Verbose (in the util\ directory on the server being contacted):
psdebug -prog smonotu -level 99
Rotate the log:
..\service\idmlogsvc -trace-restart
Perform a successful disclosure for a user whose access works.
Check
idmsuite.logto ensure thatsmonotulogs at Verbose level (search for a line that contains both "smonotu.exe" and "Verbose"If you find it, rename that log to
idmsuite-success.log.If not, verify the
psdebugcommand was run in an administrative command prompt.
Rotate the log again.
Perform an unsuccessful disclosure for a user whose access doesn't work.
If you can't get the issue to reproduce, it may be that the load balancer causes it, by not providing sticky sessions and sending disclosure HTTP requests to different servers.
If the issue is reproduced, verify there are
smonotulog entries, and if so, rename the log toidmsuite-failed.log.Remove the verbose logging:
psdebug -prog smonotu -remove
Zip up the two log files and send the resulting archive to Bravura Security Support.
Web app privileged sign-on: pswxwebapp
The pswxwebapp access disclosure plugin provides users brokered access to a website without the need to enter the administrative credentials for the managed account.
This is compatible with desktop Chrome browsers and requires installation of the Bravura Security browser extension.
The pswxwebapp plugin is primarily used in conjunction with Team Management.
You can modify the following default attributes to control the behavior of pswxwebapp :
configuration_fileThe configuration file in JSON format.webappjson_createIf enabled, the user checking out the managed account can upload their own website applications. This is disabled by default.webappjson_searchBy default, the user checking out the managed account has the ability to search and select a desired website application.
Note
The logutil utility cannot capture pswxwebapp plugin activity.
Configuring global access disclosure options
You configure access disclosure plugins globally, and then override settings and behavior for different managed system policies if necessary. Attributes control the behavior of the access disclosure plugins.
Getting started
To configure system-wide access disclosure options:
Click Manage the system > Privileged access > Access disclosure plugins.
To define a:
New access disclosure plugin, click Add new… .
Existing access disclosure plugin, select the plugin you want to view or modify.
You can now:
Define common access disclosure parameters.
Modify attributes that control disclosure
Add attributes that control disclosure
Defining access disclosure plugins
You can add custom access disclosure plugins to make them available to managed system policies. For each access disclosure plugin, you can configure one or more attributes that modify the behavior of the plugin.
To define common parameters for an access disclosure plugin:
Navigate to the access disclosure plugin configuration page
Set the access disclosure plugin options as described in Table 2, “Access disclosure plugin global options”.
Caution
For existing plugins, it is recommended that you only modify Description or the options to automatically add this plugin to new managed system policies.
Click Update to modify an existing plugin, or Add new… to add a new plugin.
Option | Description |
|---|---|
ID | Automatically generated ID |
Filename | The filename of the access disclosure plugin. The file must either be deployed to client workstations or located in the \<instance>\wwwdocs\ directory on the Bravura Security Fabric server |
Class ID | The GUID of the access disclosure plugin. This is not applicable for Guacamole access disclosure plugins. |
ActiveX server/type | The server name of the access disclosure plugin. This is not applicable for Guacamole access disclosure plugins |
Version | The version of the access disclosure plugin |
Description | The plugin description presented to users |
Notes | Additional details about this plugin to be displayed under the description |
Allow this as a selectable option for group sets | Check to make group sets selectable during managed system policy configuration |
Allow this as a selectable option for current passwords | Check to make current passwords selectable during managed system policy configuration |
Allow this as a selectable option for old passwords | Check to make old passwords selectable during managed system policy configuration |
Allow this as a selectable option for SSH keys | Check to make SSH keys selectable during managed system policy configuration |
Automatically enable for group sets on new managed system policies | New managed system policies created will include this plugin to access the current group sets |
Automatically enable for current passwords on new managed system policies | New managed system policies created will include this plugin to access the current privileged password |
Automatically enable for old passwords on new managed system policies | New managed system policies created will include this plugin to access old privileged passwords |
Automatically enable for SSH keys on new managed system policies | New managed system policies created will include this plugin to access privileged accounts using SSH keys |
Defining access disclosure attributes
You can add or modify attributes to customize the plugin behavior.
To define access disclosure plugin attributes:
Navigate to the access disclosure plugin configuration page
Select to update and modify an existing plugin, or Add new.. to add a new plugin
Option | Description |
|---|---|
Name | The name of the plugin attribute. Cannot be modified after attribute has been added. |
Description | The description of the plugin attribute. |
Type | Choose the plugin attribute type:
|
User access | Sets the options that a user has for the attribute:
|
Default value | Use only if the user does not override the value, or it is not overridden at the managed system policy level. |
Allowed values (comma-delimited list) | A restricted list of values that the attribute value can take. This option is only displayed for type integer and strings. |
Value must match this regular expression | A value must be validated with this regular expression in order for the plugin to be enabled. This option is only displayed for type integer and strings. |
Minimum | If set, no value can be less than the value set. This option is only displayed for type integer. |
Maximum | If set, no value can be more than the value set. This option is only displayed for type integer. |
Value is required | If checked, a value must be set in order for the plugin to be enabled. This option is only displayed for type integer and strings. |
You can override these default settings on the managed system policy level. See Overriding global settings in managed system policies .
Configuring string plugin attribute values
All access disclosure plugin attributes of type String can be defined with variables. You can define discovered system attribute values in this manner.
To use the discovered system attribute as-is, simply enter the following in the attribute’s Default value field:
% <attribute name> %
For example, the default domain value for a remote desktop plugin is:
%netBIOSDomainName%
String attributes can be manipulated by using the following syntax:
%k:(start position):(end position):<attribute name>%
For example:
%netBIOSDomainName% = corporate.domain
%k:3:12:netBIOSDomainName% = porate.dom
%username% = CORP\account00
%k:5:username% = account00
Cloning access disclosure plugins
In some scenarios, it may be desirable to have multiple instances of the same access disclosure plugin but with different settings; for example:
Some end users like to use a PuTTY terminal; others prefer Tera Term.
A product administrator defines two disclosure plugins; one for PuTTY, one for Tera Term.
The PSW disclosure plugin dynamically selects which disclosure plugin to display to an end user using a request or profile attribute.
Product administrators can create new instances of the same access disclosure plugin by cloning.
To clone an access disclosure plugin:
Navigate to the access disclosure plugin configuration page
Select to update and modify an existing plugin.
Click Clone .
Specify a description and modify other options as needed.
Click Add.
When using the
pswdisclosurescript, you will need to know the new disclosure plugin’s ID in order for it to be available to the plugin.
You can also clone access disclosure plugins in managed system policies. See Cloning access disclosure plugins within a managed system policy .
You can set up access disclosure plugins to allow end users to save sessions with their preferred settings. See Enabling saved sessions .
Enabling saved sessions
In scenarios where end users can override disclosure plugin attributes, they may want to save their modified values as a saved session ; for example if they want to:
Specify a webpage to log into with a directory account
Specify an RDP destination to log into with a directory account
Choose a synthetic attribute that expresses a common set of values that will be used to gain access to a system
This allows end users to save their preferences, improves usability and reduces the likelihood of error. It also requires less administrative work than cloning.
To enable users to save sessions for a disclosure plugin, at least one attribute must be set to allow overrides , on either the global or managed-system-policy level.
This capability is not available for Copy, Display, or Run command plugins.
The Functional.pam_saved_session_policy component allows administrators to configure global saved sessions that are available for all end users.
To learn how to save sessions as an end user, see Saving sessions in the User Guide.
Configuring pam_saved_session_policy
To configure saved session policies:
Install the
Functional.pam_saved_session_policycomponent.Click Manage external data store to edit the following tables in the external data store (
extdb) :pam_saved_session_policy
Define the policy to apply the saved session.
pam_saved_session_action
Define the saved session to apply to the selected policy.
If the saved session overrides multiple disclosure attributes, then an entry needs to be created for each disclosure attribute that will be modified.
If there are multiple entries with the same SavedSessionName value, those entries will be treated as the same saved session.
If there are multiple entries with the same SavedSessionName value but different SavedSessionCategory and SavedSessionNotes values, the value from the latest entry will be used (unless the value is empty).
If any entries are modified or added to an existing saved session, end-users will need to remove the existing saved session from the Privileged Access App in order to use the saved session with the updated settings.
Filter policy and action tables
Disclosure filter logic is stored within two external data store (extdb) tables; pam_disclosure_filter_policy and pam_disclosure_filter_action. The action table stores each type of disclosure method installed and the plugin that they activate. The policy table is where rules determine which disclosure methods are available to a user when they request a password. These disclosure methods can be restricted based on the platform type of the managed account, the recipient’s user class or group membership or on a variety of other attributes.
Disclosure Filter Policy and Action Tables
The policy and action tables are in a linked design and rely on each other to deliver disclosure options to requesters. The disclosure filter policy table is used to provide access to disclosure options, whereas the associated disclosure filter action table is used to set specific attributes of the disclosure options (timeouts and so on)
Bravura Privilege executes all actions that reference (via a foreign key) a policy that passes. This design allows a user to configure a single policy that activates one or more disclosure plugins.
Not all columns in a policy or action table rule have to be populated, only the ones the rule purpose requires. If multiple columns are populated for the rule, the condition is an AND, whereby all conditions of the rule must be true for the rule to trigger its action. If OR logic is needed, add separate rules for each condition requirement.
Like all policy tables, the last policy that passes wins. If you have conflicting actions, the last one overwrites any previous conflicting actions.
Policy Engine terminology:
Wildcard Field
A text field that supports wildcard matching uses Unix filename pattern matching . The field tests if the variable and field match. The following operations can be used:
* - Match everything
? - Match a single character
[seq] - Matches any character in seq
[!seq] - Matches any character not in seq
Expression Field
An expression that will determine the value of the field when Bravura Privilege evaluates the field. The Mako templating language is used and all data is stored in the obj_data variable.
These expressions are commonly used for building group names, for example, “application_${obj_data.account.acctid}_view”.
Disclosure Filter Policy Table
Disclosure Filter Policy Table
Note
Each table in the external data store (extdb) has configuration options that only product administrators with all administrative privileges (superuser) can modify. Superusers can access the configuration options by clicking on the plus (+) symbol located below the table. See External data store Table configuration options for details.
The following table outlines the supported options and usage of the fields in the pam_disclosure_filter_policy extdb table.
Field | Supports | Description | |
|---|---|---|---|
StageNumber | Integer | The grouping stage number used to determine the ordering of sets of rules. | required, not NULL |
RuleNumber | Integer | The rule number used to determine the evaluation order of rules within a stage. | required, not NULL |
SkipRemaining | Combo Box | Use this column to skip evaluation of some of the remaining rules. One of:
| optional |
Comment | Text | Rule description. | optional |
FilterID | Text | The ID for the filter that is used by the action table. | required, not NULL |
Operation | Text, Expression | Operation of request, or an expression to evaluate. | optional |
PlatformType | Text, Wildcard, Expression | The platform type of the target. For example, Windows Server, Linux, Oracle. | optional |
MSPID | Text, Wildcard, Expression | The managed system policy ID that the requested privileged access is managed under. . To future-proof policies avoid using this column. | optional |
ClientIPCIDR | Text, Expression | The CIDR mask to test against the user’s IP address. | optional |
AccountID | Text, Wildcard, Expression | The account ID. Only usable for account checkouts. | optional |
AccountTargetID | Text, Wildcard, Expression | The Target ID associated with the account. Only usable for account checkouts. | optional |
RecipientUserclass | Text, Expression | Single-participant user class to evaluate for recipient membership. | optional |
RequesterUserclass | Text, Expression | Single-participant user class to evaluate for requester membership. Note: The recipient generally is tested for disclosure filter policies, not the requester. | optional |
GroupFQNrecipientMembershipTargetID | Text, Expression | The Target ID of the managed account group defined in GroupFQNrecipientMembership. | optional |
GroupFQNrecipientMembership | Text, Expression | The Group ID to which the recipient belongs. Requires GroupFQNrecipientMembershipTargetID to be defined. Group short ids are also accepted. | optional |
GroupFQNrequesterMembershipTargetID | Text, Expression | The Target ID associated with the managed group defined in GroupFQNrequesterMembership. | optional |
GroupFQNrequesterMembership | Text, Expression | The group ID of the requester. Requires GroupFQNrequesterMembershipTargetID to be defined. Only usable for account checkouts. To future-proof policies avoid using this column | optional |
RequestAttributeBoolTrue | Text, Expression | The Profile or Request Attribute ID which should have its truth value evaluated. If defined, this will match if the attribute is set to True. If the attribute is False or undefined, the rule will not apply. | optional |
RequestAttributeBoolFalse | Text, Expression | The Profile or Request Attribute ID which should have its truth value evaluated. If defined, this will match if the attribute is set to False. If the attribute is True or undefined, the rule will not apply. | optional |
AttributeType | Combo Box | Defines what the attribute defined by AttributeID is associated with. One of:
| optional |
AttributeID | Text, Expression | The Attribute ID. Requires Attribute Type to be defined. | optional |
AttributeValue | Text, Wildcard, Expression | The value of attribute defined in AttributeID. Requires AttributeType and AttributeID to be defined. | optional |
UTCStartTime | Text, Expression | The start time that a rule should be applied. Requires UTCFinishedTime to be defined. | optional |
UTCFinishedTime | Text, Expression | The end time that a rule should be applied. Requires UTCStartTime to be defined. | optional |
The ComponentOwnerFQN field, included in all external data store tables, shows the name of the component providing specific rows to a table.
Disclosure Filter Action Table
Note
Each table in the external data store (extdb) has configuration options that only product administrators with all administrative privileges (superuser) can modify. Superusers can access the configuration options by clicking on the plus (+) symbol located below the table. See External data store Table configuration options for details.
The following table outlines the supported options and usage of the fields in the pam_disclosure_filter_action extdb table.
Field | Supports | Description | Input |
|---|---|---|---|
ActionID | Text | Unique number used to determine the evaluation order of actions. | required, not NULL |
FilterID | Foreign Key | The corresponding disclosure filter policy FilterID to link this action to. | required, not NULL |
DisclosureID | Text, Expression | The GUID for the access disclosure plugin that corresponds to the one this action uses. The list can be found under Manage the system > Privileged access > Access disclosure plugins. | required, not NULL |
AttributeName | Text, Expression | The disclosure plugin attribute name. | optional |
AttributeValue | Text, Expression | The attribute value to set the disclosure plugin attribute specified in AttributeName. | optional |
AttributeCalculationFunction | Text | The callback function to execute. Callback functions are small scripts used to modify the disclosure attributes directly. (Callback functions may be removed in a future release, use only if necessary) A Python function, contained in a script file, that provides additional plugin attributes and values. The script file must be defined in the <instance>componentCallbacks directory. | optional |
AttributeRequired | Boolean | Set to True to make AttributeName and AttributeValue required. | optional |
NewDescription | Text | Override for the disclosure description. | optional |
Comment | Text | Rule description. | optional |
The ComponentOwnerFQN field, included in all external data store tables, shows the name of the component providing specific rows to a table.
Disclosure Filter Policy Examples
Restricting display of passwords to Windows platforms only and limiting disclosure
Click below to view a demonstration where disclosure filter rules are altered so display of passwords is restricted to Windows platforms only, with a time limit of 5 minutes. A Windows and Linux account are then checked out to demonstrate that only the Windows account can display passwords, and it remains visible for only the configured time.
Adding a new disclosure to a checkout
This is an example of adding the Remote Desktop disclosure plugin to a checkout for a user accessing a Windows server. This example assumes that the default Remote Desktop disclosure plugin has not been changed.
Policy Table:
Field | Value | Notes |
|---|---|---|
StageNumber | 1 | This number will depend on the rest of your policy rules and stages. |
RuleNumber | 1 | This number will depend on the rest of your policy rules. |
SkipRemaining | [No selection] | This can be switched to Stage if you want this to be the last rule that processes. |
Comment | Check to see if the user is requesting access to an account on a Windows server. | |
FilterID | WINDOWS_SERVER | |
PlatformType | WINNT | WINNT is the Windows platform ID. |
Action Table:
Field | Value | Notes |
|---|---|---|
Action ID | WINDOWS_RDP | |
FilterID | WINDOWS_SERVER | This will link to the policy that will trigger this action. |
DisclosureID | !!!PSW_PLUGIN_TSVC_DESC | |
Comment | Add the Remote Desktop disclosure plugin |
Setting up AD disclosure based on group membership
This is an example of adding multiple disclosure plugins based on the user’s group membership. This example assumes that you have managed the Active Directory security group “security_appliance_admins” and run Auto discovery. This example also assumes you have configured new disclosure plugins in Bravura Privilege for Cisco Iron Port and Blue Coat.
This example is going to look at the platform the account exists on, and the security group. Once it confirms that the account being accessed exists on an Active Directory domain and a security group, it will add both Cisco Iron Port and Blue Coat to the list of disclosure controls available to the user.
Generally, this type of policy would be paired with a generic Active Directory policy that would add a disclosure control(s) that all users have access to, such as Remote Desktop.
Policy Table:
Field | Value | Notes |
|---|---|---|
StageNumber | 1 | This number will depend on the rest of your policy rules and stages. |
RuleNumber | 2 | This number will depend on the rest of your policy rules. |
SkipRemaining | [No selection] | This can be switched to Stage if you want this to be the last rule that processes. |
Comment | Check to see if the user is requesting access to an account on Active Directory, and if they are a member of the security group | |
FilterID | AD_SECURITY_TEAM | |
PlatformType | AD | AD is the platform ID for Active Directory. |
GroupFQNrecipientMembershipTargetID | AD_TARGETID | The Active Directory target where the group exists. |
GroupFQNrecipientMembership | security_appliance_admins | The short id of the group we want to test membership of |
Action Ironport Policy:
Field | Value | Notes |
|---|---|---|
ActionID | AD_IRONPORT | |
FilterID | AD_SECURITY_TEAM | This will link to the policy that will trigger this action |
DisclosureID | Iron Port Web GUI | This needs to match exactly what you entered in the description when creating the Iron Port browser disclosure plugin in Bravura Privilege. |
Comment | Add the Cisco Iron Port web portal disclosure plugin |
Action Bluecoat Policy:
Field | Value | Notes |
|---|---|---|
ActionID | AD_BLUECOAT | |
FilterID | AD_SECURITY_TEAM | This will link to the policy that will trigger this action |
DisclosureID | Blue Coat Web GUI | This needs to match exactly what you entered in the description when creating the Blue Coat browser disclosure plugin in Bravura Privilege. |
Comment | Add the Blue Coat web portal disclosure plugin |