Delegating control
In Active Directory, you can delegate administration of users to a specific individual or group, eliminating the need for the Bravura Security Fabric target system administrator to have authority over an entire domain. We refer to the user as the delegated ID.
If you use a delegated ID, you may also need to configure the AdminSDHolder object.
It is highly recommended that you enable SSL between domain controllers and the Bravura Security Fabric server.
The following steps are used in Windows Server 2012. The steps may vary in other versions.
To create a target system administrator with delegated control, also known as a delegated ID :
Log into a domain controller as an administrator.
Launch .
Create a user in the Users container (or some other container if necessary).
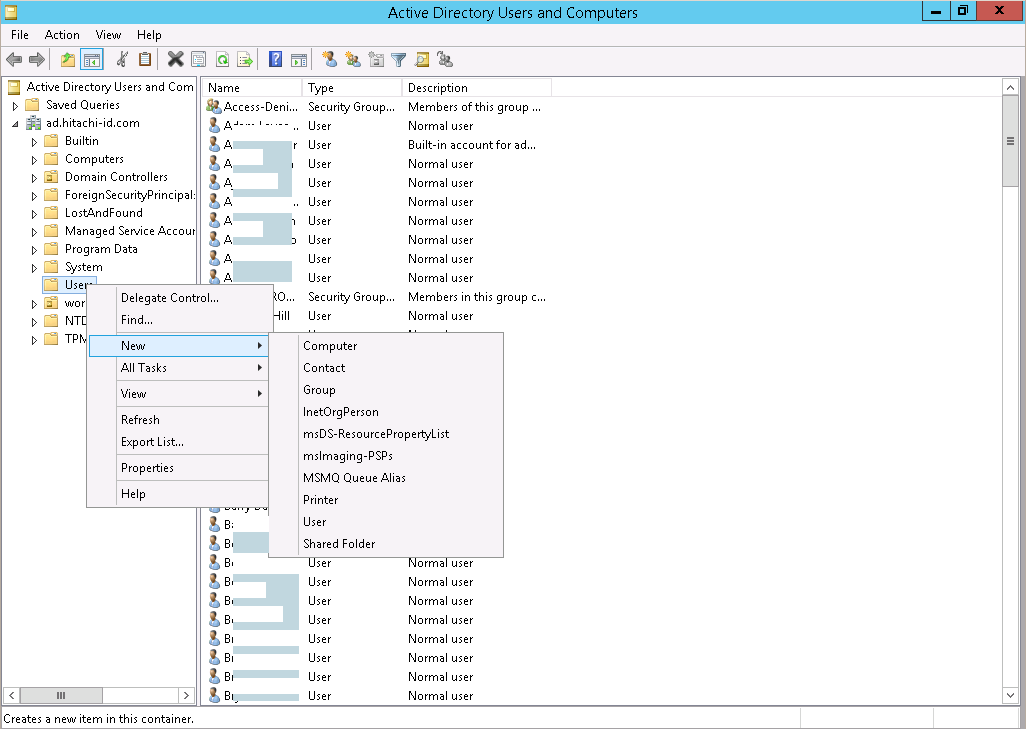
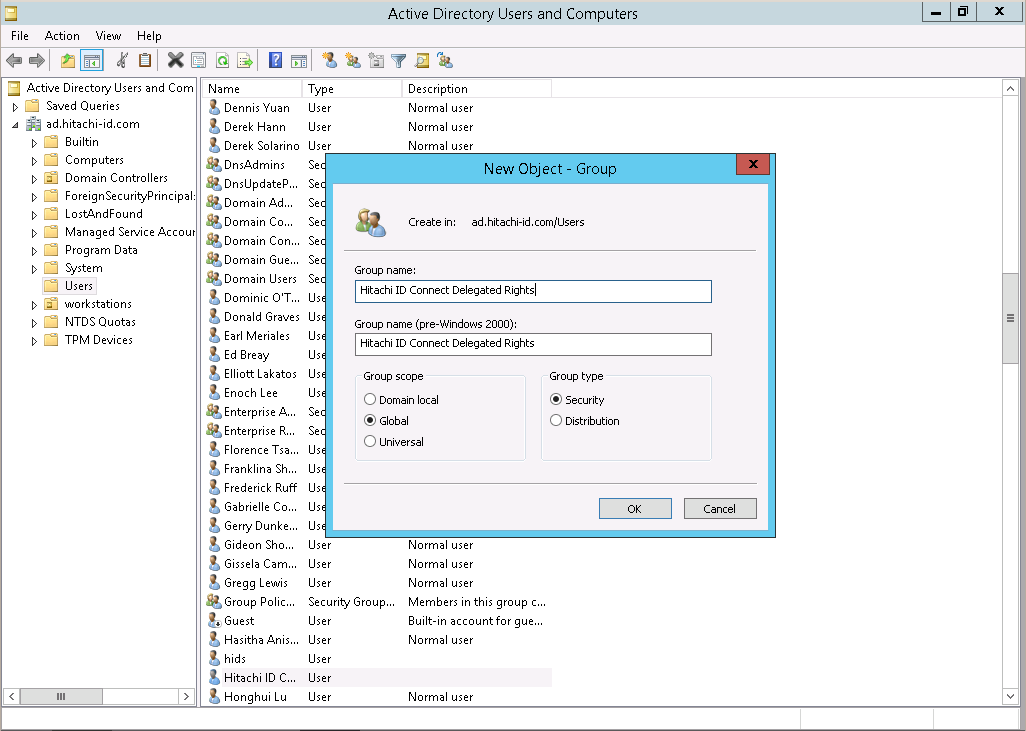
Create a security group to which you can grant delegated control.
This allows you to delegate control to group members, rather than to an individual user.
Set the scope to Global, and type to Security.
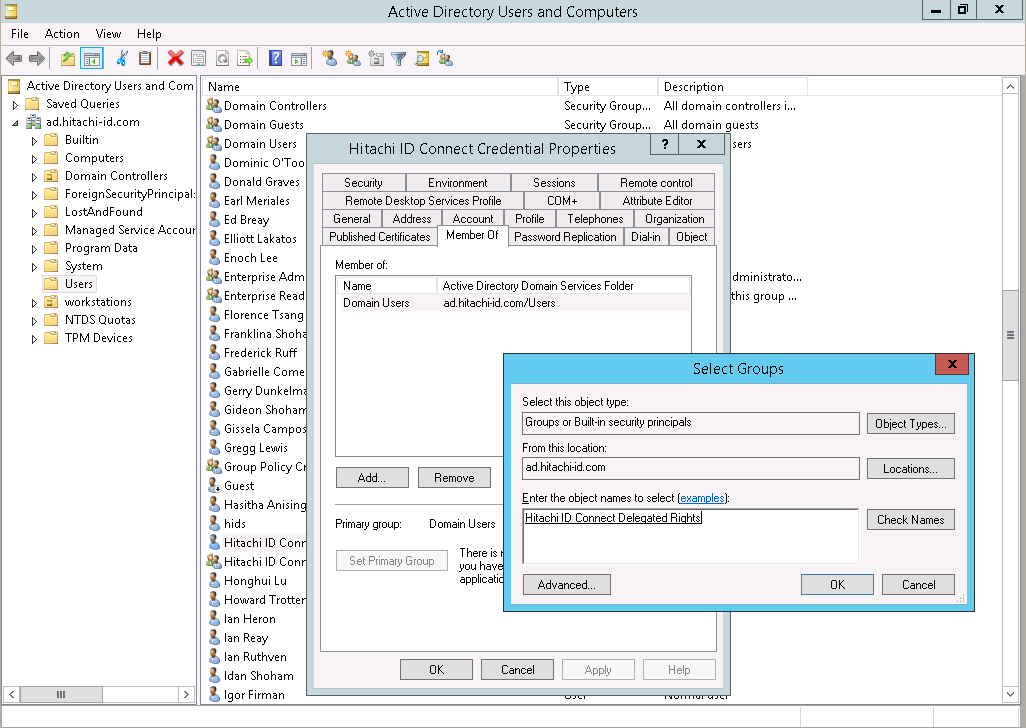
Add the user you created in step 3 as a member of the group.
Right click on the container where you created the user, and select "Delegate Control…".
Click Next .
Click Add… and select the group.
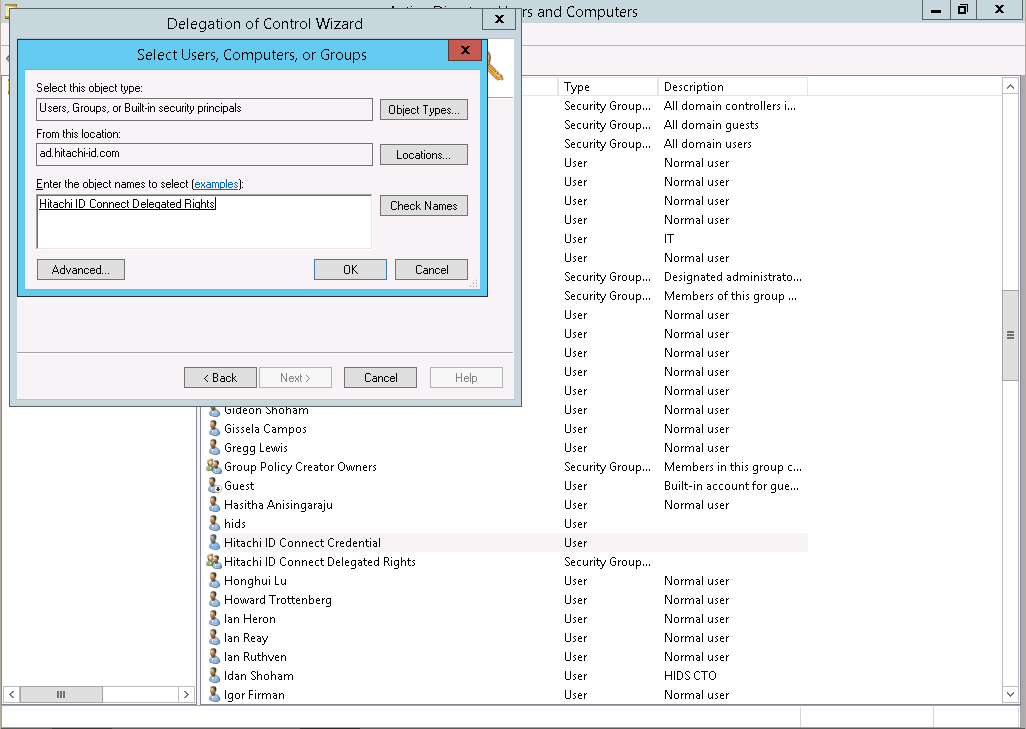
Click OK.
Click Next .
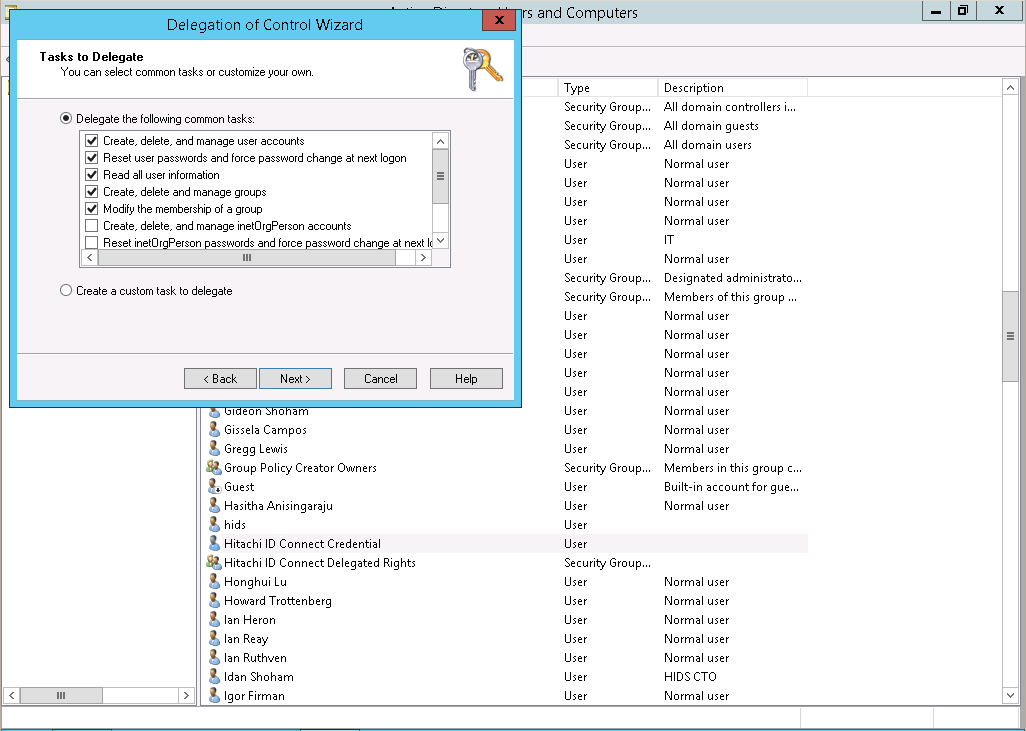
Provide the group with required permissions.
If your license includes Bravura Identity , include "Create, delete, and manage users accounts", "Create, delete and manage groups", and "Modify the membership of groups" in the tasks to delegate. If your license does not include Bravura Identity , you do not need to check those items unless there is a customization; for example, modifying an extra attribute when doing a password reset could require the ability to manage a user account.
Click Next , then Finish.
For setting more granular permissions, use the ADSI Edit tool. See your Windows documentation for detailed information.