REST API quick start
This guide provides a simple example using the REST API. This is done using Swagger UI , which is included with Bravura Security Fabric .
Swagger UI is an interactive API documentation that allows users to execute REST API endpoints directly in the browser. By using Swagger UI, it will be easy to visualize what is being passed into the REST API and what is being returned. In addition, Swagger UI does not require any additional installation.
This example involves a user changing their own account password and verifying that it has been changed. The workflow is as follows:
A user logs into the REST API and gets an authentication (bearer) token
The user calls an endpoint to get a list of their associated accounts
The user calls an endpoint to get an account based on a key
The user calls an endpoint to change the account’s password
The user calls an endpoint to get the result of the password change
The user calls an endpoint to test the account’s password
The user calls an endpoint to get the result of the password test
The user logs out of the REST API
By default, users can list their own accounts, and change and verify their own passwords, however users cannot view or act on other users’ accounts. This is enforced using Open Policy Agent authorization policy rules. Thus, some endpoints cannot be run unless additional permissions are granted. See our REST API Reference for more information.
Preparation
The user must be provisioned to use the REST API. To do this, add the user to the _EXPLICIT_REST_API_USERS_ user class. An example user User1 will be used throughout this QuickStart guide.
Log into the Bravura Security Fabric instance as a superuser.
Go to Manage the system > Policies > User classes.
Locate and click on _EXPLICIT_REST_API_USERS_.
Click Explicit Users.
Click Select…
Locate and select the user that will be used to access the REST API (User1).
Click Add.
Login
To access the endpoints, the user needs to log in to the REST API. Upon successful authentication, a bearer token will be issued which will grant the user access to the REST API for 3600 seconds (1 hour).
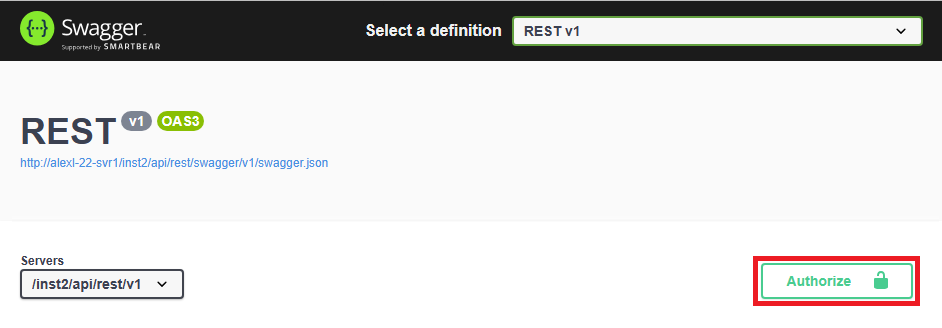
From a web browser, go to:
https://<ip-of-fabric-instance>/<instancename>/api/rest/swagger/index.htmlIf the instance is not using SSL, go to:
http://<ip-of-fabric-instance>/<instancename>/api/rest/swagger/index.htmlClick Authorize.
Enter the following:
username: User1
password: <password-of-User1>
client_id: passwordclient
Scopes: select all
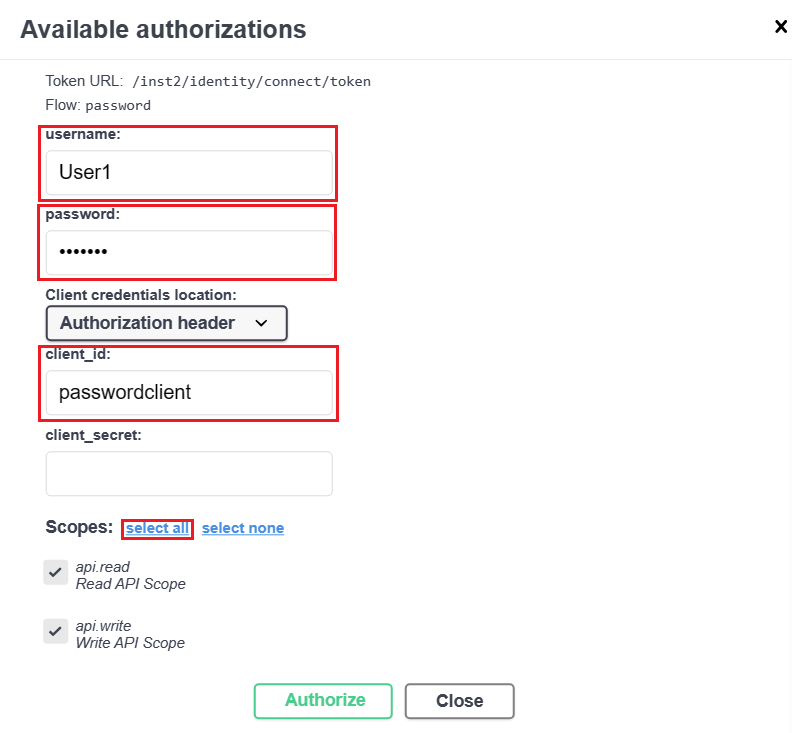
Click Authorize.
It may take a few moments to return the authorization result.
Check that the session is authorized (a bearer token is issued at this stage).
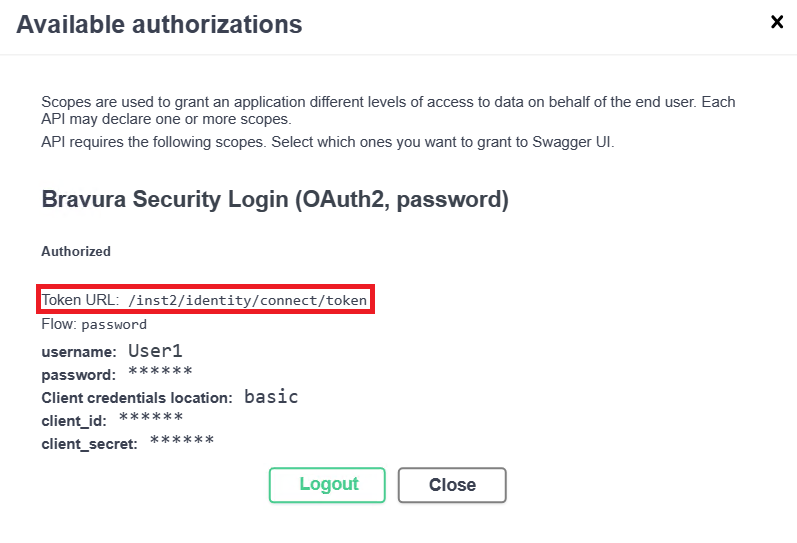
The bearer token value will not be explicitly shown upon log in using Swagger UI.
Note that authenticating to the REST API uses a Token URL, which is different than a Request URL, which is used for calling endpoints.
Exit out of the dialog box, by either clicking Close or x on the top right of the dialog box.
Get a list of accounts
Now that the user is logged into the REST API, they can obtain a list of their associated accounts. The endpoint used to achieve this is GET /accounts.
From Swagger UI, locate GET /accounts, which is under Accounts.
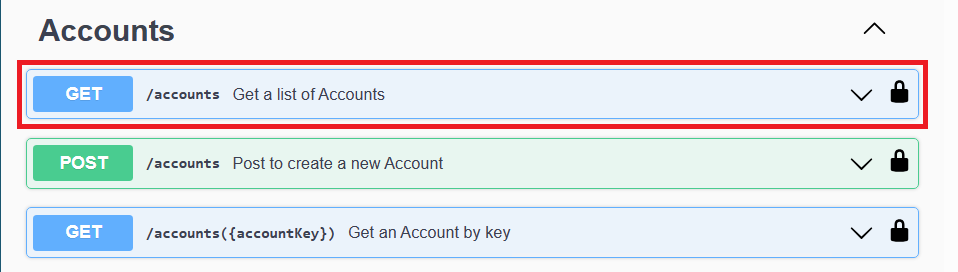
Click GET /accounts.
View the parameters available for the endpoint, which is mainly used to format or filter the results returned. These are optional fields but can be useful to specify, especially if there are a lot of results returned. Not all endpoints will have the same parameters, and some may have required fields, so be sure to go through each endpoint to see what is applicable.
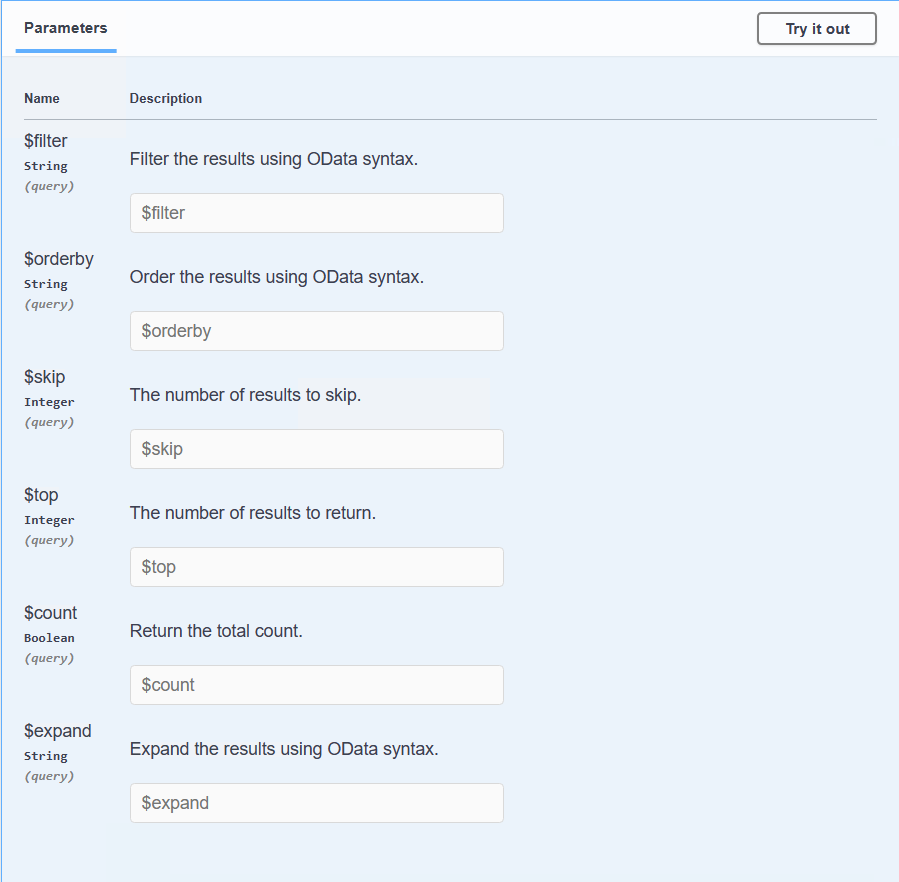
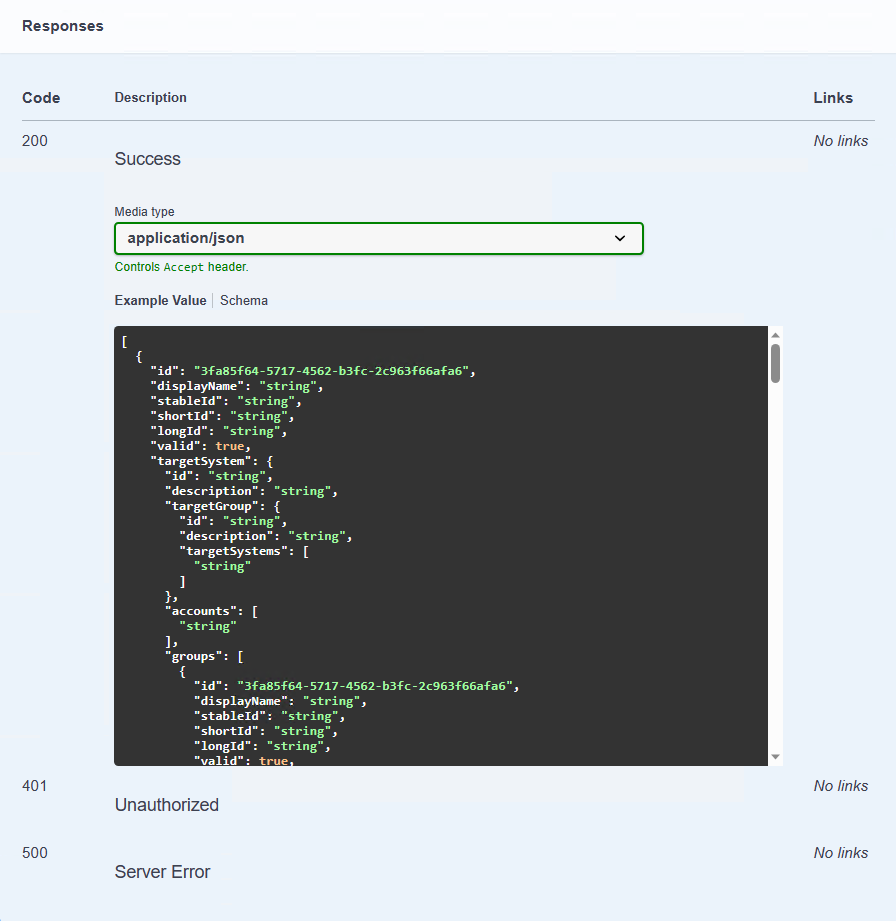
You can also see what response codes will be returned from this endpoint, as well as an example response body in json format.
Click Try it out to get the list of accounts for User1.

We can leave the parameters blank for now.
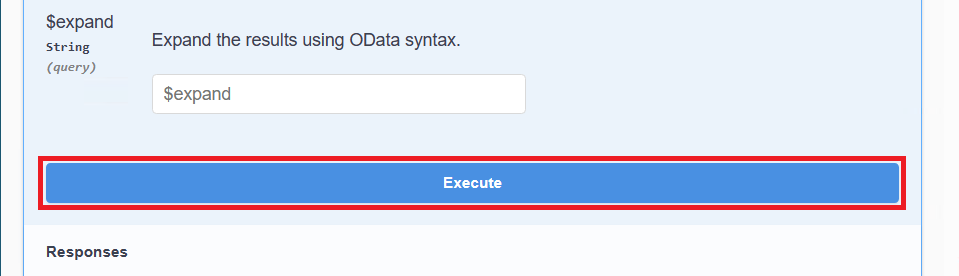
Scroll down and click Execute.
Check that the endpoint returned a 200 (Success) code, and displayed the response body with the list of User1’s accounts.

You should also see the Curl and Request URL used for the endpoint execution. This can be useful to note if you want to know what headers and other inputs are required if you want to execute this in an external program. It is where you can also see the bearer token issued for this session.
Choose the account to change the password for. The account’s id is needed, so for this example, we will choose the first one with id: 1a7145c0-537c-4e77-af36-1a7e6ead288a.
Get an account by key
This step is not required, but it can be helpful to see which endpoint can be used if you already know the account’s ID, which we do from the previous step. The endpoint used to achieve this is GET /accounts({accountKey}) .
From Swagger UI, locate GET /accounts({accountKey}), which is under Accounts.
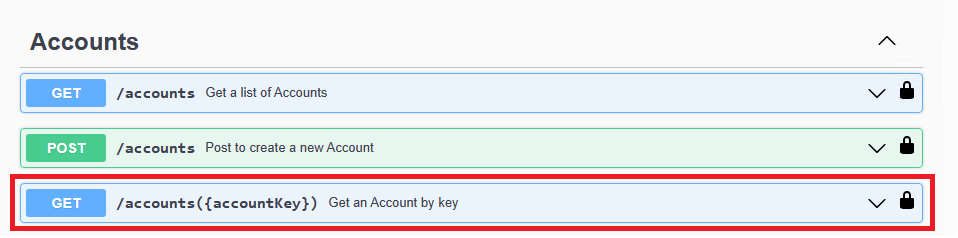
Click GET /accounts({accountKey}).
Click Try it out.

Since we already know the ID of the account, fill it in the accountKey field.
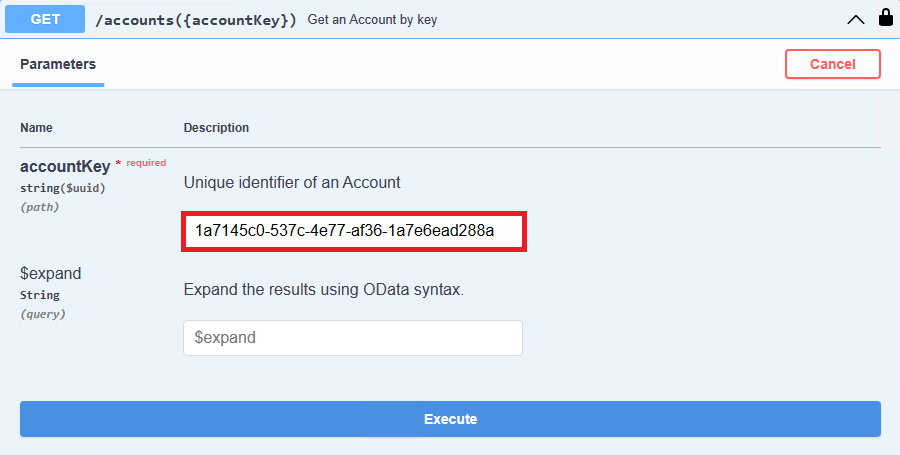
Click Execute.
Check that it returns a 200 (Success) code and displays the response body with the chosen account of User1.
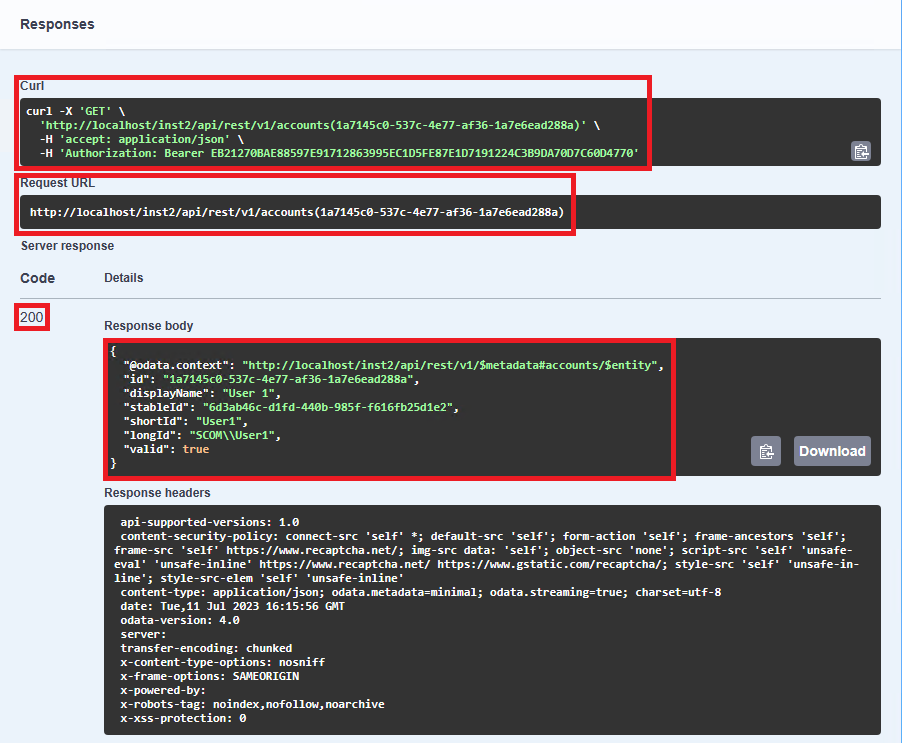
It is good practice to observe the Curl and Request URL to see exactly what is being passed in.
Changing an account password
Now that we know the ID of the account, we can now change its password. The endpoint used to achieve this is PATCH /accounts({accountKey}).
From Swagger UI, locate PATCH /accounts({accountKey}), which is under Accounts.
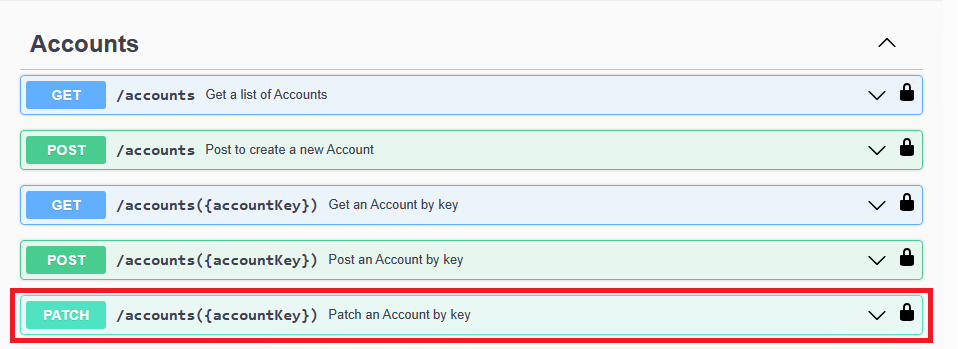
Click PATCH /accounts({accountKey}) .
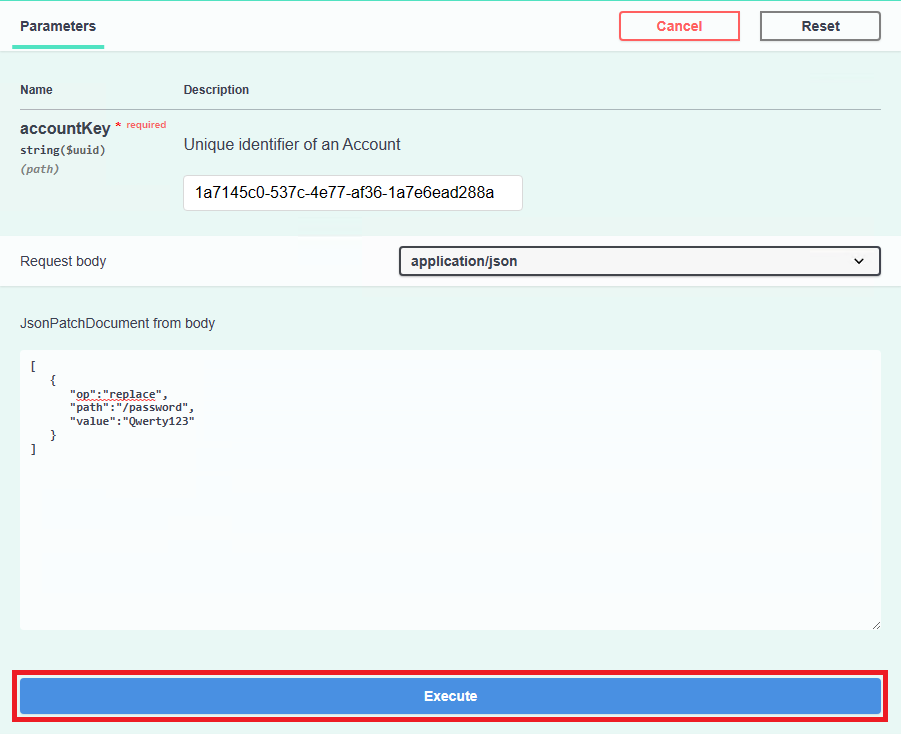
Click Try it out.
Fill in the accountKey field, and provide json containing the operation and password in the request body.
PATCH /accounts({accountKey}) supports replace, remove and test operations.
replace: change a password
remove: remove a password
test: verify a password
An example json looks like:
[
   {
      "op":"replace",
      "path":"/password",
      "value":"Qwerty123"
   }
]
Here, we will change the account’s password to
Qwerty123using the replace operation.Click Execute.
Check that the endpoint returned a 202 (Accepted) code; the request was successfully submitted, however it does not tell us the status of the password change.
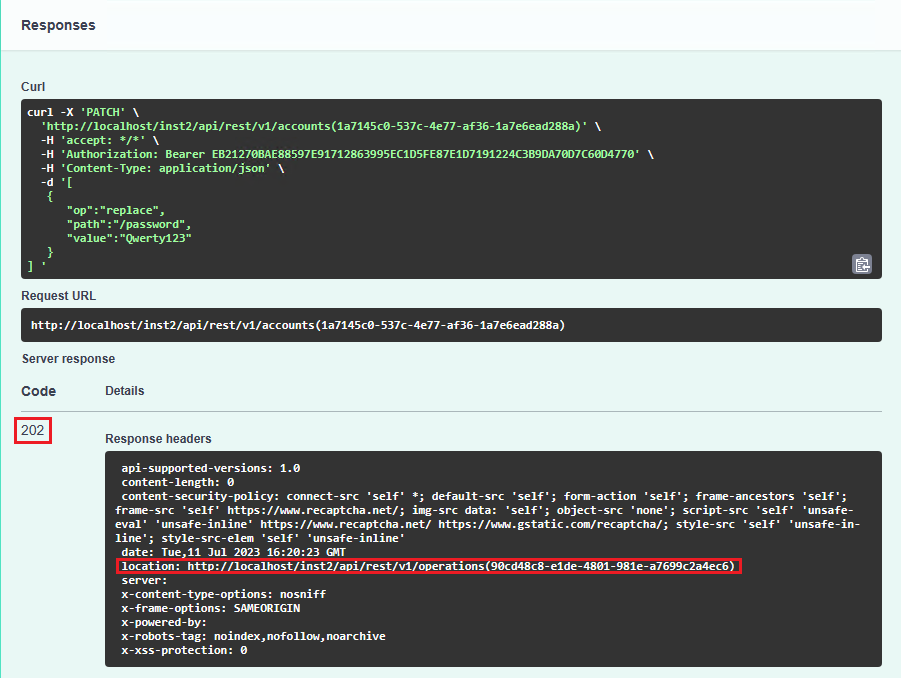
The response header returns a location field, containing the operation key of the request (in this case, 90cd48c8-e1de-4801-981e-a7699c2a4ec6) We will use that to get the operation result.
Get the operation result
We can get the operation result of the password change since we know the operation ID. The endpoint used to achieve this is GET /operations({key}) .
From Swagger UI, locate GET /operations({key}), which is under Operations.

Click GET /operations({key}) .
Click Try it out.
Fill in the key field with the operation ID of the password change.
Click Execute.

Check that it returned a 200 (Success) code as well as display the response body containing the status of the password change (in this case, it also succeeded).
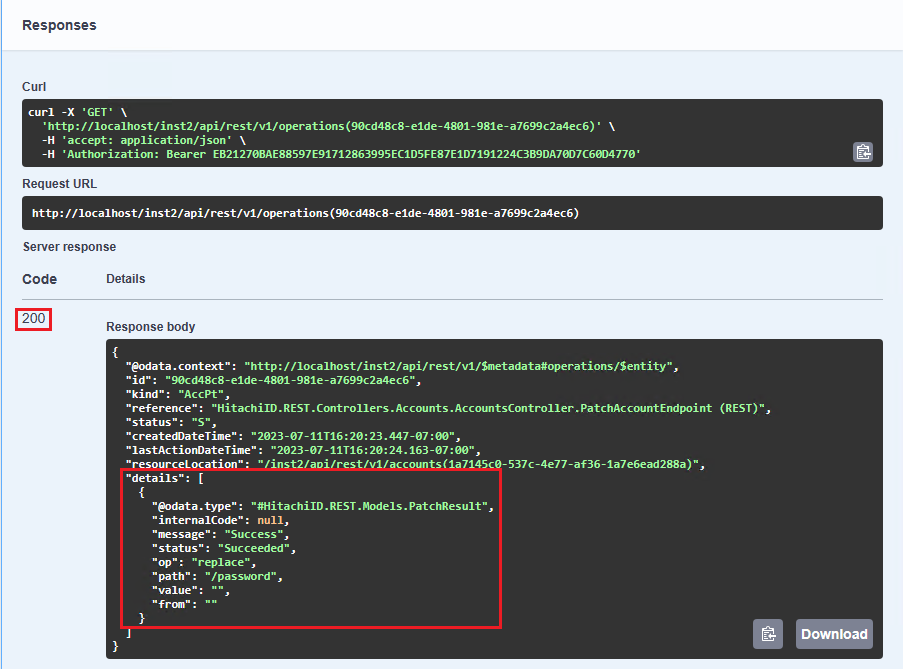
Typically, the details of the operation should be returned instantly, however it could take a few moments to appear. If it does not appear, this means that the operation is still not complete. In this case, you may need to run the endpoint several times until you get a result.
Status codes:
S = Success
F = Failure
R = Still running
Test the password
The steps to test a password is identical to changing a password, except with a different operation type. It will also require running an endpoint to get the operation result.
From Swagger UI, locate PATCH /accounts({accountKey}), which is under Accounts.
Click PATCH /accounts({accountKey}).
Click Try it out.
Fill in the accountKey field and provide json code containing the operation and password in the request body.
An example json looks like:
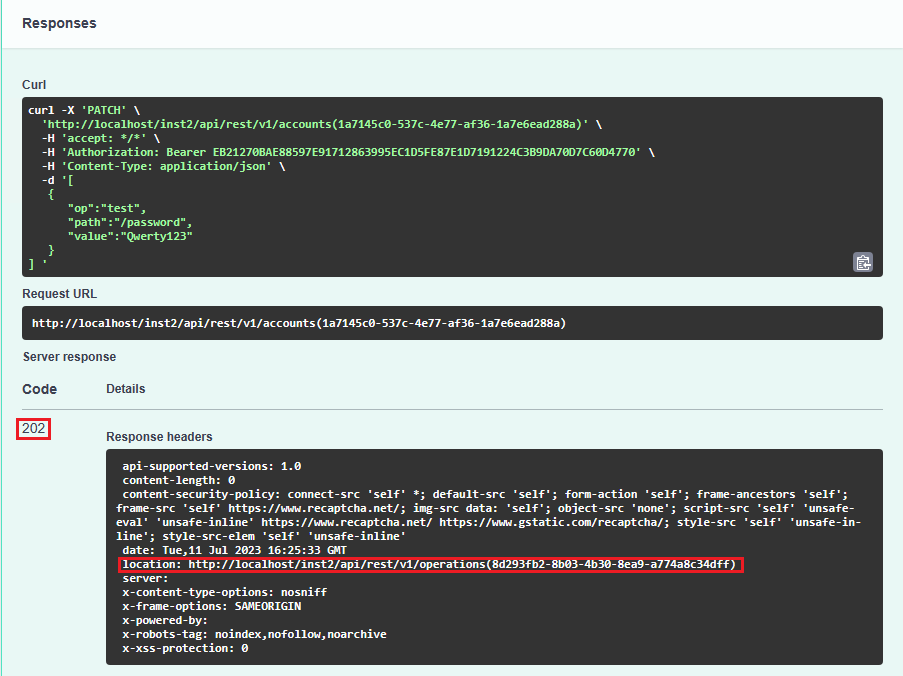
[
   {
      "op":"test",
      "path":"/password",
      "value":"Qwerty123"
   }
]
Here, we will verify that the account’s password is set to
Qwerty123using the test operation.Click Execute.

The request was accepted but now we must see whether the test operation completed
Obtain the operation ID from the location field in the response header (in this case, 8d293fb2-8b03-4b30-8ea9-a774a8c34dff)
From Swagger UI, locate GET /operations({key}), which is under Operations.
Click GET /operations({key}).
Click Try it out.
Fill in the key field with the operation ID of the password test.
Click Execute.
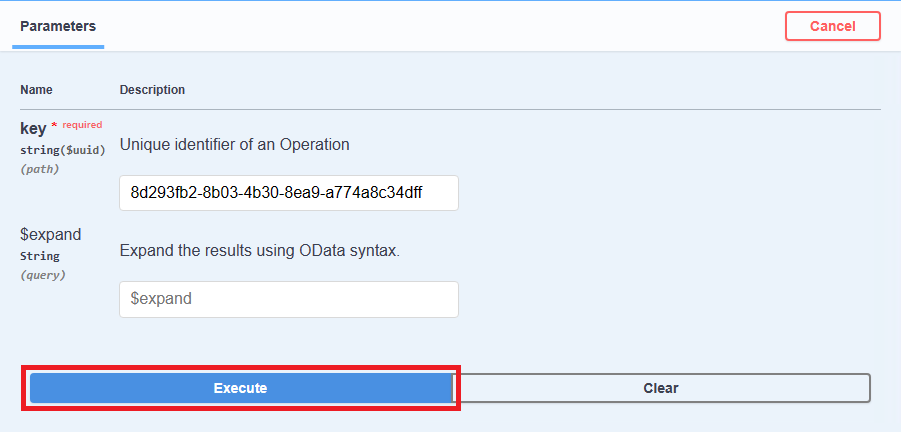
Check that it returned a 200 (Success) code as well as display the response body containing the status of the password test (in this case, it also succeeded)
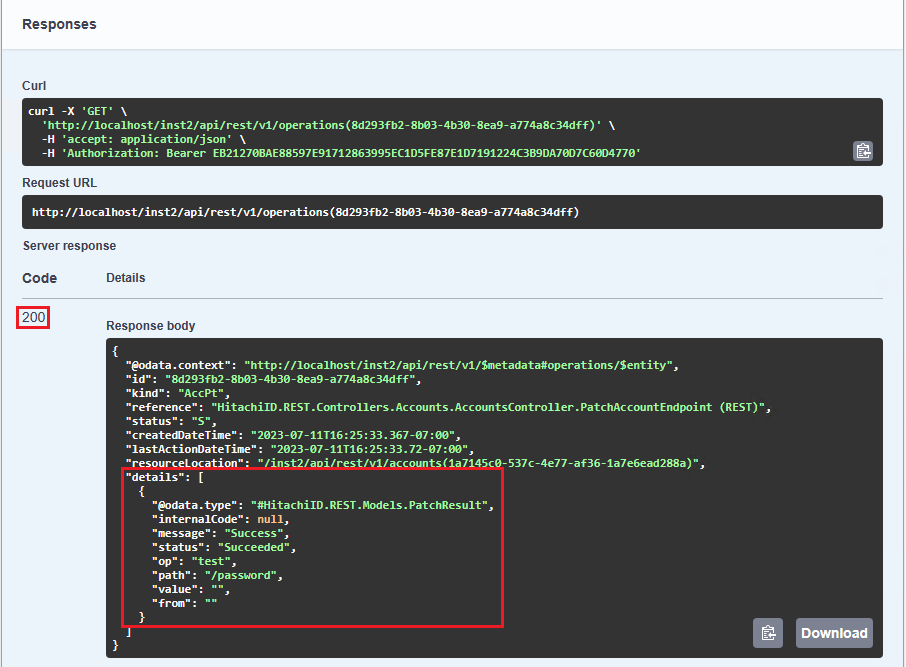
The details of the operation should be returned instantly; otherwise you may need to run the endpoint several times until you get a result.
Exercise
Since the account password of User1 has been changed to Qwerty123, try to change it back to the original password and verify that it has been successfully changed, all using endpoints from the REST API.
Logout
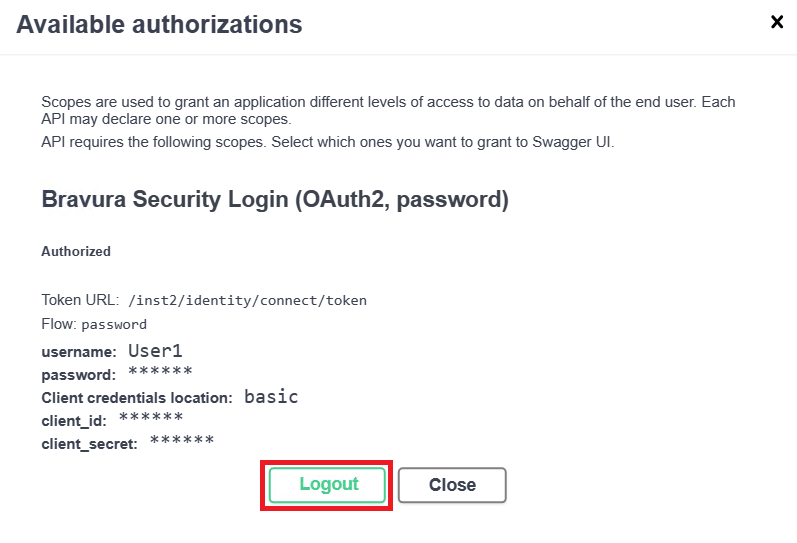
After changing and testing the password, we can log out of the REST API. This will revoke the authentication token and prevent further calls to the REST API unless the user logs in again.
Click Authorize.
Click Logout.
Next steps
By now, you should be familiar with how to log into the REST API and run endpoints. You can also try running REST API endpoints on Postman, by importing the schema referenced in the Swagger UI, ie:
http://<ip-of-fabric-instance>/<instancename>/api/rest/swagger/v1/swagger.json
Refer to the REST API Reference documentation for more information on supported endpoints.