Migrating between instances
This chapter explains migrations between two unrelated instances. The most common case for doing this is synchronizing changes between test and production environments to update or upgrade the production version or to add or change the capability in an existing deployment.
By validating changes on a test environment before pushing changes to production, you can reduce the chances that a change will negatively impact the production environment.
Ideally, the test environment is identical to the production environment in all ways: the same hardware characteristics, the same operating system, the same installed software, and the same networking architecture. If it is not possible to have identical environments, be certain that you are not including test expectations that are unrealistic; for example, load testing on a test environment which uses weak hardware and no replica servers can not be compared to a production environment using powerful hardware and multiple replicas.
Maintaining a test environment requires moving data between the test and production environments. In simple cases, synchronizing environments could require copying files and exporting the registry from one environment to another. In more complex cases where data in databases must be synchronized, the process is complex enough to require some server downtime. The typical process for pushing a change into production might go like this:
Migrate the current production system into a test environment.
Implement the changes in the test environment and then test everything that might be affected.
Migrate the changes into production.
Avoid a situation where the same systems are targeted by two instances, which will split the history and account data. This may lead to password expiry notices being sent from one instance even after, on the other instance, the password was already reset. Account data (like profile attributes) will exist on one instance, not on the other. Passwords on managed systems will be reset by both instances, resulting in race conditions and each instance losing control over the managed systems that the other instance has randomized. One way to work around this is to target a different set of accounts from the test instance; for example, create a test OU on an Active Directory system and target that.
Many migrations can be complicated, involving complex components that require an in-depth knowledge of Bravura Security Fabric . It is highly recommended you contact support@bravurasecurity.com for assistance.
Migrating files and registry
Generally, migrating files and registries between instances is simple. In the case of files, you copy them from one system to another. In the registry case, you export from one server and import from the other. There are a few things to keep in mind:
If the hardware, operating system, file system, or installed software (which includes the Bravura Security software and web server) is configured differently between the instances, then be certain the content of the files or registry export is valid for the server you are copying it to. This can mean checking hard-coded drive letters, file paths, and file names in your files and registry imports.
The regularly scheduled file replication task only pushes new or changed files from the primary server to the replicas and proxies. As such, when copying files, they must be copied to the primary server. Files can optionally be copied to the replica servers if you don’t want to wait for or force the scheduled task.
As with handling files, the registry replication only pushes changes from the primary to the other servers. As such, all registry changes must at least be made to the primary server and optionally to the replicas and proxies.
If the file or registry entry being changed or added is related to a running service, that service must be restarted to recognize the change.
For more details on the capability and limits of the file and registry replication service (such as maintaining white lists and black lists that apply limits on what should and should not be replicated), see:
Migrating data
There are some things to keep in mind when migrating data:
When exporting data, Bravura Security recommends that you export from the primary server (the server running auto discovery). If the primary server is not recoverable, use the server that has been in replication the longest.
When exporting data, ensure that the entire system is not in active use to export referentially intact data. This usually means arranging for a service outage for all instances so you can stop the necessary services (including the web server). Ensure that you disable the health check task from Windows Task Scheduler.
Similarly, when bulk importing data, ensure that the system is not in active use to ensure that you import referentially intact data.
If you bulk import data to a Bravura Security server, the database service will not be doing the work, and as a result, the changes will not be sent to replica servers. Either you must import identically to each server, or you must rebuild the replica databases manually.
The database user on the new database must have read (select) access to the old database.
The smonmove program changes the location of session monitoring data in the database from one node to another.
Verify that the MSSQL database version to which the application database is being migrated is supported.
Use the Bravura Security Data Migration Utility (migratedata) to migrate user data from an older version of Bravura Security Fabric to a current version.
See the sections below for details.
Users have security questions populated for their question sets including user-defined and pre-defined question sets (built-in and optionally custom).
Password policies are updated for password history enforcement if password history is being exported. Users need to have reset their passwords previously to have values populated for the password history.
If attributes are to be exported, users have profile attributes populated, where those profile attributes are not listed from any target systems. However, they may be associated with attributes on a target system.
Users may have their profiles locked out (too many bad authentication attempts) or disabled (a help desk administrator has disabled a user’s profile). For testing purposes, these accounts should be noted and revisited after the migration.
Users have mobile devices that have been registered. The mobile device registration data may be exported so that the users are not required to re-register their devices.
Target system credentials can be exported from Bravura Security Fabric version 8.2.0 or newer.
Team management data can be exported from Bravura Security Fabric version 10.1.4, and versions 11.1.1 or newer.
The following Bravura Privilege data cannot be exported using the utility:
managed accounts and systems not onboarded using team management
import rules and related data
managed system policies
archived data (*_hst tables)
inactive managed systems and accounts
active managed account check-outs
Target systems should be set up prior to data import. Accounts should be discovered, and profiles should already be created.
Target systems should reflect existing configuration between the older version and the current version of Bravura Security Fabric . For example, you should use newer agents such as the Active Directory DN (
agtaddn) rather than the older and mostly obsolete Active Directory (agtad).Target system credentials will only be imported for target systems matching the older version's IDs. This will override any existing credentials already defined on the current version.
Password policies are updated to the intended policy. Password history enforcement must be enabled if password history is being imported.
Profile attributes must be created for any profile attribute values that will be imported.
A dry run might generate some entries in the log with !!!TAG complaints, but they are minor and only related to a multilingual UI. Any !!!TAG (multilingual) values should be recreated on imported target systems to avoid missing translations if you deploy in additional languages.
Bravura One is configured on the Bravura Security Fabric server and the Mobile Worker Service (mobworker) is configured for mobile access with the Bravura One proxy server.
When migrating the mobile device registrations and the instance name has changed for Bravura Security Fabric and/or the company name has changed for the Bravura One proxy server Apache configuration, the Proxy server URL address for the Mobile Worker Service may remain the same, however, the rewrite rule in the Apache configuration on the Bravura One proxy server will need to be modified.
This is to ensure that when one or both of these names have changed, users will not be required to re-register their mobile devices. See Mobile access for more information on the Apache configuration requirements.
Randomization must be disabled for all accounts. It is also recommended that all checked out accounts are checked in before data export.
The same team management components installed in the older version must also be installed in the current version. This includes the following:
Bravura Privilege refbuild components (pam_team_management, pam_team_vault_management)
system type scenario components (pam_system_type_winnt, pam_system_type_linux)
subscriber validation scenario component (pam_subscriber_validation)
personal admin scenario component (pam_personal_admin_management)
The same source of profiles target used in the older version must also be added and configured in the current version to list users and manage groups.
If the target system credentials of onboarded systems are associated with a Bravura Privilege managed account, you must manually add the managed system the account is a part of. As well, you will also need to manually create the managed system policy the managed account was originally added to (if it doesn’t already exist), and bind the account to the managed system policy.
Exporting data from the older (source) version
Obtain a copy of the
migratedata.msiWindows installer from Bravura Security.Copy
migratedata.msito the computer where the older (source) instance is installed.On the computer where the source instance is installed, run
migratedata.msi.On the page, ensure that the Installation folder is set to the directory where the source instance is installed; for example, the following source instance is installed under C:\Program Files\Bravura Security\Bravura Security Fabric\default :
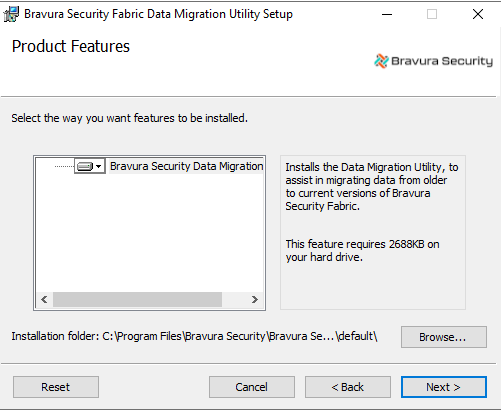
Continue with the remaining wizard pages to install
migratedata.If you do not have at least SQL Server Native Client 2008 installed, you will receive a warning, and installation will not proceed until it is installed. Upon completion of the installation process,
migratedata.exewill be available in the \util sub-directory of the location specified for the Installation folder .
Open a command prompt and navigate to the directory where migratedata is located.
Run
migratedatausing the following parameters:migratedata.exe -action export -file <dbfile> <datatype>
where:
<dbfile> is the SQLite database file that will be created if it does not exist already, or opened if it already exists.
<datatype> is one or more of the data types listed in Table 1, “datatype arguments”.
Enter a password.
The password will be used to encrypt the data key of the instance.
The migratedata utility will create the export SQLite database. If the SQLite database file already exists, then it will be updated but the password must match the one used to create the database file.
Argument | Description |
|---|---|
-qaconfig | Question set configuration (qdef+qset tables) Security question configuration settings and lists of custom questions. |
-qadata | Question set data (response+responseqd tables) Answers provided by the users for the security questions. Note : -qaconfig is required when -qadata is specified. |
-madmin | Target system credentials (madmin table) Administrator credentials configured for target systems. |
-mobilereg | Mobile registrations (usermobiledevice table) Mobile device registration data for users that have registered a Bravura One app with the Bravura Security Fabric server. |
-pamteam | Bravura Privilege team management data Configuration of teams, including team groups, members, privileges, systems and accounts |
-force-pamteam-export | When the data type is -pamteam, force export of Bravura Privilege team management data, even if there are checked out managed accounts. Checked out managed accounts will be considered checked in. |
-pwhistory | Password history (history table) List of passwords reset by users when password history is enforced in the password policy rules. |
-userstat | Userstat tags (userstat table) Userstat tags/records and their values set for users for specific actions. |
-userattr | Profile attributes that didn’t come from a target (userattr table) Profile and request attributes that have values stored in the database and are not read in from any targets. |
-userattr_file | Profile file attributes that didn't come from a target (userattr_file table) data type. |
-userauth | Profile lockout/disabled-ness (userauth table) User profiles that have been locked out or disabled by the help desk. |
-manual_assoc | Manually associated accounts (account table) data type |
-rolembrs | Role memberships (profiles) data type |
-ignore_deprecated_roles | When the data type is -rolembrs, ignore migrating role memberships of deprecated roles |
-ignore_non_assignable_roles | When the data type is -rolembrs, ignore migrating role memberships of non-assignable roles |
-all | All of the above data types |
Importing data to the current (destination) version
Locate a copy of the
migratedata.msiWindows installer from Bravura Security.Copy
migratedata.msito the computer where the current (destination) instance is installed.On the computer where the destination instance is installed, run
migratedata.msi.On the page, ensure that the Installation folder is set to the directory where the destination instance is installed; for example, the following destination instance is installed under C:\Program Files (x86)\Bravura Security\Bravura Security Fabric\default :
Continue with the remaining wizard pages to install
migratedata.If you do not have at least SQL Server Native Client 2008 installed, you will receive a warning, and installation will not proceed until it is installed. Upon completion of the installation process, migratedata.exe will be available in the \util sub-directory of the location specified for the Installation folder.
Copy the SQLite database file you created when exporting data , to the computer where the Bravura Security Fabric instance is located for the current version.
Dry run
(Optional) Perform a dry run (i.e. not actually import data into the backend database used by the instance).
You can do this by running migratedata in the destination instance’s \util sub-directory with the following parameters:
migratedata.exe -action dryrun -file <dbfile> <datatype> -log <logfile>
where:
<dbfile> is the SQLite database file from Step 6 above.
<datatype> is one of the data type values listed in Table 1, “datatype arguments”.
<logfile> is the file used to log the results.
(Optional) Enter the password used to encrypt the data key in the database file.
(Optional) Review the dry run results for any errors.
Import data
To import the data, run the
migratedatautility in the destination instance’s \util sub-directory with the following parameters:migratedata.exe -action import -file <dbfile> <datatype> -log <logfile>
where:
<dbfile> is the SQLite database file from Step 6 above.
<datatype> is one of the data type values listed in Table 1, “datatype arguments”.
<logfile> is the file used to log the results.
Enter the password used to encrypt the data key in the database file.
Review the results of the migration and then proceed to verify the upgrade.
Note
If migratedata seems to hang on import, wait for its timeout (30min) before killing the process.
Do not left-click on the command prompt screen when a console app is running, especially for apps like migratedata which takes a long time to complete.
If something is selected in the command console while migratedata runs, it may seem that the process is stuck, but in fact the command prompt is paused, waiting for the user to do something with the selection; in that case, press any key (e.g. Delete ) to remove the selection and allow the prompt to continue processing.
The password history table is the only one that will be preserved in the new instance during data import. Any new entries imported are added to any existing ones. All other imported tables are emptied before the data is imported from the old instance. This is important to remember when more than one import is being done to the same instance, for example, when import tests are run in sequence or if the old system remains in use after the data migration.
Question set configuration
Confirm that:
Any customized settings for the question sets, such as user-defined and pre-defined, are present.
Any custom pre-defined questions that existed in the older version are now present in the current version after the data migration.
Security questions
Confirm that:
A user’s security questions and answers match those from the imported data. For example, user-defined and pre-defined question sets for both built-in and custom security questions. Previously defined question sets for the account that existed on the current instance will be replaced.
A user can authenticate to self-service using the security questions and answers from the imported data.
A user can use the "Test mode" for all of their security questions successfully when valid answers from the imported data are provided.
If configured to do so, a help desk administrator may see the list of the user’s security questions and they are from the imported data.
Password history
Confirm that:
A user cannot reset their password to a value in the password history from the imported data following the password policy.
Users can reset their password to a new value not in the password history.
A help desk administrator cannot reset a user's password to a value in the password history from the imported data.
A help desk administrator can reset the password for a user to a new value that is not in the password history.
Profile attributes
Confirm that:
Values for a user’s profile attributes are replaced with those from the attributes in the imported data.
Statuses for profile lockout and profile enabled/disabled
Confirm that:
The status for whether or not a user’s profile is locked out when a user has provided too many bad authentication attempts to self-service and has locked out their profile is replaced with the status from the imported data.
The user cannot log in to self-service if their profile is locked out.
A help desk administrator can see whether or not a user’s profile is locked out.
The status for whether or not a user’s profile has been disabled for when a help desk administrator has disabled their profile is replaced with the status from the imported data.
The user cannot log in to self-service if their profile is disabled.
A help desk administrator can see whether or not a user’s profile is disabled.
Userstat tags
From the instance after the import is complete, locate and run the Userstat report. The Userstat report will include records for the users from the imported data. For example, the report output will show the PSQDONE userstat tag for users from the imported data that had completed their security questions profile.
Target system credentials
Confirm that:
Target system credentials are imported, assuming that the target systems exist on the current version and matches the target system IDs of the older version. If a target system exists on the current version and already have credentials defined, its password will be overwritten during import.
Target system credentials are not exported if the target system does not exist on the current version.
Target system credentials of onboarded systems are associated with the same Bravura Privilege managed account, if associated in the previous version.
Mobile device registrations
Confirm that:
A user is able to use the Bravura One app on their mobile device to login to and access Bravura Security Fabric for devices that were previously registered.
If configured, a user is also able to still authenticate successfully for Computer Login on the desktop for a mobile authentication chain to scan a QR code using the mobile device.
The mobile devices are not required to be re-registered.
Team management
Confirm that:
The team admin from the previous version will still be able to create teams, manage group membership of teams, and delete teams.
In versions 12.0 and newer, the trustee privilege is broken down into several trustee privileges, including Team trustee, System trustee, Account trustee, Vault trustee, OTP trustee, LC trustee and Subscriber trustee. By default, the trustee user from the previous version will have all of these privileges.
Refer to Bravura Privilege Pattern in the Bravura Security Fabric Documentation site for more information about trustee privileges.
The same systems and accounts are present in the current version.
The same team vaults and vault accounts are present in the current version.
The same OTP API user accounts are present in the current version.
Account settings are unchanged, such as disclosure method, session monitoring, and randomize/override settings.
Managed account and vault account passwords are unchanged.
Vaulted files can be downloaded as normal.
Managed accounts previously checked out before migration are checked in and can be requested and checked out as normal.
Personal admins continue to have unrestricted access to the managed accounts they are entitled to.
Users with Requesters, Approvers, Auto-approved, and Credential Manager privileges in the previous version will continue to have the same access in the current version.
Before migration, users who were help desk trustees continue to have help desk privileges in the current version.
If associated with the previous version, the target system credentials of onboarded systems are associated with the same managed account.
Using idmsetup.inf to install Bravura Security Fabric
When you install Bravura Security Fabric on the main server, an idmsetup.inf file is created in the \<instance>\psconfig\ directory. You can use the file to aid in installing proxy servers, backup servers, and add-on software. It is a recommended best practice to use this file during migration projects. It acts as an "answer file" for the installer by populating instance-specific configuration parameters and encryption keys at every step during the setup process.
It is highly recommended that you:
Copy the
idmsetup.inffile to each new server and place it in the same directory from which you will run the installer (idm.msi).Ensure the architecture of the new server matches the architecture of the primary server.
Following is an example of using idmsetup.inf to install a replication node.
When you install Bravura Security Fabric on the main server, an idmsetup.inf file is created in the \<instance>\psconfig\ directory. You can use to file to aid the installation of a replication node. It contains the encrypted communication key (or Master Key) and other correct default values and encryption keys for prompts during installation.
To install a replication node using the idmsetup.inf configuration file:
Log into the host Windows server as a member of the Administrators group.
If required, download and unzip the Bravura Security Fabric distribution folder.
Contact your Bravura Security account representative for details.
Copy
idmsetup.inffrom the \<instance>\psconfig\ directory on the primary server to the replication node and place it in the root of the distribution folder.Launch the setup program located at the root of the distribution folder.
The setup program asks you to choose a product to install.
Tip
Do not install Connector Pack first; choose Bravura Security Fabric .
Select Bravura Security Fabric .
Click Next .
Verify that the instance name is already filled in and optionally enter a description.
Click Next .
The setup program performs a pre-installation check and verifies all of the requirements for installation.
If all of the checks are successful, click Next to proceed with the installation.
If any of the pre-install checks produce warnings or errors, click Report for details.
The Configure a Dedicated Database User page is displayed.
Choose your database user setup option, then click Next .
Create and configure a new dedicated database user for a new database node, as illustrated below.
On the page, when you select Create a new dedicated database user for the new instance, setup displays the database user and connection information page depending on your database system.
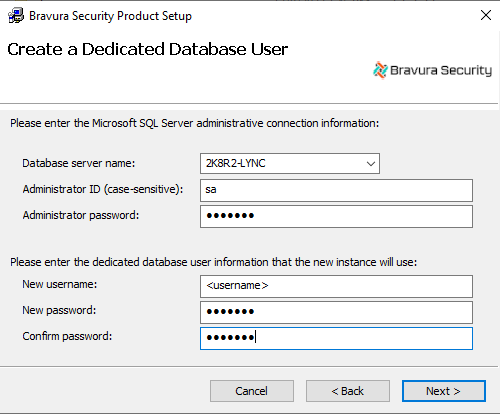
Enter the database connection and user information, then click Next .
Use an existing database user when creating a shared schema node, or a hybrid schema node if the database node already exists.
On the tab uncheck the options to install the schema and default data.
The setup program launches
idm.msi.Click Next .
Read and accept the license agreement.
Click Next.
Verify the location of the license file already filled in.
It is recommended that all replicated servers use the same license file.
Click Next .
Choose the setup type:
Typical to accept the settings from the
idmsetup.inffile.Custom to customize settings.
It is recommended that all replicated servers have the same installed components.
Verify that the psadmin passwords are already filled in (masked with stars).
Click Next .
Verify that the communication key is the same as the one entered for the main Bravura Security Fabric server.
Click Next .
Verify that the database encryption key is the same as the one entered for the main Bravura Security Fabric server.
Click Next .
Verify that the workstation authentication encryption key is the same as the one entered for the main Bravura Security Fabric server.
Click Next .
Verify that the connector encryption key is the same as the one entered for the main Bravura Security Fabric server.
Click Next .
Verify that the IDMLib encryption key is the same as the one entered for the main Bravura Security Fabric server.
Click Next .
Verify the administration login ID and password.
Click Install.
Click Finish to exit.
The post-installation tasks begin.
Do not stop the post-installation tasks. The installer is attempting to load connectors from the Connector Pack, language tags, and reports.
If you install the Bravura Security Fabric before a Connector Pack has been installed (recommended), a warning appears at this stage that no connectors could be found. It is safe to proceed.
If any of the post-installation tasks produce warnings or errors, click:
Report for details on all post-installation tasks
Or,
Messages... for details on a specific post-installation task
Otherwise, wait until the status changes to success, then click Finish.
Run setup again to install a Connector Pack for this instance (unless you installed a global Connector Pack first, which is not recommended, as it can introduce maintenance issues).
Install all software required for integration with target systems and for accessing all resources. Configure the firewall on the new server and other required networking that allows access to needed resources.
The setup of the application node’s Connector Pack should match the setup of the primary node’s Connector Pack. See Installing Connector Pack for details.