Explore your safe
Navigation
When you first log in, the My Safe view opens showing  All Items using the filter from the left panel. This will list any of your 'personal' items (added by you) and any items shared with you via Teams and collections on the right.
In the My Safe view, items shared from a Team will show the Team name in the Owner column.
Items in the right panel include action icons allowing you to launch a website, copy credentials and add attachments.
The gear drop-down for each item allows you to clone a personal item, move a personal item to Team, manage shared item collections (where permitted) or delete an item.
Actions that involve collections are based on permissions assigned to you or a group to which you belong.
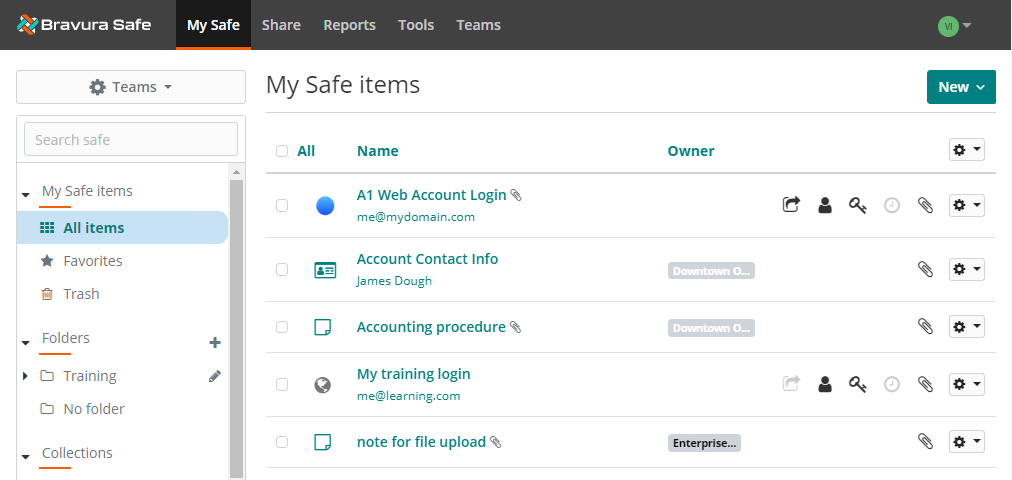
From the filter panel on the left, you can:
Select a Team to which you have been granted access from the Teams drop-down.
Search your safe based on the selected Team or filter.
Set items as favorites for easy access using the Favorites filter.
Organize items into personal folders .
Use a collection filter to quickly locate shared items owned by a Team .
Log in to Bravura Safe via the web interface.
Click My Safe.
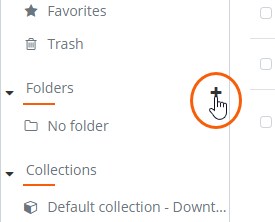
In the left panel, beside Folders, click
 Add folder.
An ADD FOLDER dialog appears.
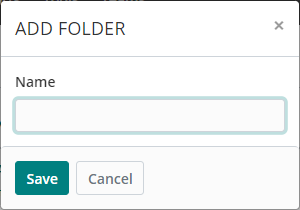
Add a folder Name.
See also Nested folders
Click Save.
The new folder appears in the left panel.
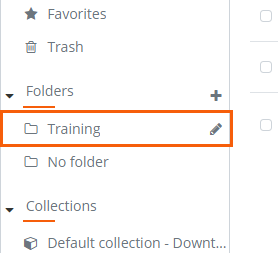
Edit or delete a folder using the web interface:
Log in to Bravura Safe via the web interface.
Click My Safe.
Under Folders, locate the folder you want to edit or delete.
Click the corresponding
 Edit Folder icon.
The EDIT FOLDER dialog appears.
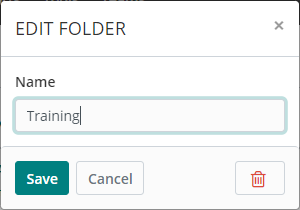
To edit the folder:
Make changes to the Name or nesting as desired.
Click Save to save any changes.
To delete the folder:
Note
Deleting a folder will not delete the items in that folder; they will simply be moved to the "No folder" folder.
Note
Deleting a 'parent' folder will not delete 'child' folders nested within it. 'Child' folders will remain with the 'parent' folder name included.
Click the
 Delete icon.
A confirmation message appears.
To proceed, click Yes.
Log in to Bravura Safe via the web interface.
Click My Safe.
Before adding an item, optionally do the following (to save a step later):
Under Folders, select an existing personal folder to add the item to. If the selected folder has subfolders, select the desired subfolder.
When you add an item, the Folder will be selected.
Click New and select Item from the drop-down list.
Select the type of item from What type of item is this?:
Input fields differ according to the item type.
Fill in the required fields, as applicable.
For login types, see notes below on:
Optional: Add CUSTOM FIELDS (Text, Hidden, Boolean, Linked) to the item (which can be auto-filled along with login credentials using the Bravura Safe browser extension). See Custom fields for more information.
Optional: Add a layer of security for a sensitive item by selecting Master password re-prompt. When selected, it requires verification of your master password to access or edit the item.
Caution
The master password re-prompt is not an encryption mechanism; rather, it serves as an additional safeguard for the interface. Always lock your safe when unattended or on a shared workstation.
Specify OWNERSHIP:
Click on the Who owns this item? drop-down and select yourself (default) to not share the item.
OR
Select a Team to share the item with.
If a Team is selected, scroll down to COLLECTIONS and select at least one collection to share the item with.
Note
You must select at least one Collection. If you do not see the expected collection, your permission for that collection is set to "Can view", which will not allow you to create an item in it.
Optional: Add the item to your personal favorites by clicking the Favorite (star) icon at the bottom right.
Click Save.
The new item is saved to your personal safe; or to a Team and collection if selected.
 Generate password: See Generate a stronger item password using the web interface.
 Check if password has been exposed:
Click to check known data breaches for the current password via Have I Been Pwned and receive notification of results:


 Toggle character count: Click to display the character count of the current password (example below).
Click Hide to hide the password character count.
 Toggle visibility: With screen privacy ensured, click to toggle visibility of the entered password.
 Copy password: Click to copy the current password to your local system clipboard.
Websites that support time-based one-time passwords (TOTPs) using an authenticator handle the setup differently. Start from the website/service that you are accessing (e.g. google.com, github.com).
Note
TOTP is a common form of two-factor authentication (2FA) that generates a temporary code that changes at a fixed interval, typically every 30 or 60 seconds.
Bravura Safe can initiate TOTP generation three ways:
From a Bravura Safe browser extension by scanning a QR code from the desired website/service
From a Bravura Safe mobile app by scanning a QR code from the desired website/service
From any Bravura Safe application by manually entering the website/service's authenticator key
Bravura Safe authenticator continuously generates six-digit TOTPs rotated every 30 seconds.
Scan a QR code - browser extension
To set up the Bravura Safe authenticator using a browser extension:
From the desired web account, initiate adding TOTP for multi-factor authentication.
A QR code will likely be displayed.
Open a Bravura Safe browser extension.
Search or filter to locate the login item for which you want to generate TOTPs.
Select the item to view it.
Click Edit at top right.
Click the camera icon next to the Authenticator key (TOTP) field.
Bravura Safe scans the QR code and adds the secret to the Authenticator key (TOTP) field.
Click Save to start generation of TOTPs on the login item.
Bravura Safe authenticator continuously generates six-digit TOTPs rotated every 30 seconds.
Scan a QR code - mobile app
To set up the Bravura Safe authenticator using a mobile app:
From the desired web account, initiate adding TOTP for multi-factor authentication.
A QR code will likely be displayed.
Open a Bravura Safe mobile app.
Search or filter to locate the login item for which you want to generate TOTPs.
Select the item to view it.
Tap Edit at top right.
Under Authenticator key (TOTP), tap Set up TOTP.
Tap OK to allow Bravura Safe to access your camera.
Aim your device's camera to scan the QR code from the desired website/service.
Tap Save to start generation of TOTPs.
Bravura Safe authenticator continuously generates six-digit TOTPs rotated every 30 seconds.
Note
You can edit the TOTP seed at any time using the camera icon on the Edit item screen.
Manually enter an authenticator key
To manually enter an authenticator key using any Bravura Safe client:
From the desired website account:
Initiate adding multi-factor authentication (MFA) via time-based one-time password (TOTP).
A QR code will likely be displayed.
Instead of scanning the QR code, select the alternative/manual TOTP setup method (usually a link or option provided under the QR code).
Copy the displayed authenticator key to your local device clipboard.
Open the desired Bravura Safe client (browser extension/web interface/desktop application/mobile app).
Search or filter to locate the login item for which you want to generate TOTPs.
Select the item to view it.
Click or tap Edit.
Locate the Authenticator key (TOTP) field.
Note
For the mobile app: Under Authenticator key (TOTP), tap Set up TOTP.
Then, tap the Enter key manually link at the bottom of the screen.
Tap Add TOTP.
Paste the copied Authenticator Key for the desired website/service to the required field.
Paste or enter the copied Authenticator Key for the desired website/service to the required field.
Click or tap Save to start generation of TOTPs.
Bravura Safe authenticator continuously generates six-digit TOTPs rotated every 30 seconds.
Login items can have one or more Uniform Resource Locators / Identifiers (URLs/URIs) and include the following:
Website address
Server IP address
Mobile app package ID
and more...
A URL is required to use auto-fill with Bravura Safe apps.
URLs should include a scheme; for example, https:// to securely reference a website address.
If none is specified,
http://is assumed.Without a scheme, launching will not work properly.
Note
Bravura Safe browser extensions and mobile apps allow you to select a Default match detection. This can be overridden for each login item in all Bravura Safe applications. Base domain matching is the default option.
Bravura Safe will offer to auto-fill login item credentials when:
Base domain: the top-level and second-level domain of the URL matches a login item
Host: the hostname and (if specified) port of the URL matches a login item
Starts with: the URL starts with the URL of a login item (regardless of what follows)
Regular expression: the specified regular expression matches a login item
Exact: exact match to a login item
Never: auto-fill is never offered
See also
This topic covers the general use of the Bravura Safe Generator. To generate a new password for a specific saved login item, see Generate a stronger item password using the web interface.
To configure settings and generate a password or passphrase:
Log in to Bravura Safe via the web interface.
Click Tools.
The Generator page appears.
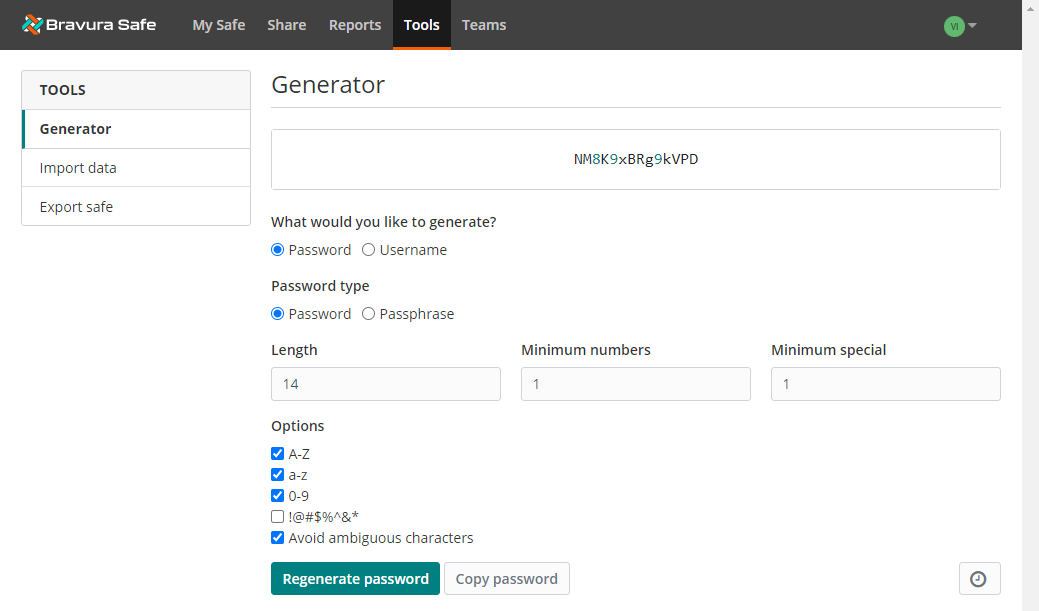
Choose Password from the What would you like to generate? options.
Choose Password or Passphrase for the Password type.
Specify the password or passphrase criteria.
Password: (see image above)
Passphrase:
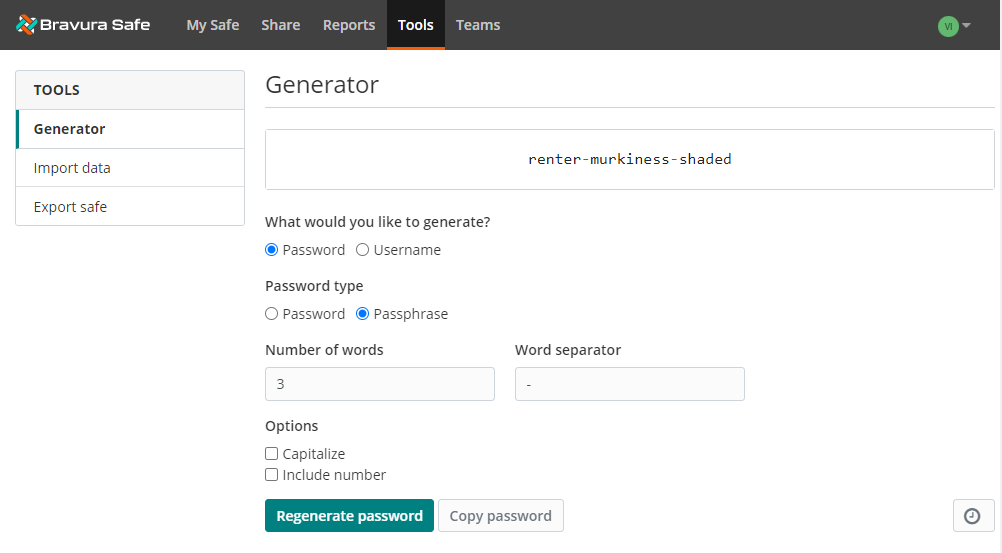
The generated password updates dynamically as you move from one field to the next.
Optionally, click Regenerate password.
Click Copy password to copy the password/passphrase to your clipboard.
Click the
 Password history icon at bottom right to view, copy or clear generated passwords/passphrases.