Explore your safe using the desktop app
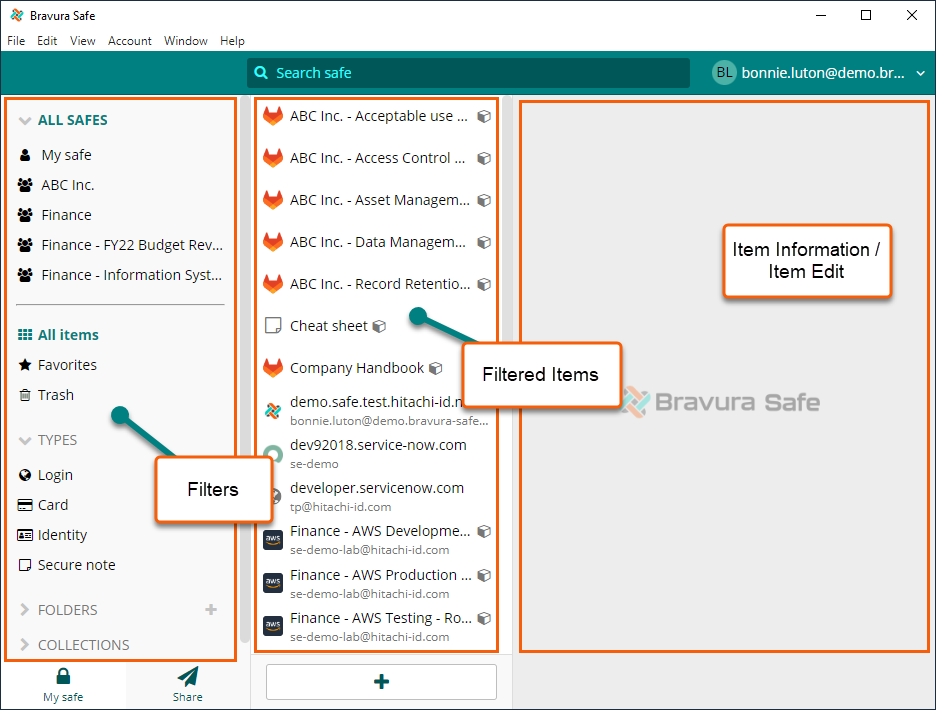
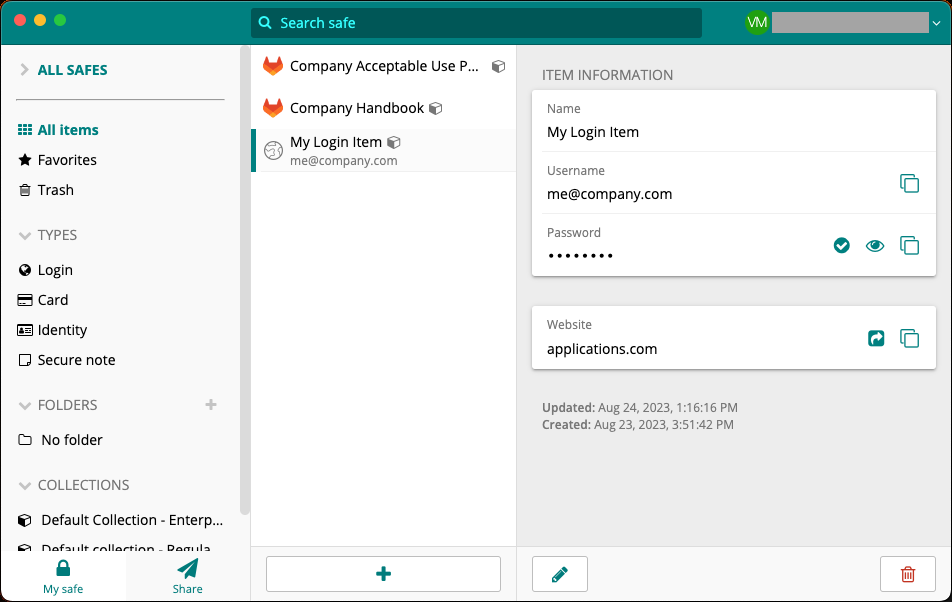
When you first log in to the Bravura Safe desktop application, the My Safe view displays filtered items in the middle panel for the ALL SAFES > ALL items filters (selected from the left panel). These include items owned by all Teams you are a member of.
Windows:
macOS:
From your desktop app you can:
Use the various filters in the left panel to change the resulting list of items in the middle panel. Read more about filters.
Select a filtered item from the middle panel to view or edit item details in the right panel.
Explore menu options and shortcut keys (Windows) OR Explore menu options and shortcut keys (macOS)
Including: Sync, general Settings/Preferences, Lock, Log out, Copy credentials, Password Generator and history, Account settings, Help (online product documentation), and access to the Web safe.
Search for or add items in: safe (all), My Safe (personal), Team safe, favorites, trash, types, folders, and collections.
Access the Share view to share sensitive information.
Filters include:
ALL SAFES - all Team safe (shared) items to which you have been granted access + personal My Safe items
My safe - personal (unshared) items not belonging to a Team
<Team name> - shared items belonging to the selected Team safe to which you have been granted access
All items - all items in the selected Team safe to which you have been granted access or all My Safe items
Favorites - items to which you have been granted access with the Favorite option selected
Trash - items that have been deleted (but not yet permanently deleted)
TYPES (Login, Card, Identity, Secure note) - all items of the selected type to which you have been granted access
FOLDERS - items stored in the selected personal folder
COLLECTIONS - for the filtered Team safe, all items in the selected Collection to which you have been granted access
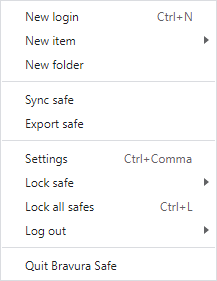
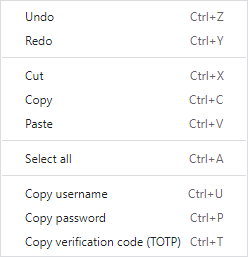
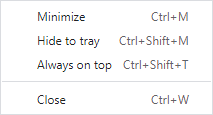
The Bravura Safe desktop application for Windows provides additional navigation to many product features via a menu. Commonly-used options are accompanied by shortcut keys. See options below:
File menu
Edit menu
View menu
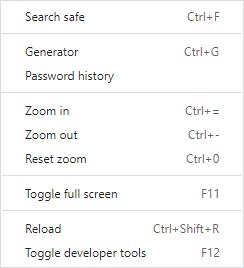
Generate a password and view password history.
Account menu

Change master password via the web interface.
Set up two-step login/two-factor authentication (2FA) via the web interface.
Window menu
Help menu
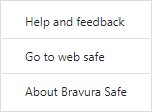
Select Help and feedback to open online product documentation for Bravura Safe in your default browser.
Select Go to web safe to open the Bravura Safe web application in your default browser.
Select About Bravura Safe to view the current product version and other related details.
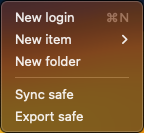
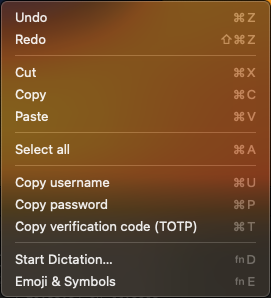
The Bravura Safe desktop application for macOS provides additional navigation to many product features via a menu. Commonly-used options are accompanied by shortcut keys. See options below:
Bravura Safe menu
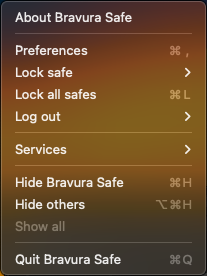
Select About Bravura Safe to view the current product version and other related details.
File menu
Edit menu
View menu
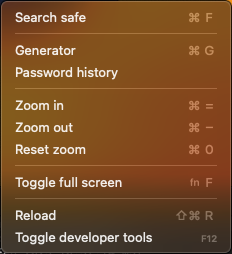
Generate a password using the desktop app and view password history.
Account menu

Change master password via the web interface.
Set up two-step login/two-factor authentication (2FA) via the web interface.
Window menu
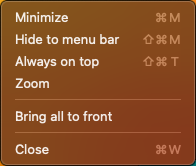
Help menu
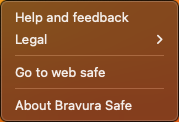
Select Help and feedback to open online product documentation for Bravura Safe in your default browser.
Select Legal to access Bravura Safe Terms of Service and Privacy Policy .
Select Go to web safe to open the Bravura Safe web application in your default browser.
Select About Bravura Safe to view the current product version and other related details.
Search your safe using the desktop app
Search your safe using the Search <filter name> field at the top of the screen.
To quickly move your cursor to the Search <filter name> field, select View > Search safe from the menu or press the [Ctrl + F] keys on your keyboard.

You can search as follows:
Search items in a selected filter from the left panel.
The Search field name will update to show the selected filter; for example, Search my safe, Search favorites, Search type, Search folder, Search collection, etc.
Perform a basic search (name, username, URL, etc.).
Perform a full-text search of indexed fields (automatically includes leading and trailing wildcards).
Search specific fields by starting query with "
>"; for example,>login.username:bonnilwill search for login items with bonnil as the username. A wildcard (*) can also be used.
Indexed fields:
shortid(first 8 characters of item ID)organizationid(Team ID)name(item name)subtitle(login username , card brand or last four digits of the number , or identity name)notes(full-word match or use wildcard)fields(field name or value; text only)attachments(filename)login.usernamelogin.uris(hostname)
Advanced query options:
Use a
+(must contain) or-(must not contain) prefix to search for term presence.Use a tilde (
~) prefix combined with an edit distance integer for fuzzy matching.
Open the Bravura Safe desktop application to the My safe view.
Click the Add folder
 icon next to FOLDERS in the left panel.
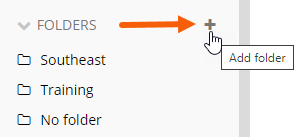
Alternatively, select File > New folder from the menu.
An ADD FOLDER pop-up appears:
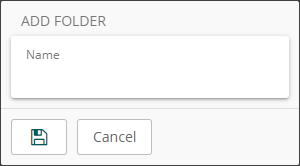
In the Name field, add a descriptive name for the folder.
See also Nested folders.
Click Save
 .
.Once created, you can select the folder and click
 (Edit folder) to rename or delete a folder at any time.
To create a new item:
Open the Bravura Safe desktop application to the My Safe view.
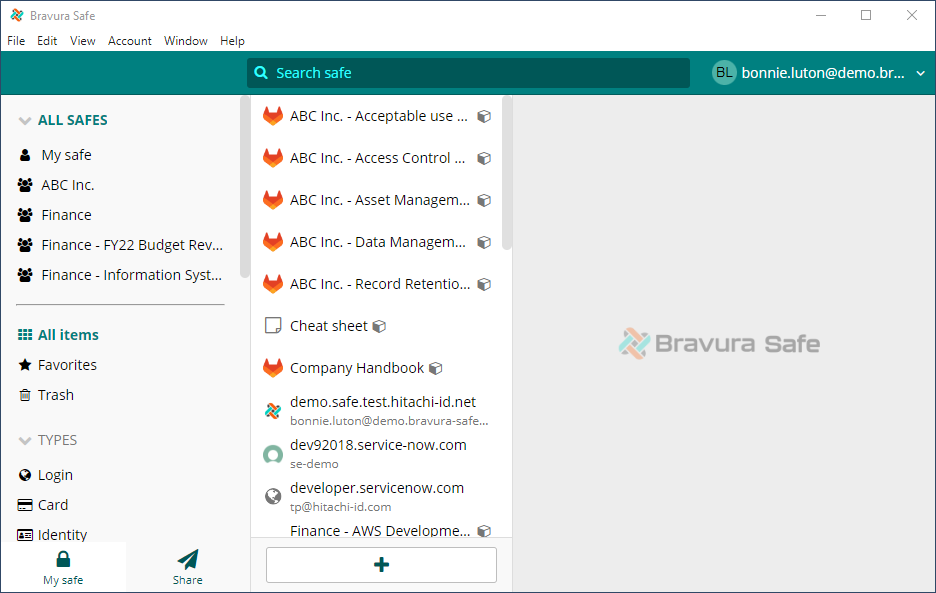
Click Add item (+) at the bottom of the middle panel.
Note
Alternatively, select from the menu File > New login (to add a login item) or File > New item > [item type].
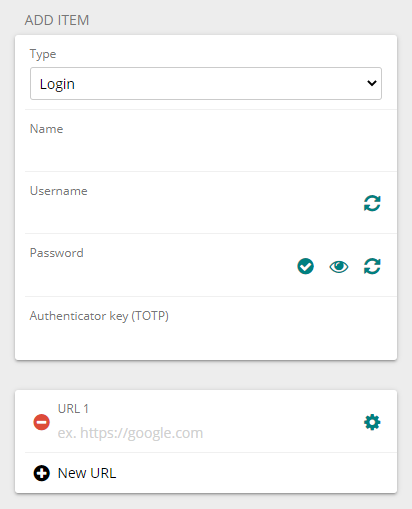
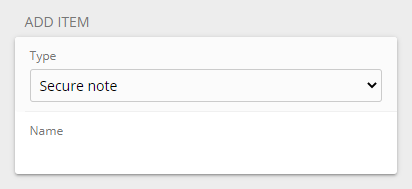
An ADD ITEM dialog will be displayed in the right panel. Fields will vary based on the selected item type.
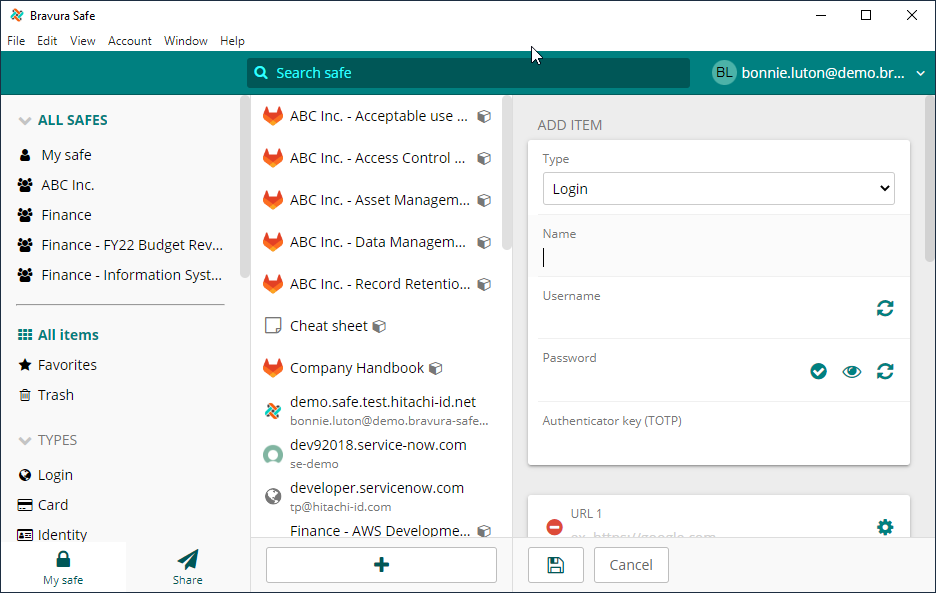
If not specified already (via the menu), select the item Type from the drop-down.
Enter a Name for the item.
Names help you identify items in your safe; for example, "My X Account Login" or "My X Credit Card".
Enter basic item information according to the selected item type:
Login - Username, Password, Authenticator key (TOTP), URL (the URL of the website)
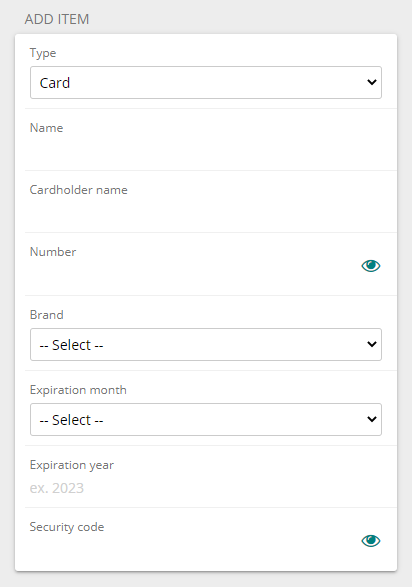
Card - Cardholder name, Number, Brand, Expiration month/year, Security code
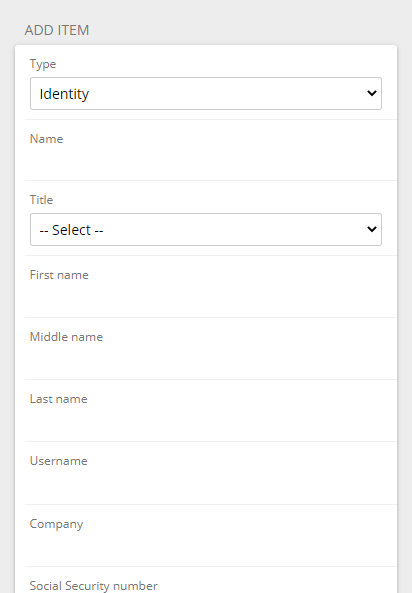
Identity - Title, First/Middle/Last name, Username, Company, SSN, Passport number, License number, Email, Phone, Address, City/Town, State/Province, Zip/Postal code, Country
Secure note - see below; use the NOTES field
Enter common item information (all types):
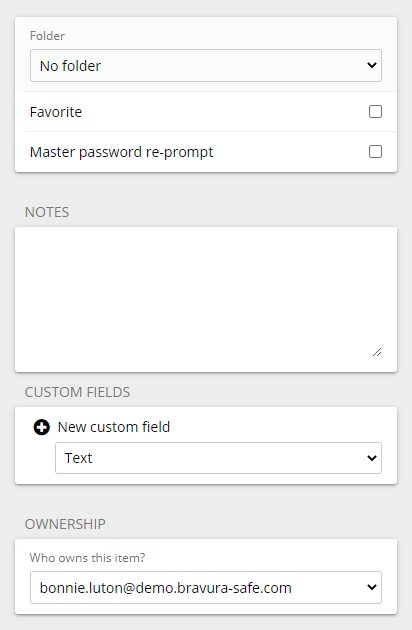
(Optional) Select an existing Folder to which you want to add the item.
Note
To add a new folder, see Create a folder. Folders are personal; seen only by you.
(Optional) To add the item to your favorites, select Favorite.
Favorites appear in the middle panel when the Favorites filter is selected.
(Optional) For extra security (requiring your master password to access or auto-fill the item), select Master password re-prompt.
Caution
The master password re-prompt is not an encryption mechanism; rather, it serves as an additional safeguard for the interface. Always lock your safe when unattended or on a shared workstation.
(Optional) Add any important NOTES to store securely with the item.
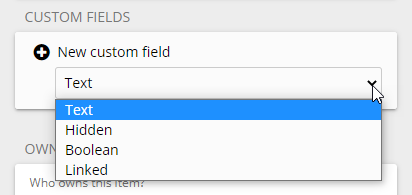
(Optional) Add CUSTOM FIELDS by selecting a field type from the drop-down, clicking + New custom field and giving the field a Name (Boolean) or Name and Value (Text, Hidden). See Custom fields for more information.
Specify OWNERSHIP of the item by selecting from the Who owns this item? drop-down.
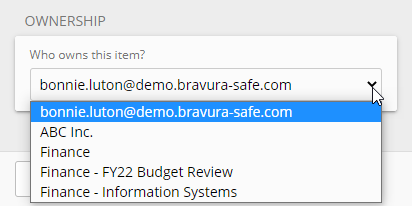
The item creator (you) is the default selection. If a Team is selected, scroll down to view and select at least one Team Collection to which you want to share the item.
Click Save to finish.
ITEM INFORMATION will appear on the right.
This topic covers the general use of the Bravura Safe Generator. To generate a new password for a specific saved login item, see Generate a stronger item password using the desktop app.
To configure settings and generate a password or passphrase:
Open the Bravura Safe desktop application.
Select View > Generator from the menu.
Alternatively, press the [Ctrl + G] keys on your keyboard.
The GENERATOR dialog appears.
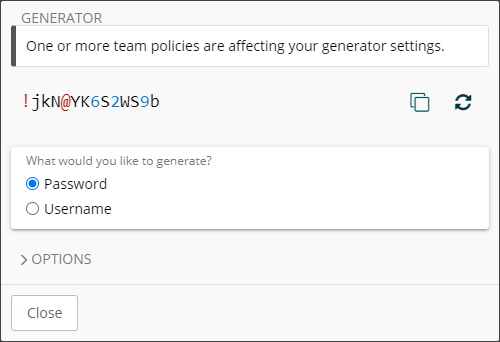
Choose Password from the What would you like to generate? options (default selection).
Note
With Password chosen, the information message at the top of the GENERATOR indicates that one or more Teams of which you are a member have a Password policy that affects the settings available under OPTIONS. Settings enforced by the Team Password policy are grayed out and cannot be modified.
Click to expand OPTIONS.
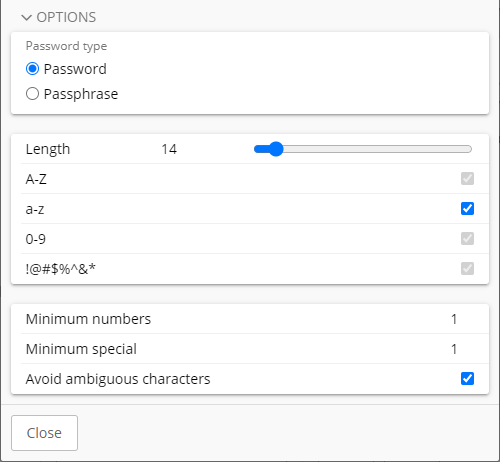
Choose Password or Passphrase for the Password type option (both sets of OPTIONS shown below).
Password options:
Passphrase options:
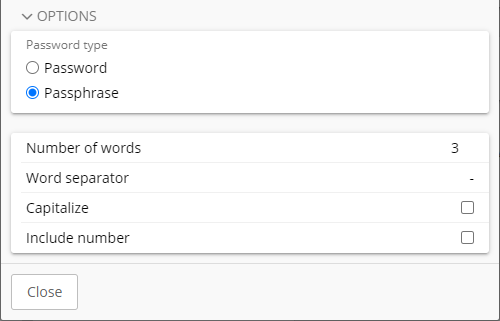
Select or enter the password or passphrase criteria as required.
The generated password/passphrase at the top of the GENERATOR updates dynamically with each change.
Click Regenerate password/passphrase
 to generate a different password/passphrase based on the selected criteria.
Click Copy
 to copy the password/passphrase to your local device clipboard.
Click Close to close the GENERATOR dialog.
See also