Auto-fill using a browser extension
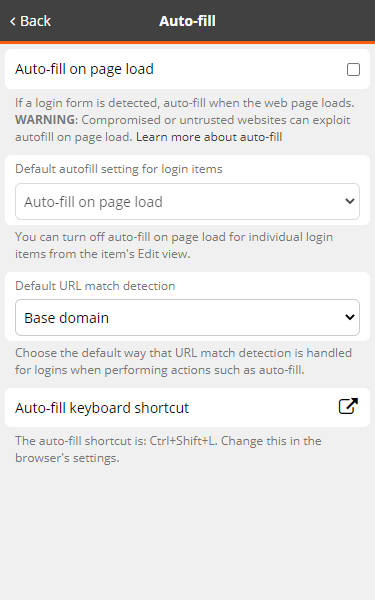
Access Auto-fill settings via Settings > Auto-fill or via Tab > Auto-fill settings. Adjust settings for:
See also
If enabled, Auto-fill on page load auto-fills login credentials when a web page matching a login item's URL loads.
Warning
This option is disabled by default as it may pose a risk; compromised or untrusted websites could use it to to steal credentials.
Bravura Safe browser extensions:
Do not allow auto-fill on page load for untrusted iframes
Warn users before auto-filling to an HTTP site when HTTPS is expected from the login item's URL
To enable auto-fill on page load:
Open a Bravura Safe browser extension.
Click Settings > Auto-fill.
Select the Auto-fill on page load checkbox.
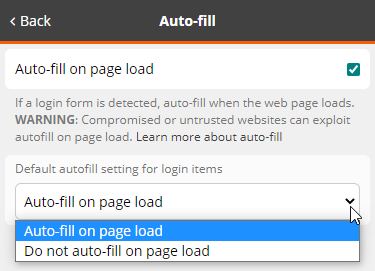
Select a Default autofill setting for login items from the drop-down.
on for all login items, OR
off for all login items
Once this feature is enabled in settings and a default is selected, you can then specify the same for each individual login. See example below:
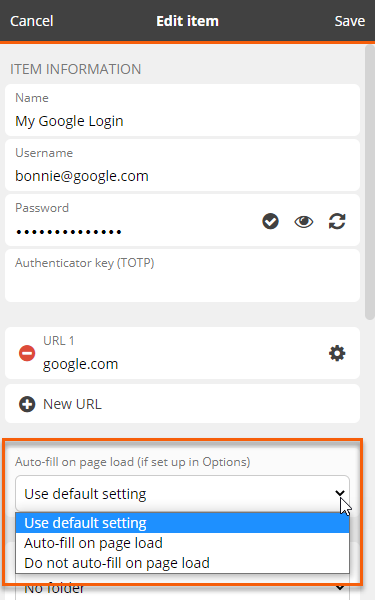
When a webpage loads with a URL that matches an existing login item, login credentials are auto-filled.
Note
If you are using the Bravura Safe authenticator and Copy TOTP automatically is enabled via Settings > Options, and the login item has an authenticator key, the verification code is copied to your clipboard at auto-fill.
Note
Your Bravura Safe administrator can activate auto-fill with page load settings on the browser extension for all existing and new members of the Enterprise Team via the Bravura Safe web interface: Teams > Enterprise Team > Settings > Policies > Activate auto-fill. However, these global settings can be overridden for a regular Team or a login item using the steps above.
These settings allow you to specify how Bravura Safe detects matching URLs for login items used during auto-fill.
Open a Bravura Safe browser extension.
Click Settings > Auto-fill.
Select an option from the Default URL match detection drop-down:
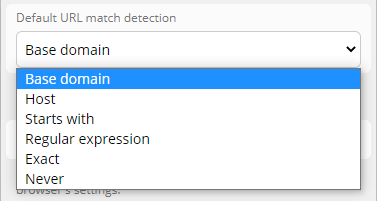
Bravura Safe will offer to auto-fill login item credentials when:
Base domain: the top-level and second-level domain of the URL matches a login item
Host: the hostname and (if specified) port of the URL matches a login item
Starts with: the URL starts with the URL of a login item (regardless of what follows)
Regular expression: the specified regular expression matches a login item
Exact: exact match to a login item
Never: auto-fill is never offered
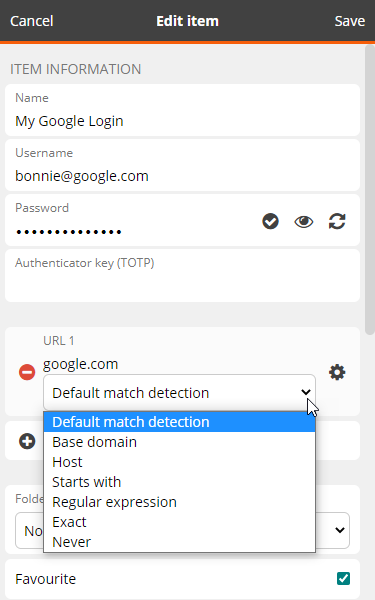
Global match detection (above) can be overridden for each login item in all Bravura Safe applications. See example below:
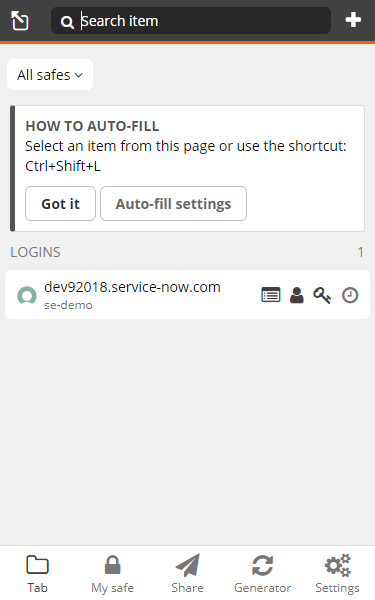
Bravura Safe's browser extension automatically detects and displays on the Tab page any login items with base URLs matching the URL of the webpage displayed in your open browser tab and displays the number of logins you have for that web page (circled below).
Tip
You can disable the badge counter feature via Settings > Options > Show badge counter. See Bravura Safe options .
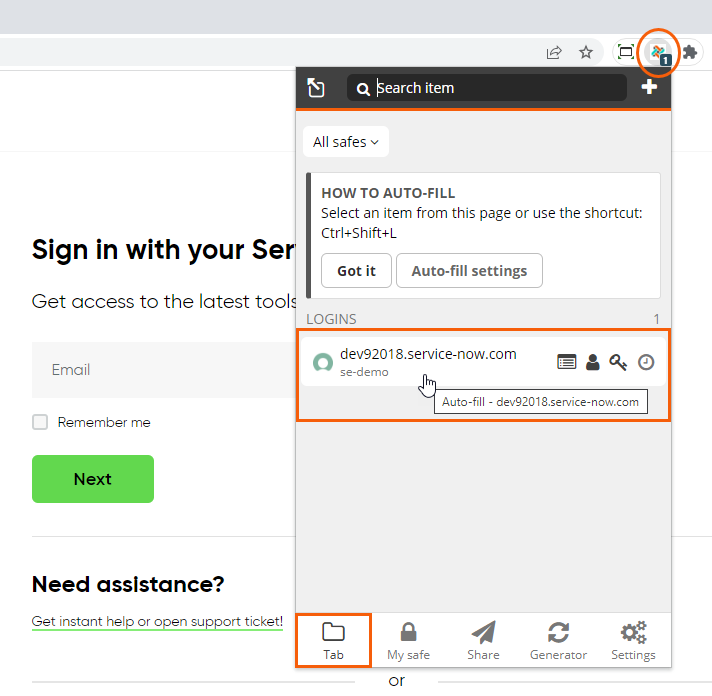
Open a Bravura Safe browser extension.
On the Tab page, under LOGINS, select the desired matching login item.
This will auto-fill the username and password to the detected input fields.
Note
If you are using the Bravura Safe authenticator and Copy TOTP automatically is enabled via Settings > Options, and the login item has an authenticator key, the verification code is copied to your clipboard at auto-fill.
Proceed with logging in to the web account.
See also
Auto-fill login via context menu
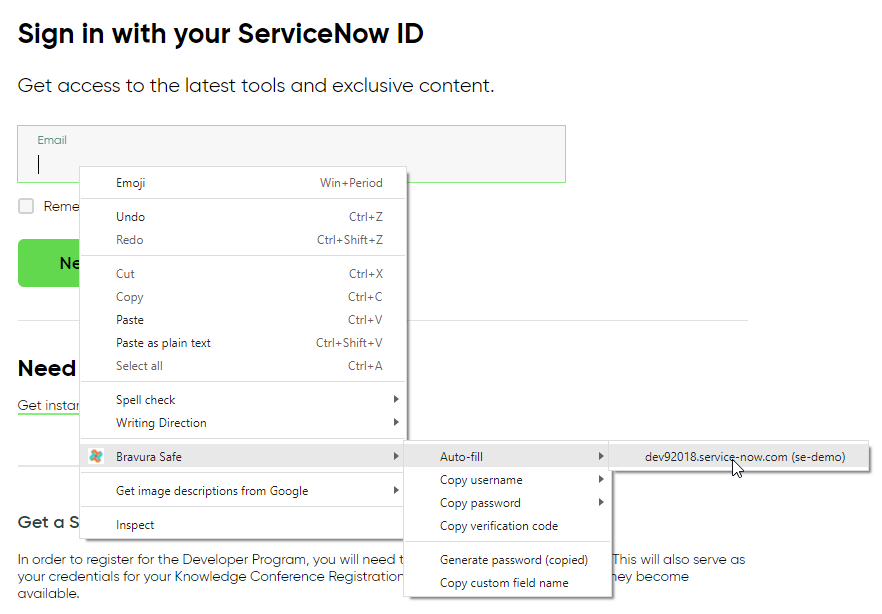
Context menu options provide quick access to matching login items for the website in your current tab. You can auto-fill without opening the Bravura Safe browser extension:
Tip
You can disable this feature via Settings > Options > Show context menu options.
Right-click on the web account username or password field.
From the context menu, select Bravura Safe > Auto-fill.
Select the desired login item matching the current webpage's base URL.
If your safe is unlocked, the browser extension will automatically auto-fill your credentials.
If your safe is locked, an Auto-fill option will prompt you to unlock:

Select Unlock your safe.
Bravura Safe will open in a new browser tab.
Unlock as desired.
Once unlocked, the browser extension will automatically auto-fill your credentials.
Note
If you are using the Bravura Safe authenticator and Copy TOTP automatically is enabled via Settings > Options, and the login item has an authenticator key, the verification code is copied to your clipboard at auto-fill.
In your browser, navigate to the desired web account sign-in page.
Open the Bravura Safe browser extension.
Click My safe.
Under TYPES, select Login.
Locate and select the desired login item.
The View item page appears.
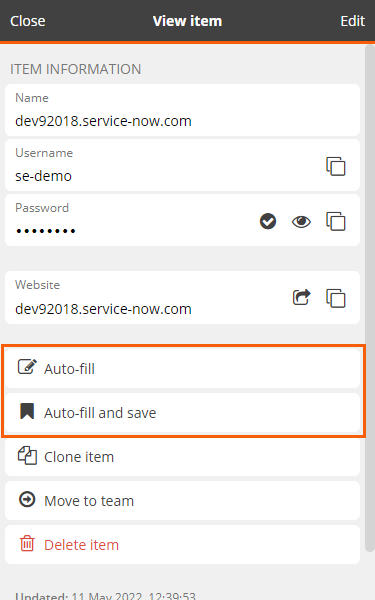
To auto-fill the existing credentials to the web account, click Auto-fill.
OR
To auto-fill the existing credentials AND save the current URL to the login item (so you do not have to manually auto-fill next time), click Auto-fill and save.
This auto-fills your username and password to the detected input fields.
Note
If you are using the Bravura Safe authenticator and Copy TOTP automatically is enabled via Settings > Options, and the login item has an authenticator key, the verification code is copied to your clipboard at auto-fill.
The Bravura Safe browser extension provides keyboard shortcuts (hot keys) to auto-fill login information.
Use the following default shortcuts to auto-fill login information:
On Windows: Ctrl + Shift + L
On macOS: Cmd + Shift + L
On Linux: Ctrl + Shift + L
If there are multiple login items with the detected URL:
The last-used login will be auto-filled
Repeat the keyboard shortcut to cycle through multiple login items
If your Bravura Safe is locked when you attempt this, a new tab will open prompting you to unlock.
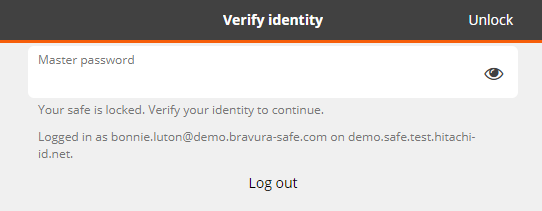
Once unlocked, the browser extension will automatically auto-fill your credentials to the login fields on the active tab.
Note
If you are using the Bravura Safe authenticator and Copy TOTP automatically is enabled via Settings > Options, and the login item has an authenticator key, the verification code is copied to your clipboard at auto-fill.
If a shortcut does not work
Another application on your device likely has it registered for use. Free up the shortcut or configure Bravura Safe's browser extension to use a different shortcut:
Tip
Click Settings > Auto-fill > Auto-fill keyboard shortcut to see the current shortcut and to quickly access and change your browser's shortcut key settings.
Note
Some browsers, including Safari and legacy Edge do not currently support changing the default keyboard shortcuts for extensions.
For Chrome, enter
chrome://extensions/shortcutsin the address bar.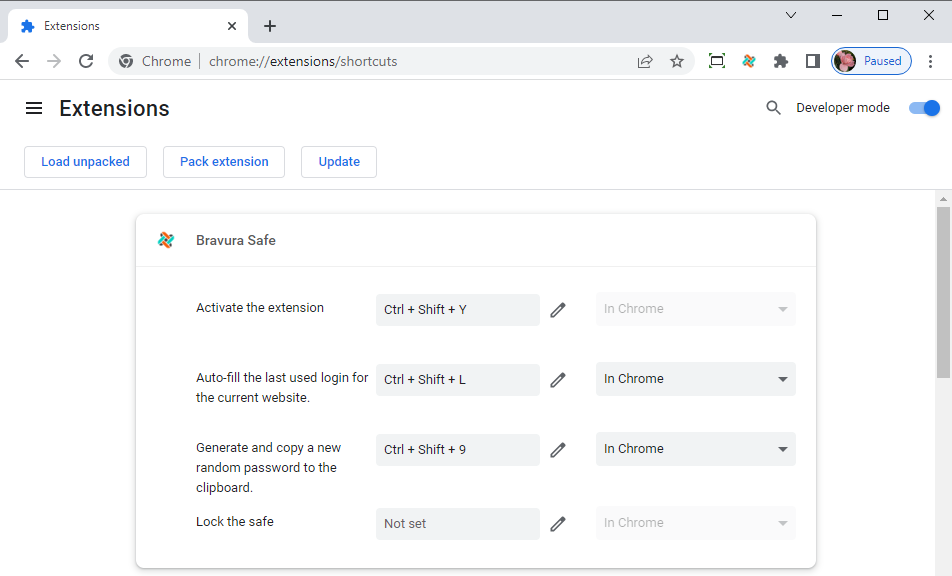
Note
For Chromium-based browsers like Brave, replace "chrome" with the relevant browser name (e.g. brave://extensions/shortcuts).
For Firefox, enter
about:addonsin the address bar, select the Gear icon next to Manage Your Extensions, and select Manage Extension Shortcuts from the drop-down.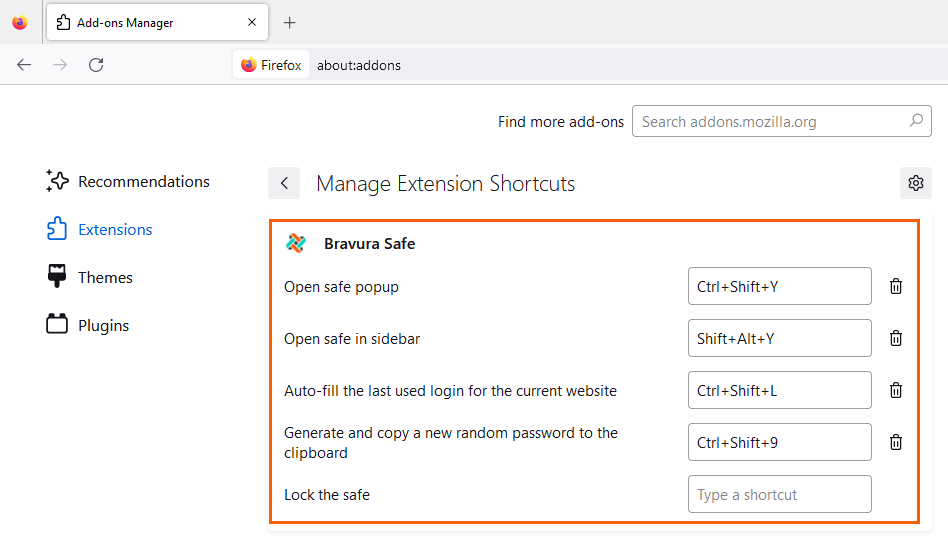
Perhaps you have multiple login items with similar matching URLs and you want to view item details before auto-filling.
To do this:
Click the Bravura Safe browser extension icon.
The Tab page appears, showing all login items matching the current webpage URL.
Locate the login item for which you want to view details.
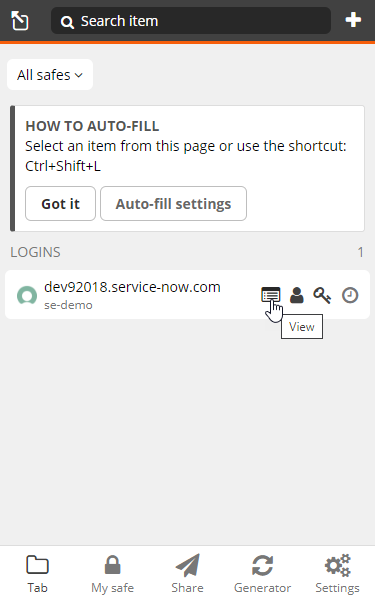
Click the View
 icon.
icon.The View item page appears, showing login item details and available actions.
To edit the item before auto-filling, click Edit at top right.
To auto-fill the login item from the View item page, click Auto-fill.
OR
Click Close to return to the Tab page and then select the item to auto-fill.