Manual onboarding
Tip
Configure Team Policies prior to inviting users to ensure compliance on entrance to your Team.
Users with the same enterprise role and optionally collections access can be manually invited to your Enterprise Team through a comma-separated list of emails up to 20 at a time. General users are subject to the invite > accept > confirm process when onboarded by email to an Enterprise Team and when added to each regular Team.
During onboarding, user Groups are not typically created/populated or required for the Enterprise Team. They are used in regular Teams to grant multiple, related members the same permissions to access collections of items. Since the Enterprise Team only shares very limited items with all users, often via the default collection alone, user groups are not required to manage access.
User rights can be tailored so that general users are given, for example, only "Can view" access to the Enterprise Team. This prevents general users from accidentally modifying records meant for all staff. It also prevents them from accidentally adding passwords and secrets to the Enterprise Team, as those sensitive items have the potential to become available to all employees.
User experience
Manually add Enterprise Team members
Invite users
Note
This task can be performed by a Team owner/admin.
To invite users to your Team:
Log in to Bravura Safe via the web interface.
Click Teams.
From the Team drop-down, select the Team to which you want to invite a user.
Click the Members tab.
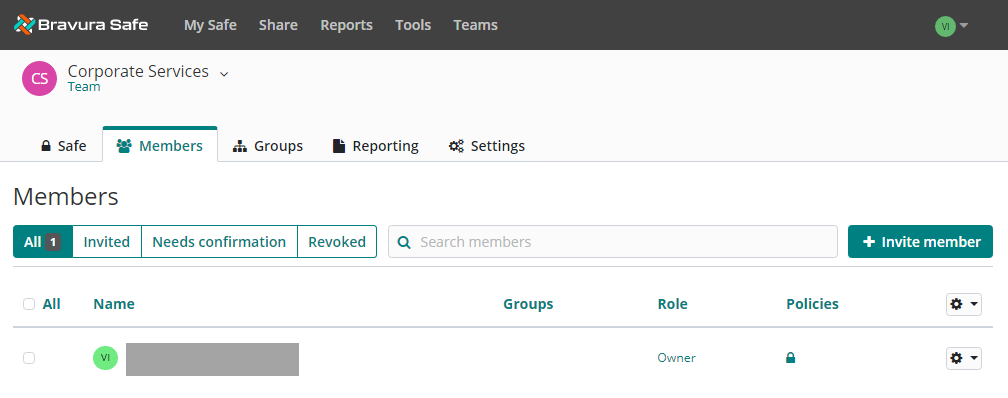
Click + Invite member.
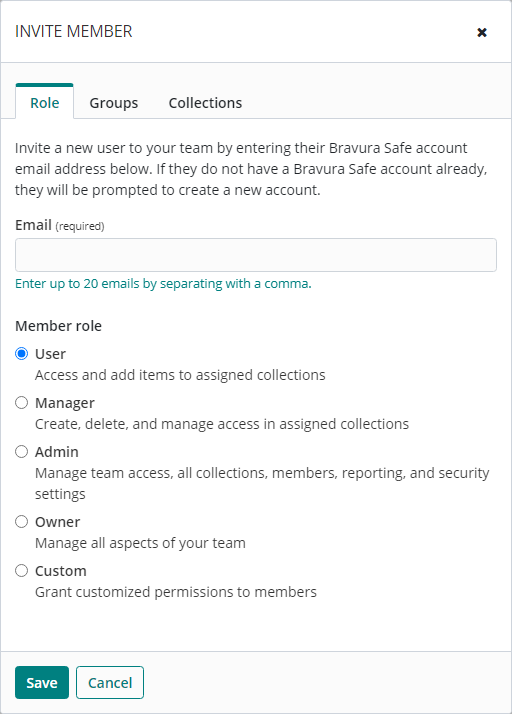
Enter the Email address where new users should receive invites.
Tip
Add up to 20 users at a time with the same Member role (below) by comma-separating email addresses.
Select the Member role to be applied to the new user(s). See Roles.
Click the Groups tab.
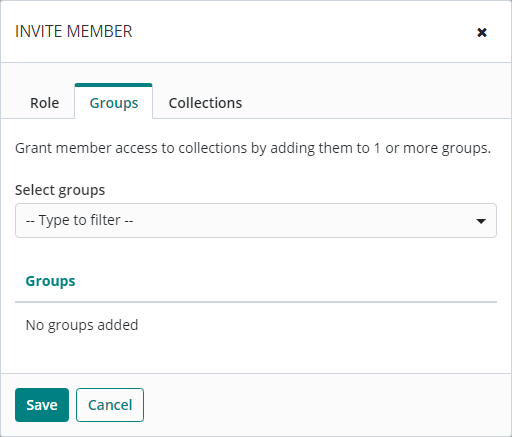
From the Select groups drop-down, select the groups to which the member should belong.
Selected groups will appear listed under Groups.
Click the Collections tab.
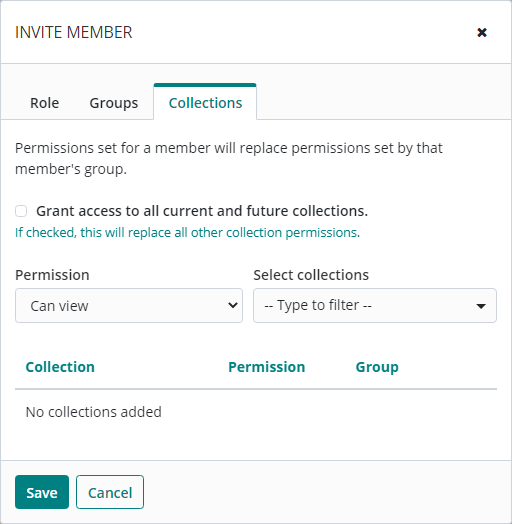
If desired, select Grant access to all current and future collections [for this Team only].
OR
From the Select collections drop-down, select a collection to which this member should have access.
From the Permission drop-down, select the corresponding permission for the collection. See Permissions.
Repeat steps 12. and 13. until all collections are added for the member.
Collections will appear listed under Collection/Permission/Group.
Click Save to invite the user to the selected Team.
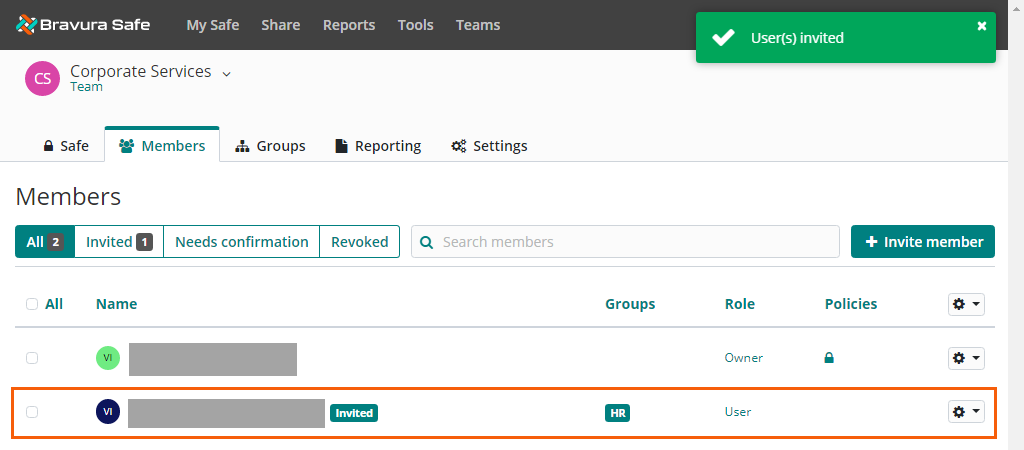
The user will receive an email invitation allowing them to join the Team. Once they have accepted the invitation by clicking Join Team Now and creating and/or logging in to their Bravura Safe account, you will then have to confirm their membership before they can access the Team and its collections and items.
See
How users accept an invitation and join a Team
Confirm users
Once a user has accepted an invitation to join a Team, the Team's admin or owner must confirm their membership to complete the process. An email notification is generated.

To confirm accepted invitations:
Log in to Bravura Safe via the web interface.
Click Teams and select your team from the Team drop-down.
Click the Members tab.
The All filter at the top of the Members list is selected by default.
Users with the
Needs confirmationlabel next to their name have accepted your invitation to the Team and are waiting for you to confirm their membership.Users with the
Invitedlabel next to their name need to accept the invitation to the Team.Users with the
Revokedlabel next to their name still have a Bravura Safe account, but their access to the Team has been revoked. These users can only be viewed by selecting the Revoked filter.Users with no label next to their name are confirmed members of the Team.
Click the Needs confirmation filter.
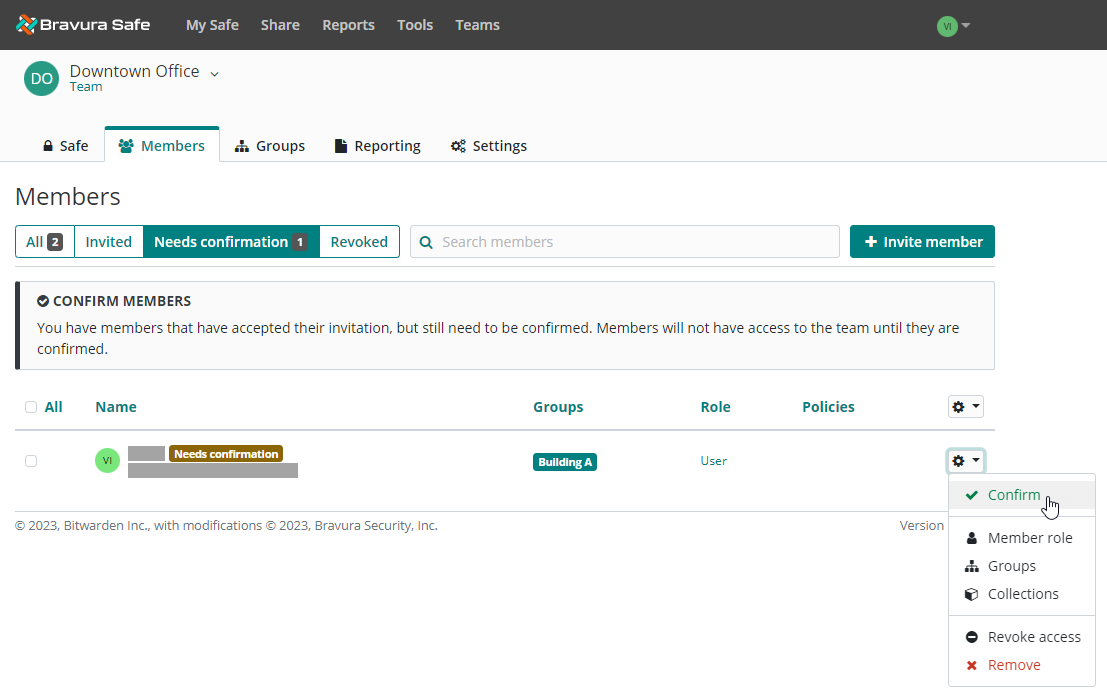
Click the corresponding gear drop-down and select Confirm.
To confirm multiple members at once, select their checkboxes (or select All at the top), click the uppermost gear drop-down and select Confirm.
A message appears indicating that the user has been confirmed and the Needs confirmation label disappears from their name in the list. The member(s) can now access the Team, collections, and items using the permissions specified when they were invited.