Managing components
The following sections show you how to list, add, install, disable, and remove components.
Viewing components
When you install Bravura Security Fabric , the default components are automatically added to the <instance>\component\default \ directory.
You can manage components using a web interface via Manage components. No setup is required.
Alternatively, you can manage components from the command line using the manage_components.py script located in <Program Files path>\Bravura Security\Bravura Security Fabric\<instance>\ util\. See Managing components from the command line for details.
Loading components
Whenever components are added to the component folder, you must reload the list of available components. It is best practice to do this before you start managing components.
To load the list of available components from the module, click Reload DB.
Bravura Security Fabric displays status messages once loading is complete.

If any components fail to be loaded, the failure will be reported in detail in the idmsuite log file.
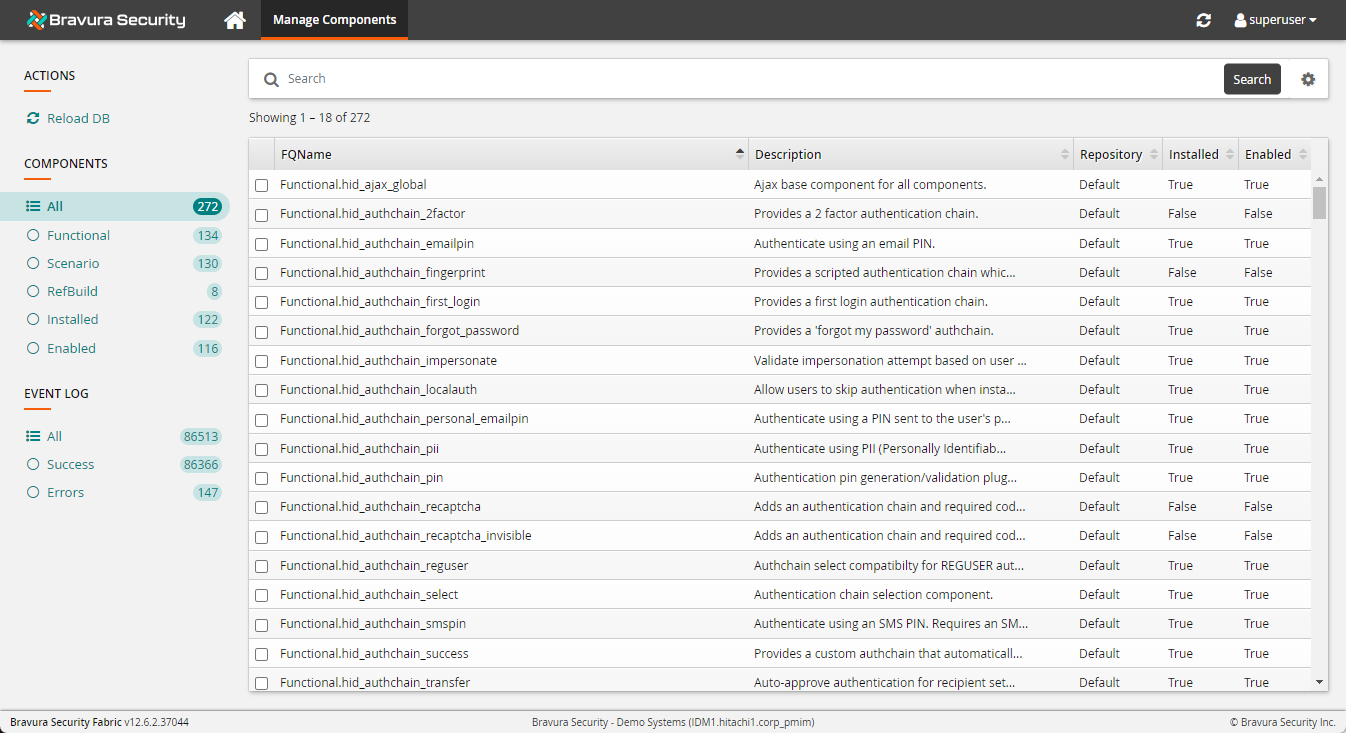
Listing components
Before installing components, review what is already installed and available.
Click on a component to view a description, as well as its extensions, dependencies, and conflicts (where applicable).
You can search by name, click on the advanced search icon  , or click on one of the side categories to filter components by type.
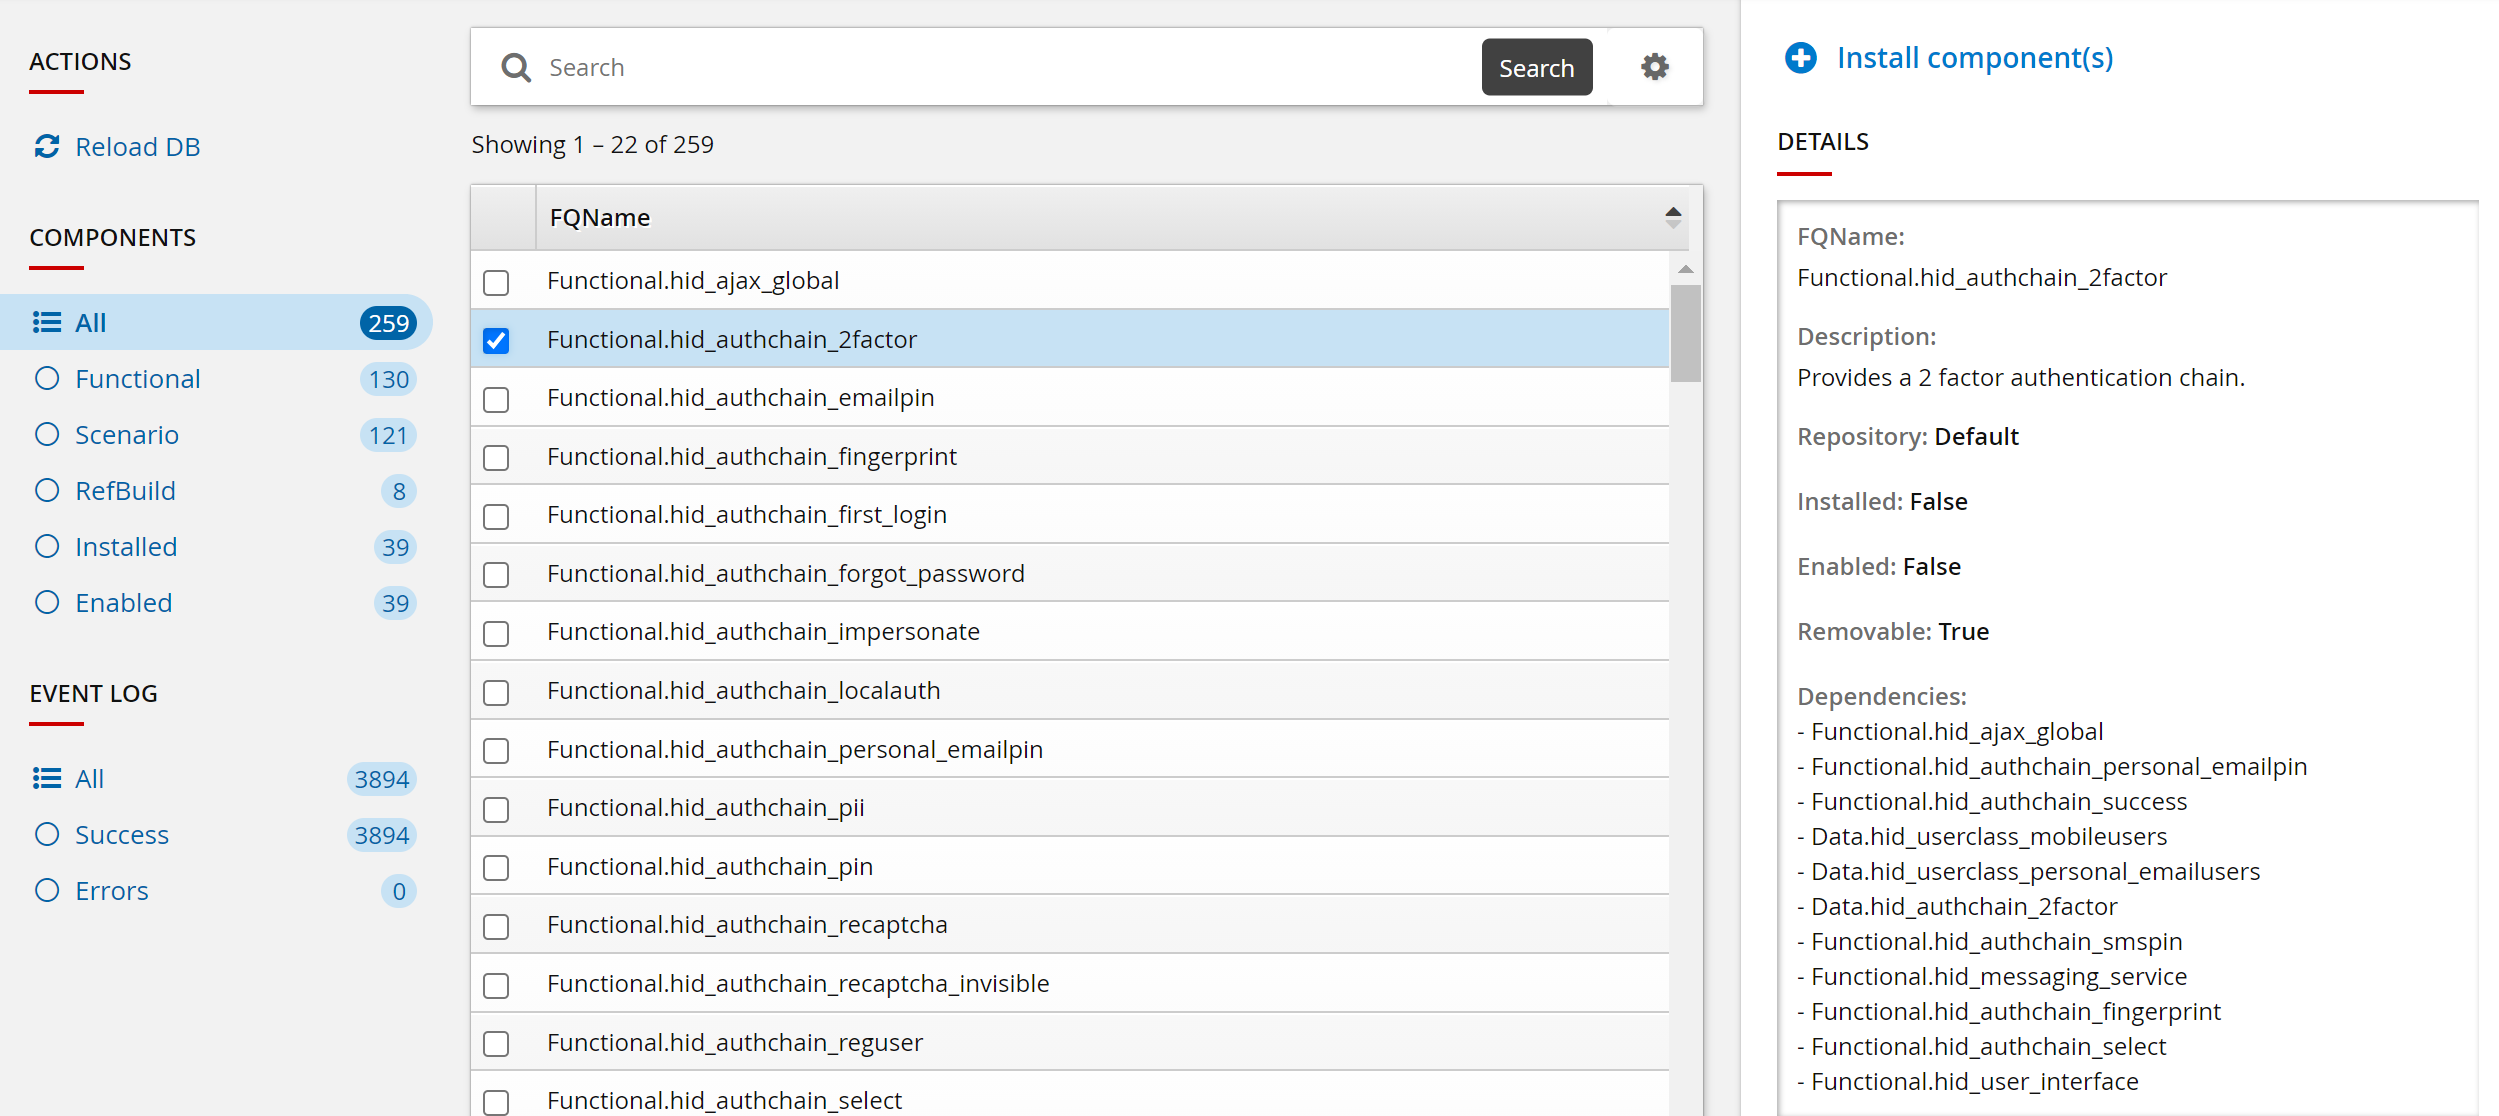
Viewing component details
For each component listed in Bravura Security Fabric , you can view a brief description, as well as a list of the component’s dependencies and conflicts, in the component UI.
Information can also be viewed in the manifest file for the component. The manifest file is an XML file containing installation information for the component. A manifest file may include any or all of the following tags:
< description > - A brief description of the component
< removable > - A boolean value that determines if the component may be uninstalled. If False, the component may only be disabled, not removed.
< version > - The component version number
< priority > - An integer that controls the order in which the component is installed. Components with a smaller priority number are installed before those with larger priority numbers
< depends > - Dependencies of the component, which are other components that contain configuration required by this component to function.
< python_depends > - Python packages required by this component. The installation of the component will fail if any required package is missing.
< configdata > - Files containing configuration information for the component.
< extension > - Script hooks or plugin points that this component contains scripts to hook into.
Installing components
Click below to view a demonstration of viewing components and component details using the Manage components app and then installing the Functional.hid_policy_wfemail component.
To install components:
List components as described in Listing components.
Select the checkbox next to one or more component names.
Click Install component(s) in the right panel, and confirm the action.
The component management program installs the components along with any dependencies. This may take some time depending on configuration requirements and dependencies. You should see ”Completed install for component” messages for each selected component in the Task Status panel.
When you install a component, the component management program creates the database tables, framework, and configurations that are necessary for the plugin points to function. Additional in-product configuration may still be required to properly run the scenarios.
Upgrading components
You can upgrade components by replacing the manifest file, with an incremented version, and any relevant Python code in the component directory. If a folder titled upgrade exists in the component directory, relevant code from this directory will be run to upgrade the component to the newest version.
For example, if your Bravura Security Fabric deployment is currently running a component version 1.0.0, and you upgrade to version 2.0.0, the upgrade process will detect the existence of a file called 1_0_0to2_0_0.py in the upgrade folder (if it exists) and run the relevant script inside. These scripts will often be used to upgrade the database schema which the component relies on, or make other changes to the system that the newest version of the component requires.
To trigger the upgrade process, you must reload the components, so that the updated manifest file can be processed, as described in Loading components.
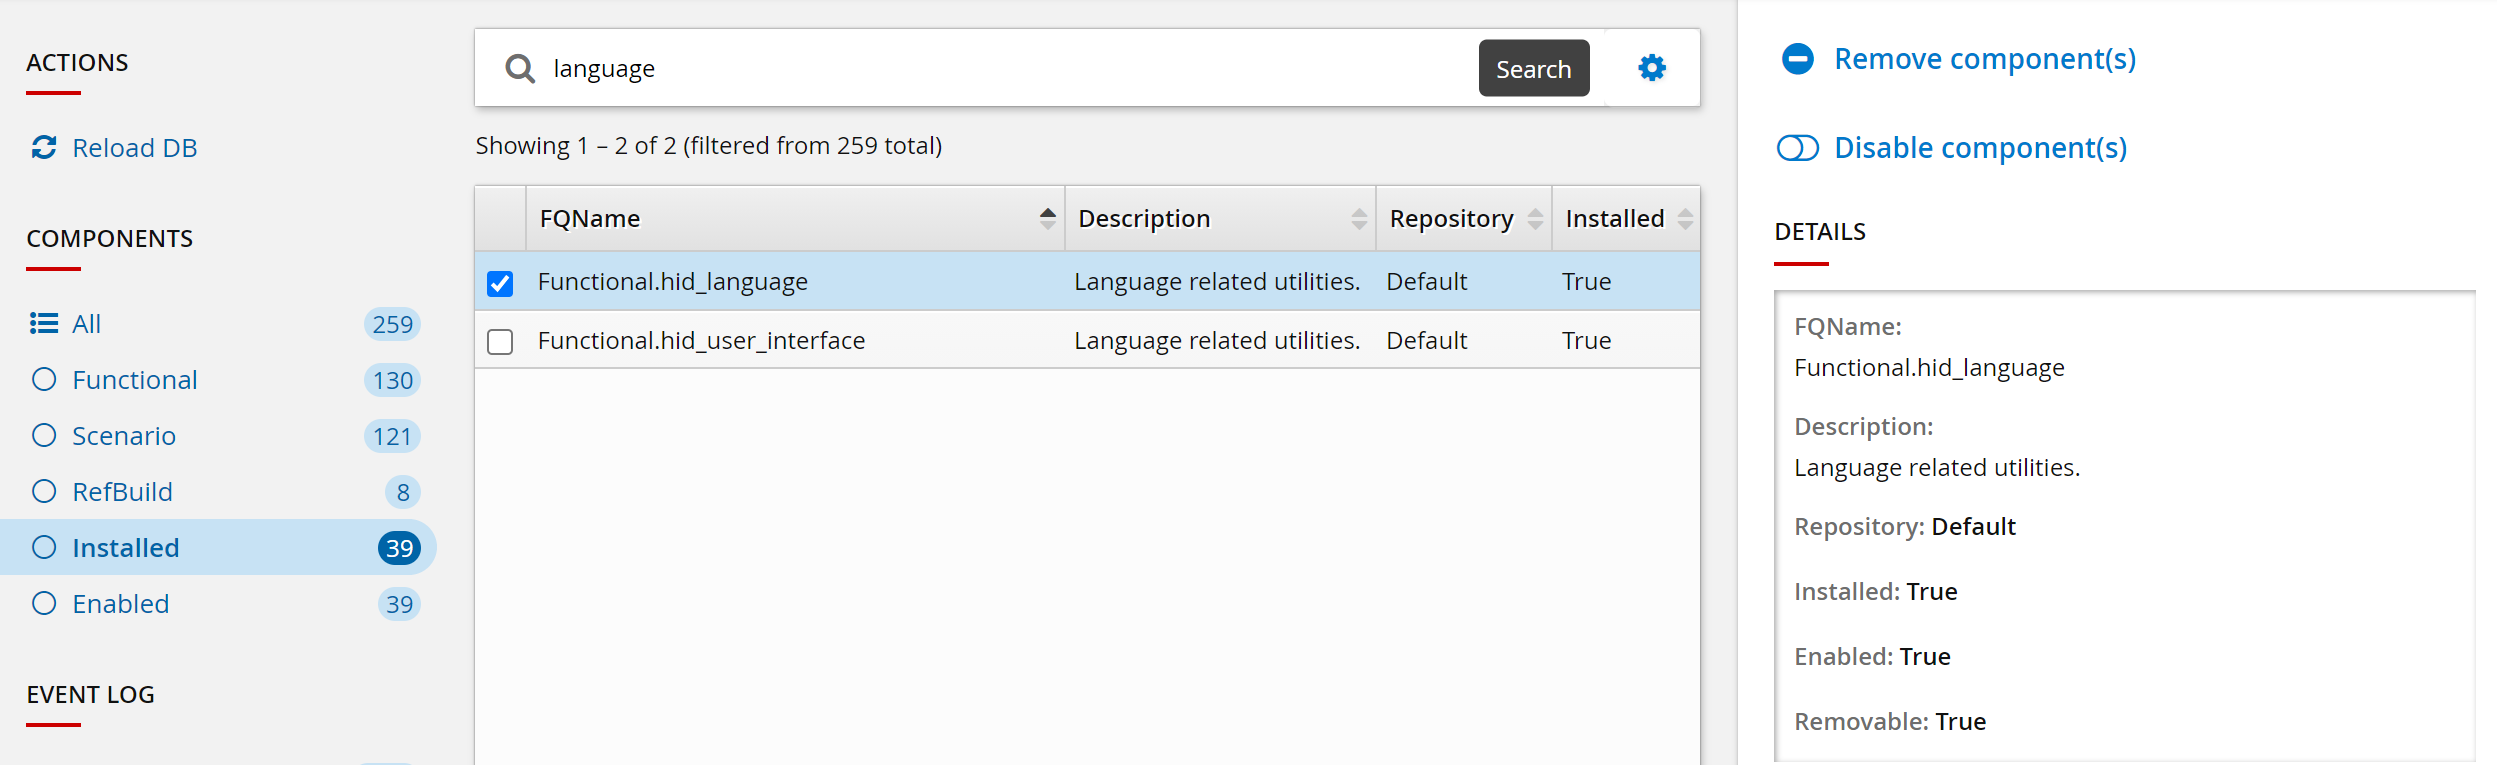
Removing and disabling components
If you want to stop using a component, you can remove or disable it, depending on the component and your needs.
Removing components
Removing a component removes its configuration and prevents any associated scripted logic from executing when the plugin points run their processes.
Components can only be removed if they have the removable flag in their manifest.xml file set to ”true”:
<removable>true</removable>
If you try to remove a component that does not have this flag set to ”true” in its manifest.xml file, the component management program will report an error indicating that the component cannot be removed. If this is the case you can disable the component instead.
The component management program also reports an error if you attempt to remove a component that depends on another component.
To remove a component:
List components as described in Listing components.
Select the checkbox next to one or more component names.

Click Remove component(s) in the right panel.
The component management program removes the components along with its dependencies. This may take some time depending on configuration requirements and dependencies. You should see ”Completed remove for component” messages for each selected component in the Task Status panel.
Disabling components
Disabling a component prevents any scripts associated with that from executing. If you cannot remove a component, it is recommended that you disable the component instead.
Take care when disabling dependency components; other installed components may also rely on them.
To disable a component:
List components as described in Listing components.
Select the checkbox next to one or more component names.
Click Disable component(s) in the right panel.
The component management program removes the components along with its dependencies. This may take some time depending on configuration requirements and dependencies. You should see ”Completed disable for component” messages for each selected component in the Task Status panel.
Creating custom components
Bravura Security Fabric administrators with sufficient Python knowledge may create custom components, either by copying an existing default component or by creating an entirely new component from scratch.
All components and their dependencies exist in <instance>\component\Default. If changes need to be made:
Rules can be changed or added after installation in the
extdbtable. This must be done manually in each environment (DEV, QA, PROD) and must be backed up manually as well.Place custom components in the <instance>\component\Custom\ directory to ensure that they are loaded properly and not overwritten during an upgrade.
In the data subdirectory of the Custom Scenario, change the CSV to have the modified/added rules.
Ensure the Custom Scenario directory is in the new environment. When the component is installed, the modified rules will be installed in the table.
The same method can be used with json instead of csv, to change the data used by the scenarios. Most commonly, adding cell providers’ email-to-text gateways for the smspin_email scenario.
The same method can be used to customize the behavior of the chain, by customizing the functional component.
Managing components from the command line
This section shows you how to manage components from the command line using the manage_components.py script.
Setting up the component management command-line program
The component management program (manage_components.py) is a Python executable script located in the <Program Files path>\Bravura Security\Bravura Security Fabric\<instance>\ script\ directory. To run it from the command line, you may need to configure a number of environment variables:
Launch a command prompt as an Administrator and navigate to the <Program Files path>\Bravura Security\Bravura Security Fabric\<instance>\ directory.
Run the command:
instance.bat
Navigate to the script directory.
You should now be able to run the component management program. Ensure that you always run it as an Administrator.
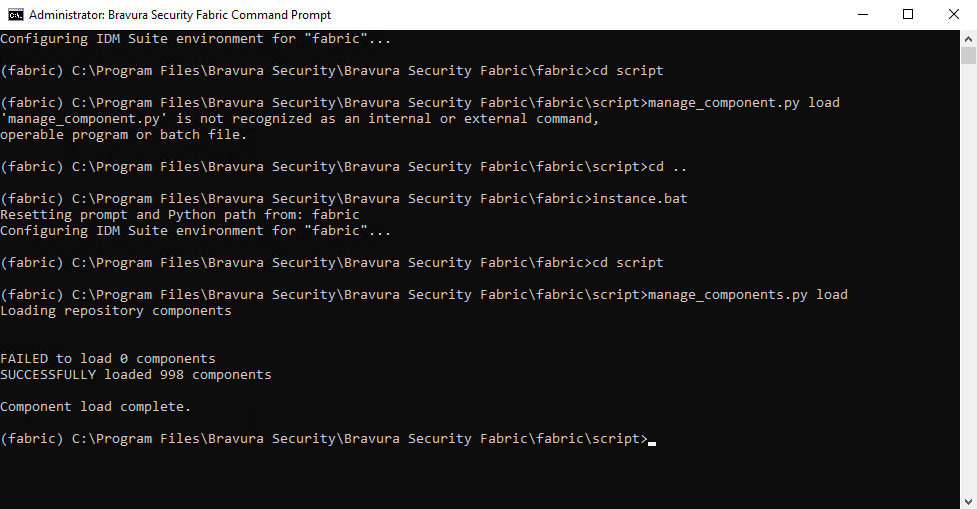
Loading from the command line
To load the list of available components from the command line:
Launch a command prompt as an Administrator and navigate to the script directory, as described in Setting up the component management command-line program .
Run the command:
manage_components.py load
Listing from the command line
To list all components from the command line:
Launch a command prompt as an Administrator and navigate to the script directory, as described in Setting up the component management command-line program.
Run the command:
manage_components.py list all
Navigate through the list using space and - keys.
You should see a list of all the components available to you with a status marker to the left of the name.
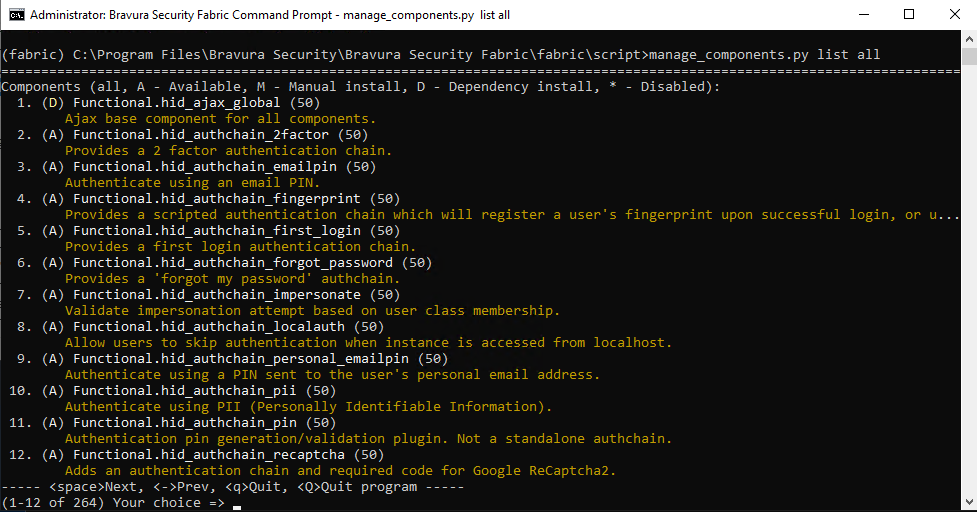
To filter the list, type any part of the component name or description; for example, type wizard to list only components whose names include the string wizard.
The status markers have the following meaning:
| Available |
| Manual install |
| Dependency install |
| Disabled |
Installing from the command line
Unlike using the web interface, using the manage_components.py script from the command line allows you to install data components, such as a component that contains data for a profile attribute.
Click below to view a demonstration.
To install a component from the command line:
Launch a command prompt as an Administrator and navigate to the script directory, as described in Setting up the component management command-line program .
List components as described in Listing from the command line .
You can shorten the list by typing part of the component name to search for.
Type the number of the component you want to install.
Type:
install
The component management program installs the component along with its dependencies. You should see its status change to an
Mon the listing page.
Alternatively, if you know the name of the component, you can type the command:
manage_components.py install <component_name>
Removing from the command line
Components can only be removed if they have the removable flag in their manifest.xml file set to ”true”.
To remove a component from the command line:
Launch a command prompt as an Administrator and navigate to the script directory, as described in Setting up the component management command-line program .
List components as described in Listing from the command line .
Type the number of the component you want to remove.
Type:
remove
Alternatively, if you know the name of the component, you can type the command:
manage_components.py remove <component_name>
Only the specified component will be removed. You must remove each of its dependencies individually. Components that were installed as a result of being a dependency will have a status of D.
Enabling or disabling from the command line
Disabling a component prevents any scripts associated with that from executing. If you cannot remove a component, it is recommended that you disable the component instead.
Take care when disabling dependency components; other installed components may also rely on them.
To enable or disable a component from the command line:
Launch a command prompt as an Administrator and navigate to the script directory, as described in Setting up the component management command-line program .
List components as described in Listing from the command line .
Type the number of the component you want to enable or disable.
To enable a component type:
enable
or
To disable a component type:
disable
Working on multiple components at the same time
The install, remove, enable, disable options can take a list of components; for example:
manage_components.py install <component_name_1> ... <component_name_n>
The above command attempts to perform the install action on all components listed in the command. If an action fails, manage_components.py outputs an error message but continues to the next item.
Additional information
One advantage of using the manage_component.py program to manage components is that it allows the installation of Data components; for instance, a profile attribute:
manage_components.py install Data.hid_attribute_personal_email
When working with custom components, it is often required to refresh the component database; for instance, after creating a new component:
manage_components.py load
If installed components contain a UI element, you can use the --patch parameter with manage_components.py to reload the component database and rebuild the skins simultaneously.
manage_components.py load --patch
Replicated instances and component installation
Component install does not replicate in a multi-node instance. In such cases, where a component has to install something on the server outside the product instance directory (for example, a service or a Python module), it is recommended to complete the following steps:
On the Primary node, disable the Task Scheduler> Library> HID External database replicator task.
Run
manage_components.pyon every node and ensure it was successful.Enable the task disabled in step 1 above.
Troubleshooting
"manage_components.py list all" command isn’t working
If the command is continuously returning the help message and not executing the ”list all” option then try running the command preceded by ”python”:
python manage_components.py list all
If the command prompt is not returning any component list try loading the components first with the command:
manage_components.py load
RuntimeError: Attempted to load a 64bit idmlib.dll
When you are listing or installing components you may run into this error:
RuntimeError: Attempted to load a 64bit idmlib.dll using a 32bit Python interpreter. Try again using a 64bit Python interpreter.
This occurs if you installed Python 3 earlier in order to install Bravura Security Fabric on your server (Earlier versions of Bravura Security Fabric downloaded and installed the 32-bit version of Python by default). To fix this, visit https://www.python.org/downloads/ and find the 64-bit version of the latest Python 3 release. Once you download and install it, replacing your 32-bit Python files, try running the component commands again.
Install operation failure
Sometimes, during component install, if something causes the install script to fail, the framework automation may still report success and mark the component as "installed" even though it or some of its dependencies were not successful.
If the "install" operation fails or there are Traceback entries in idmsuite.log from manage_components.py or component __init__.py scripts:
Edit the instance's db\components.db with a sqlite3 client like SqliteStudio .
Search the Data of the components table for the name of the failed component(s).
If they are marked "installed"='1', flip that flag to 0 (zero) and save the database.
Close the sqlite3 editor.
Solve the erroneous situation that failed a script (data, environment config, permissions, etc).
Run the install operation again on the failed component.
Search for Traceback errors in
idmsuite.logor another integration failure.Test component functionality in the product or integration.
Workaround for dealing with UTF-8 BOM encoding
Issue
When a file is opened in Python it may either contain invisible characters (reading as text), have a bad/unexpected name for the first column (reading as CSV), or fail to parse (reading as JSON).
Solution
It is likely that the file you are reading was encoded as a variant of UTF-8 that Python refers to as UTF-8-SIG but is also known as UTF-8-BOM or UTF-8 with BOM. This causes the file to have a leading set of non-printing characters (the Byte Order Mark or BOM), and Python’s default utf-8 encoding will not strip out these leading characters. It is possible to have these files read correctly in Python by setting the encoding to utf-8-sig when opening the file handle in Python, but it is recommended that you instead fix the file encoding. The UTF-8 BOM is a Windows only feature that Microsoft themselves are slowly deprecating. If you have files encoded in UTF-8-BOM they likely came from an older version of Windows, commonly created with either Windows Notepad or Powershell.
Windows Notepad prior to Windows 10 1903 (and up to windows server 2016), Notepad defaults to ANSI encoding and only has a single UTF-8 encoding, which emits a BOM. In Windows 10 1903+ (and equivalent Windows Server versions), Windows Notepad now defaults to UTF-8 encoding and distinguishes between UTF-8 and UTF-8 with BOM, using Save As you can change the encoding to UTF-8 to strip out the BOM if a file was previously encoded using UTF-8 with BOM.
Powershell below version 6 will always emit UTF-8 encoded text output with a BOM. In Powershell 6+ direct text output should have no BOM automatically, but for other output it’s not so simple, details (and potential workarounds for Powershell 5.1+) here .
If you are still on an older windows version, almost any third party text editor should be able to re-save the file without the BOM, but you may need to manually change the encoding.
Exporting component configuration and data
You can migrate component configuration and data using the following methods:
Replacing an instance’s configuration using environment files
Migrating using export_data_components.py
This is supported only for components from the same major+minor release.
See Migrating component configuration and data for details.