Defining role authorization
Define authorization information for roles to:
Set the number of approvals or denials required for requests involving the role.
Assign static authorizers to define who can approve requests based on the role.
Users must be loaded into the Bravura Security Fabric database before you can define them as authorizers.
You must assign enough authorizers to meet the minimum number of authorizers requirement. If you do not do this, requests involving the resource are automatically denied unless authorizers are assigned by a workflow plug-in.
Configuring phased authorization
If phased authorization is enabled, click the Authorization tab, then:
Click Add new… if you want to add a phase.
To change the order of phases, change the numbers in the Authorization phase column and click Update.
Select a phase to define authorizers and settings.
Parallel Authorization
A parallel authorization process is one where multiple authorizers are invited to comment concurrently – i.e., the identity management system does not wait for one authorizer to respond before inviting the next.
Parallel authorization has the advantage of completing more quickly, as the time required to finish an authorization process is the single longest response time, rather than the sum of all response times.
Click below to view a demonstration of creating a LINUX-APPROVERS user class to be used as a secondary set of authorizers for parallel authorization.
Click below to view a demonstration including the following steps:
Enabling parallel authorization in Bravura Privilege
Configuring parallel authorization for a managed system policy
Adding rules to the authorization
extdbtable to include a secondary authorizer user classModifying rule actions in the team management
extdbtableRequesting to check out an account, viewing authorizers and approving the request
Determining number of required approvals
To set authorization thresholds for a role:
Navigate to the Role information page .
Select the Authorization tab.
Select a phase if phased authorization is enabled.
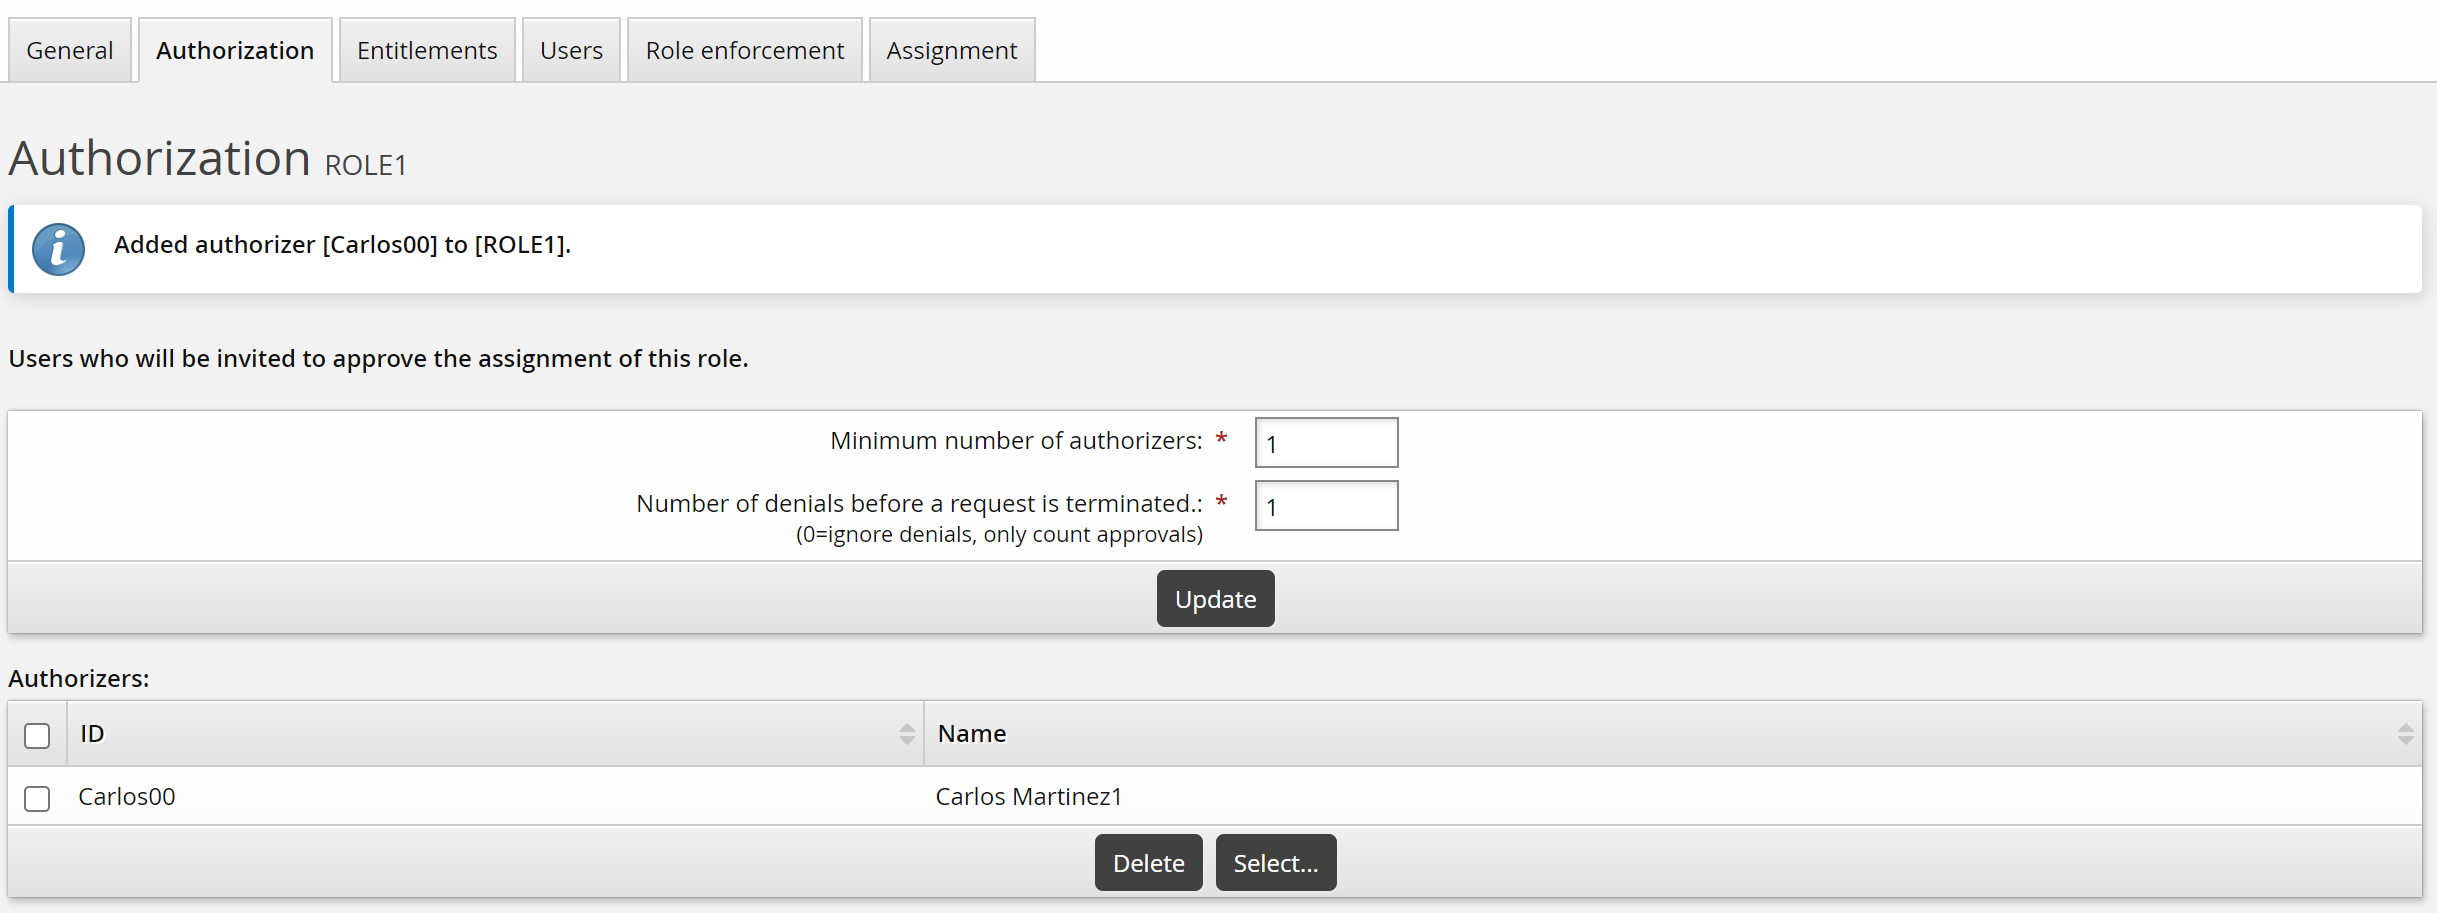
Type a value for the:
Minimum number of authorizers – A value of 0 means requests for the resource are auto-approved.
The default value is set by the MIN AUTHORIZERS policy.
Number of denials before a change request is terminated – A resource request is canceled when this number of authorizers deny it, as long as the Minimum number of authorizers has not been reached.
The default value is set by the MAX REJECTIONS policy.
Click Update.
Assigning static authorizers
To assign static authorizers to a role:
Navigate to the Role information page .
Select the Authorization tab.
Select a phase if phased authorization is enabled.
Click Select… at the bottom of the Authorizers table.
Search for, or enable the checkboxes next to the authorizers that you want to assign.
Click Select at the bottom of the page.
Note the following:
When a request is submitted to add or remove a role, the request must also be approved by each of the authorizers configured for each of the role’s required resource entitlements.
If any of the role’s required resources, such as a template or group membership request, is denied by an authorizer, the entire role is denied.
A role is only provisioned to the user when all of the required resources have been successfully provisioned.
The Denial blocks entire request flag should be unchecked for the authorizers if the role is only to be denied when optional resources are denied, otherwise the entire role could be denied if an authorizer is only intending to deny an optional resource.
Assigning authorizers by user class
To assign authorizers to a role based on user class:
Navigate to the Role information page .
Select the Authorization tab.
To define membership criteria:
Select existing user classes: Click Select… and enable the checkboxes for the user classes you want to add, then click Select.
Create new user classes: Click
 Add new…. See Adding user classes for full details on how to create a new user class.
Configure Participant mapping for each user class that you add.
Select and create user classes until you have defined membership.
If your membership criteria includes multiple user classes, define whether users are required to match All of the user classes or Any of the user classes .
Removing users from membership
To remove users from membership, you can:
Edit user classes to change the participants.
Delete user classes from the membership criteria.
Navigate to the membership criteria page where user classes are listed.
Enable the checkbox next to the user classes you want to delete.
Click Delete.