Privilege Pattern: Customize pre-defined requests
In most cases the pre-defined requests provided with Bravura Privilege Pattern will be sufficient. However, administrators can customize which profile and request attributes are exposed in the pre-defined requests by editing ExtDB tables.
Example: Expose the ZONE attribute
When onboarding a system using the Onboard System PDR there may be times an organization requires a connector proxy in order to connect to the system being onboarded. The built-in, optional Zone attribute is used to associate connector proxy server information with an onboarded system. By default, this attribute is not exposed.
This example demonstrates how to expose the ZONE attribute to allow a system trustee to specify a Zone associated with a connector proxy during the onboard system process.
Requirements
This example assumes:
RefBuild.pam_team_management is installed.
Scenario.pam_system_type_winnt is installed.
A team administrator has been configured.
A team, with a system trustee, has been configured.
Expose the ZONE attribute
Log in as superuser.
Click Manage external data store.
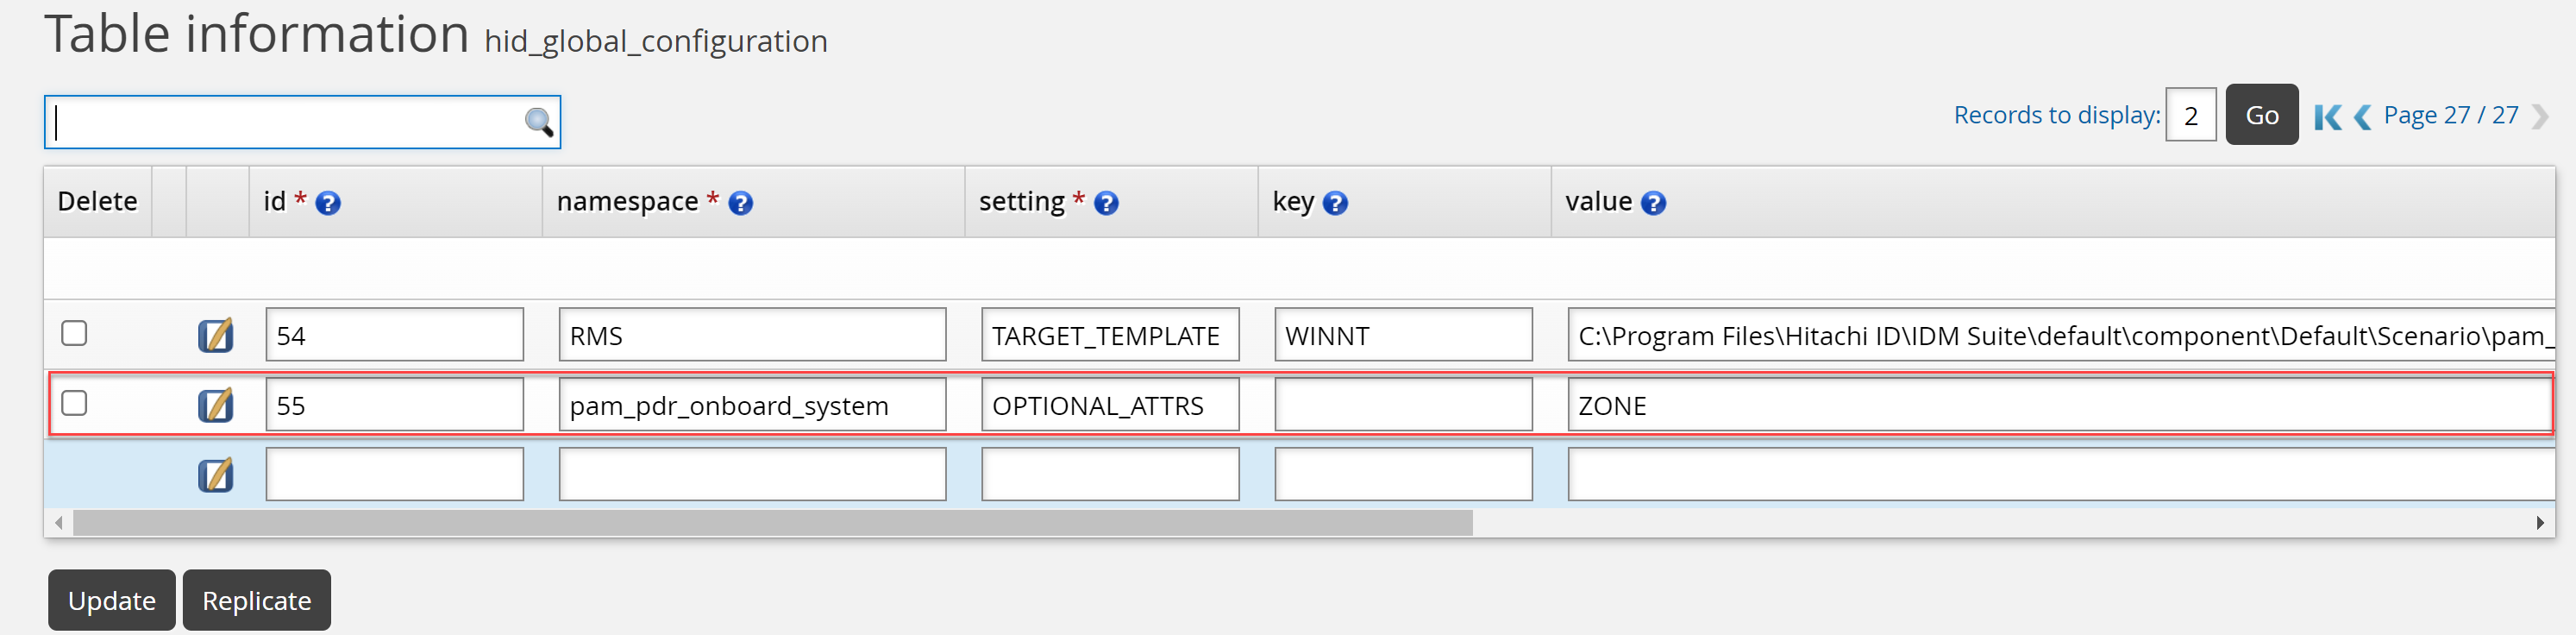
Select the hid_global_configuration table.
Add an entry for Zone attribute to be exposed:
Namespace: pam_pdr_onboard_system
Setting: OPTIONAL_ATTRS
Key:
Value: ZONE
Click Update.
Click Manage external data store.
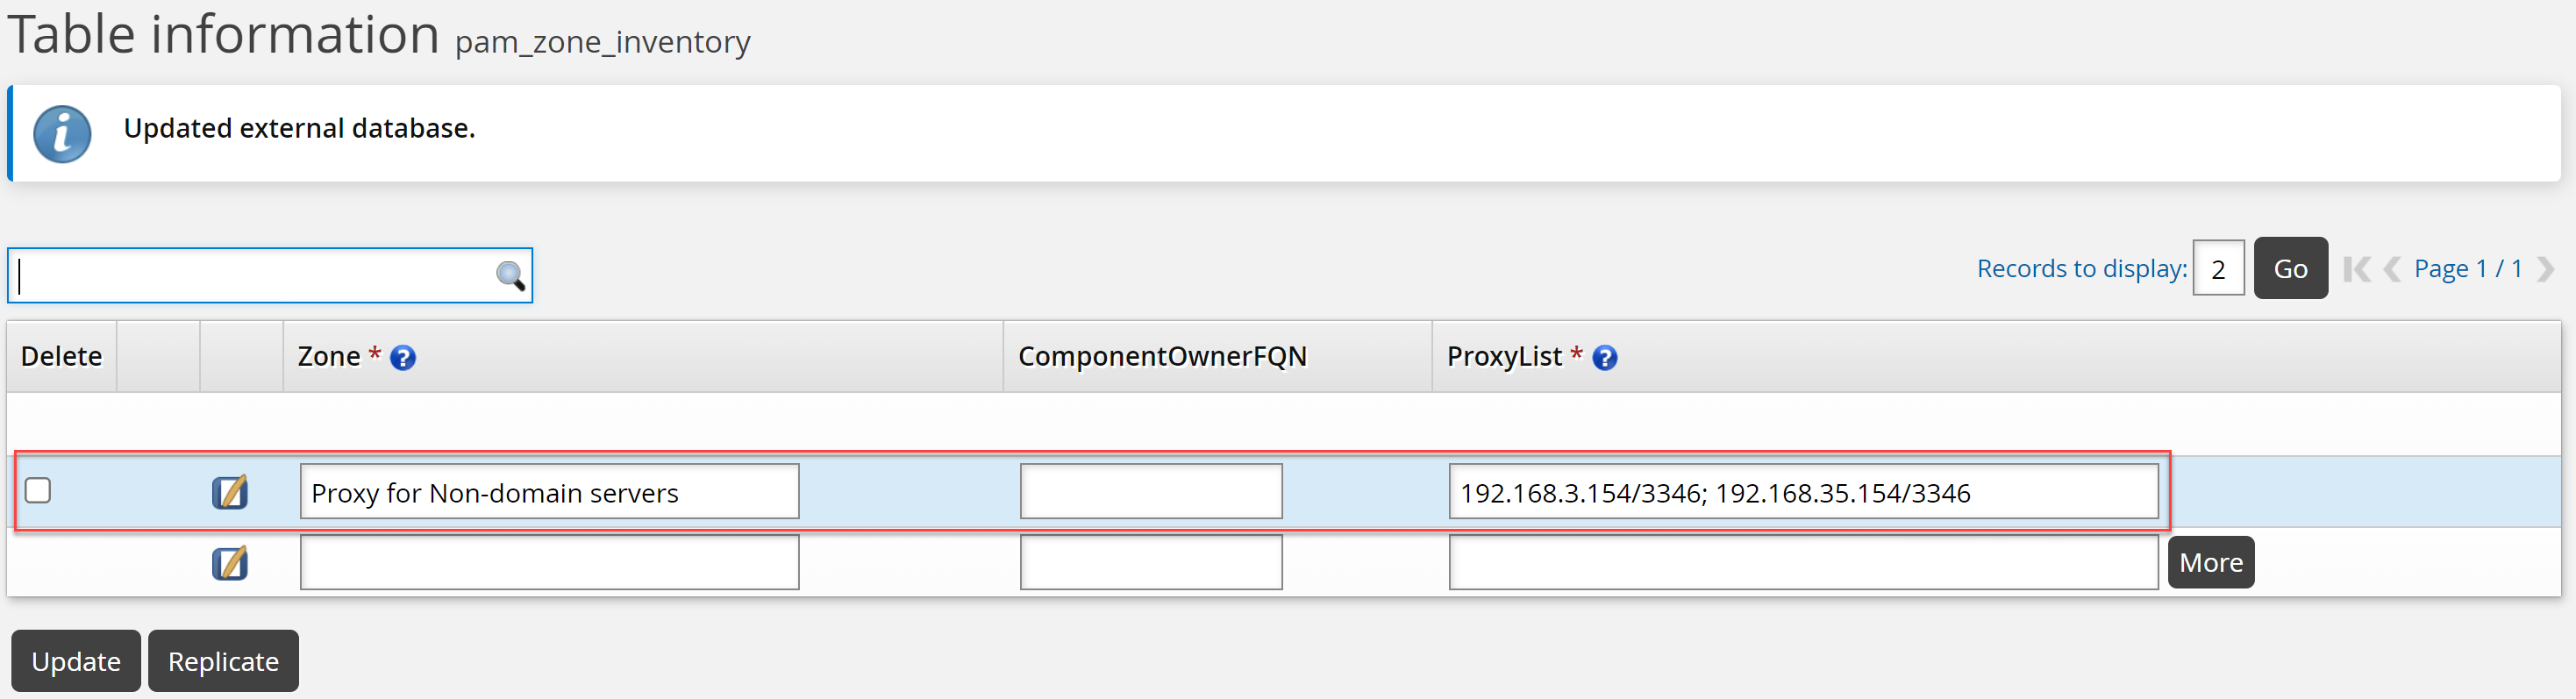
Select the pam_zone_inventory table.
Add an entry to populate the Zone attribute in PDR.
Zone: Proxy for Non-domain servers
ProxyList: <Proxy IP address>/<port the service is listening on>
The <Proxy IP address> must be the IP address of a server hosting the Connector Proxy service. The <port the service is listening on> must be the port specified for the Connector Proxy server during installation; by default, this is TCP port 3344.
Click Update.
Test the onboard system PDR
Log in as a system trustee.
Click Manage resources.
Click System: Onboard.
Select the System Type and click Next .
The Zone attribute is available.
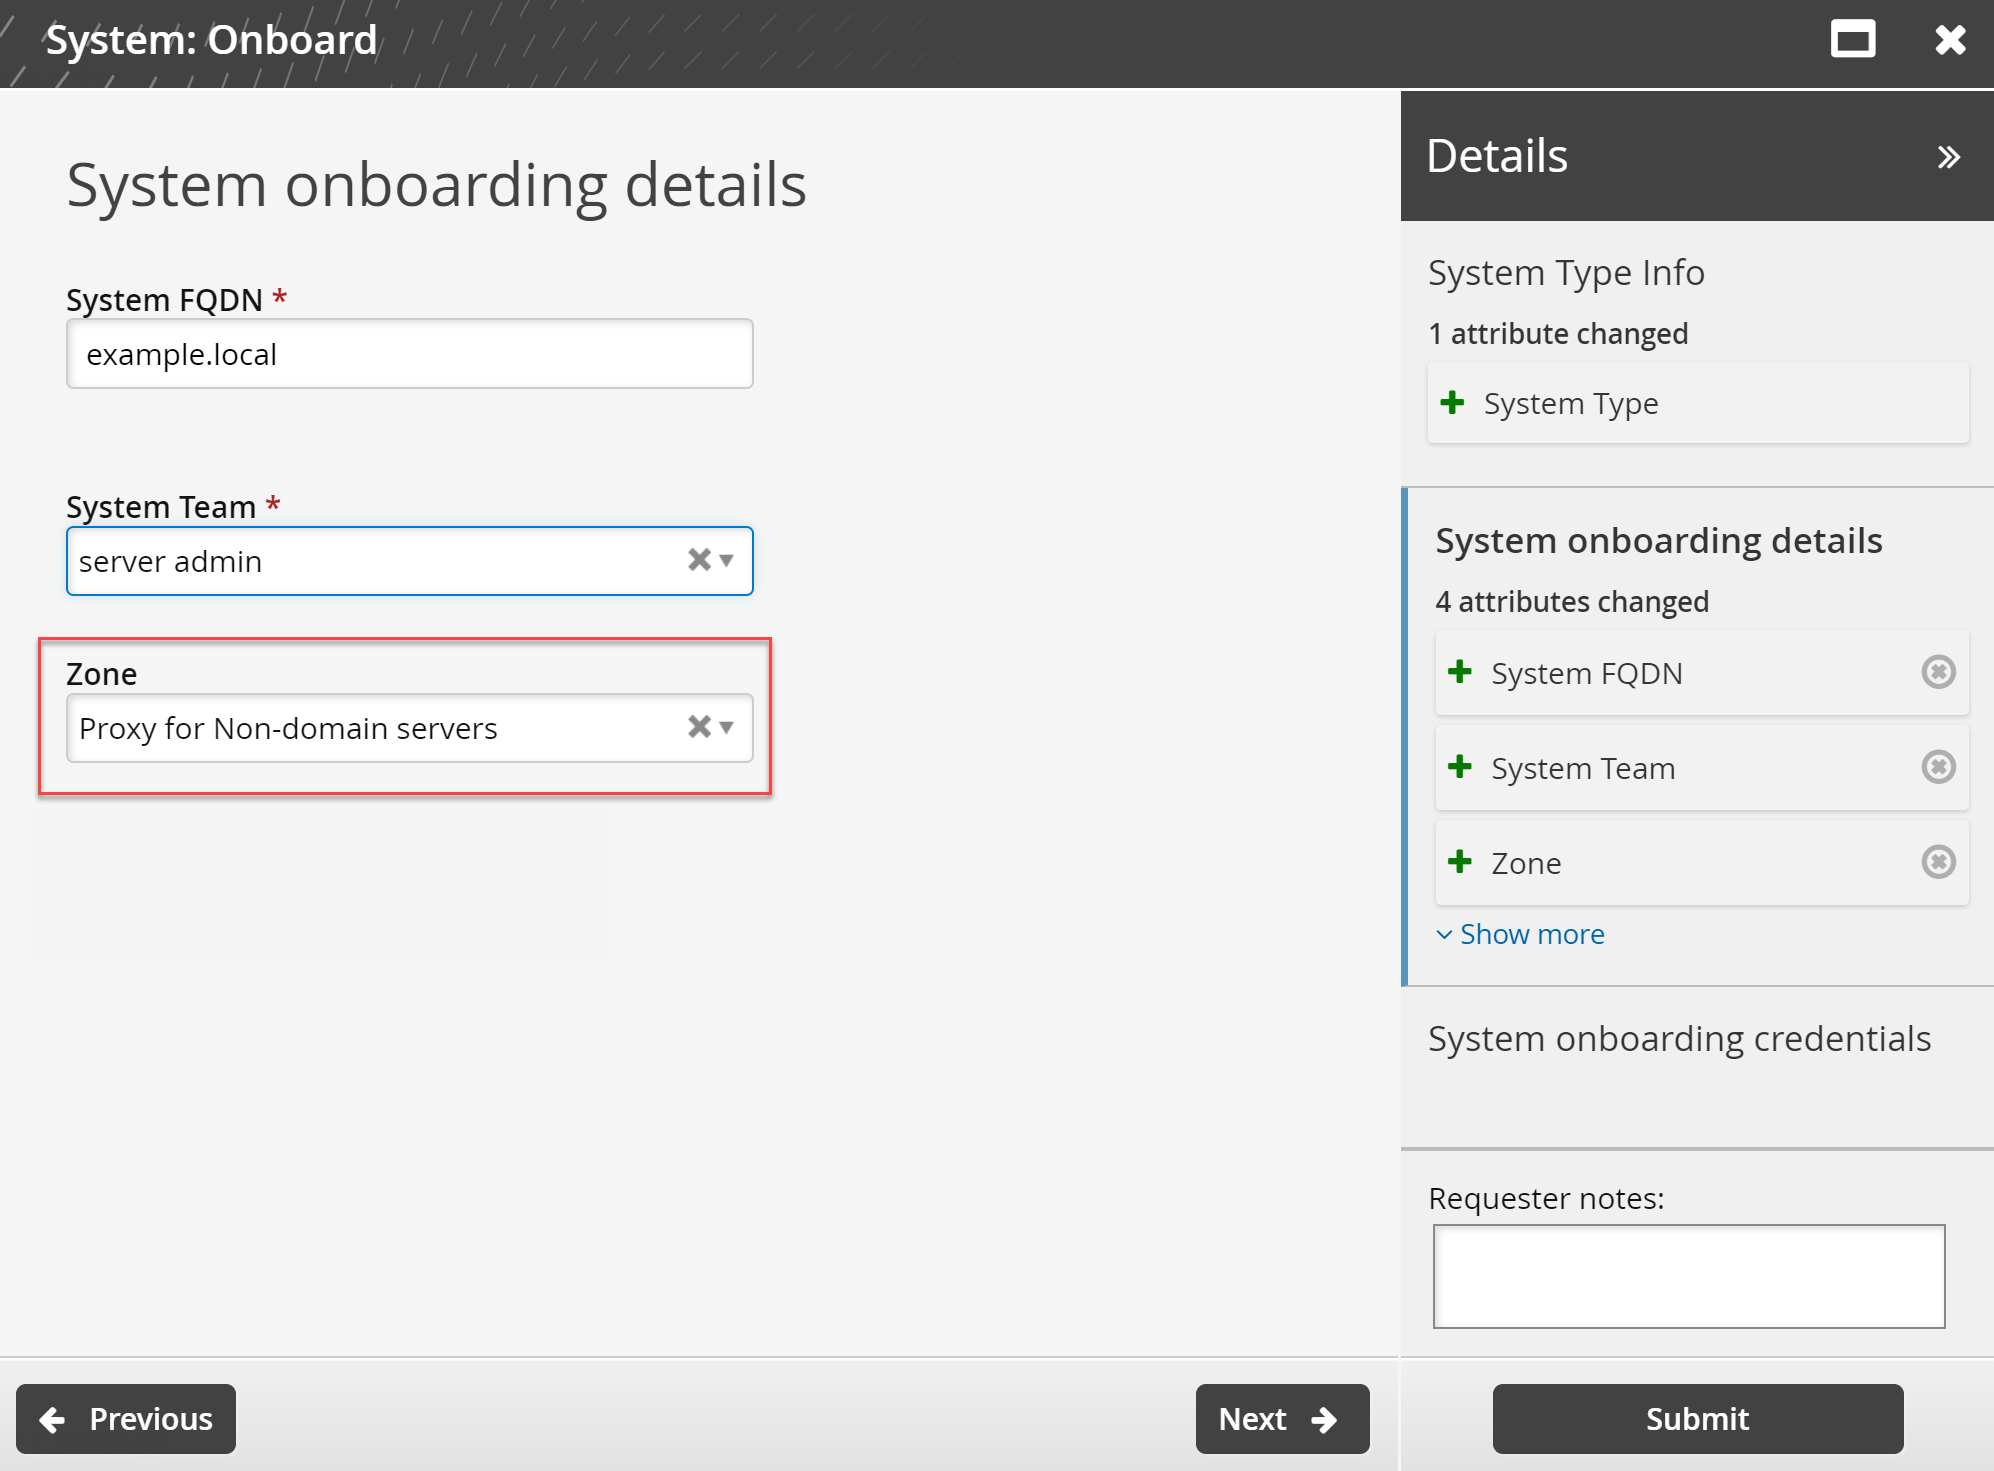
Select the Zone required.
Click Submit.
Once the request has been approved, the system will be onboarded.
Example: Expose the USE_MANAGED_CREDENTIALS attribute
This example demonstrates how to expose the USE_MANAGED_CREDENTIALS attribute so a system trustee does not need to manually enter the system's credentials when onboarding a system; instead a Bravura Privilege managed account will be used, and when that managed account’s password is updated by Bravura Privilege, the credentials used by the onboarded system will be too.
Requirements
This example assumes:
An AD Target has been configured as a managed system
An AD Target has been configured as a source of profiles.
Auto discovery has been run.
RefBuild.pam_team_management is installed.
Scenario.pam_system_type_winnt is installed.
A team administrator has been configured.
A team, with a system trustee has been configured.
Expose the USE_MANAGED_CREDENTIALS attribute
Log in as superuser.
Click Manage the System > Privileged Access -> Managed System policies.
Select the PRODUCT_ADMIN_ACCOUNTS managed system policy.
Click the Member systems tab.
Click Add new….
Select the AD managed system.
Click Select .
Click the Managed accounts tab.
Click Add new… .
Select an account that can be used as target administrator for the onboarded systems.
Click Select .
Click Home.
Click Manage external data store.
Select the hid_global_configuration table.
Add an entry for the USE_MANAGED_CREDENTIAL attribute to be exposed:
Namespace: pam_pdr_onboard_system
Setting: OPTIONAL_ATTRS
Value :USE_MANAGED_CREDENTIAL
Click Update.
Update the following entry in the hid_global_configuration table to match the Value of the managed system policy you configured above:
Namespace : pam_system_management
Setting : MANAGED_ADMIN_CREDENTIAL_POLICY
Value: PRODUCT_ADMIN_ACCOUNTS (or any other MSP which is applied to the managed target admin account)
Test the System: Onboard PDR
Log in as a system trustee.
Click Manage resources.
Click System: Onboard.
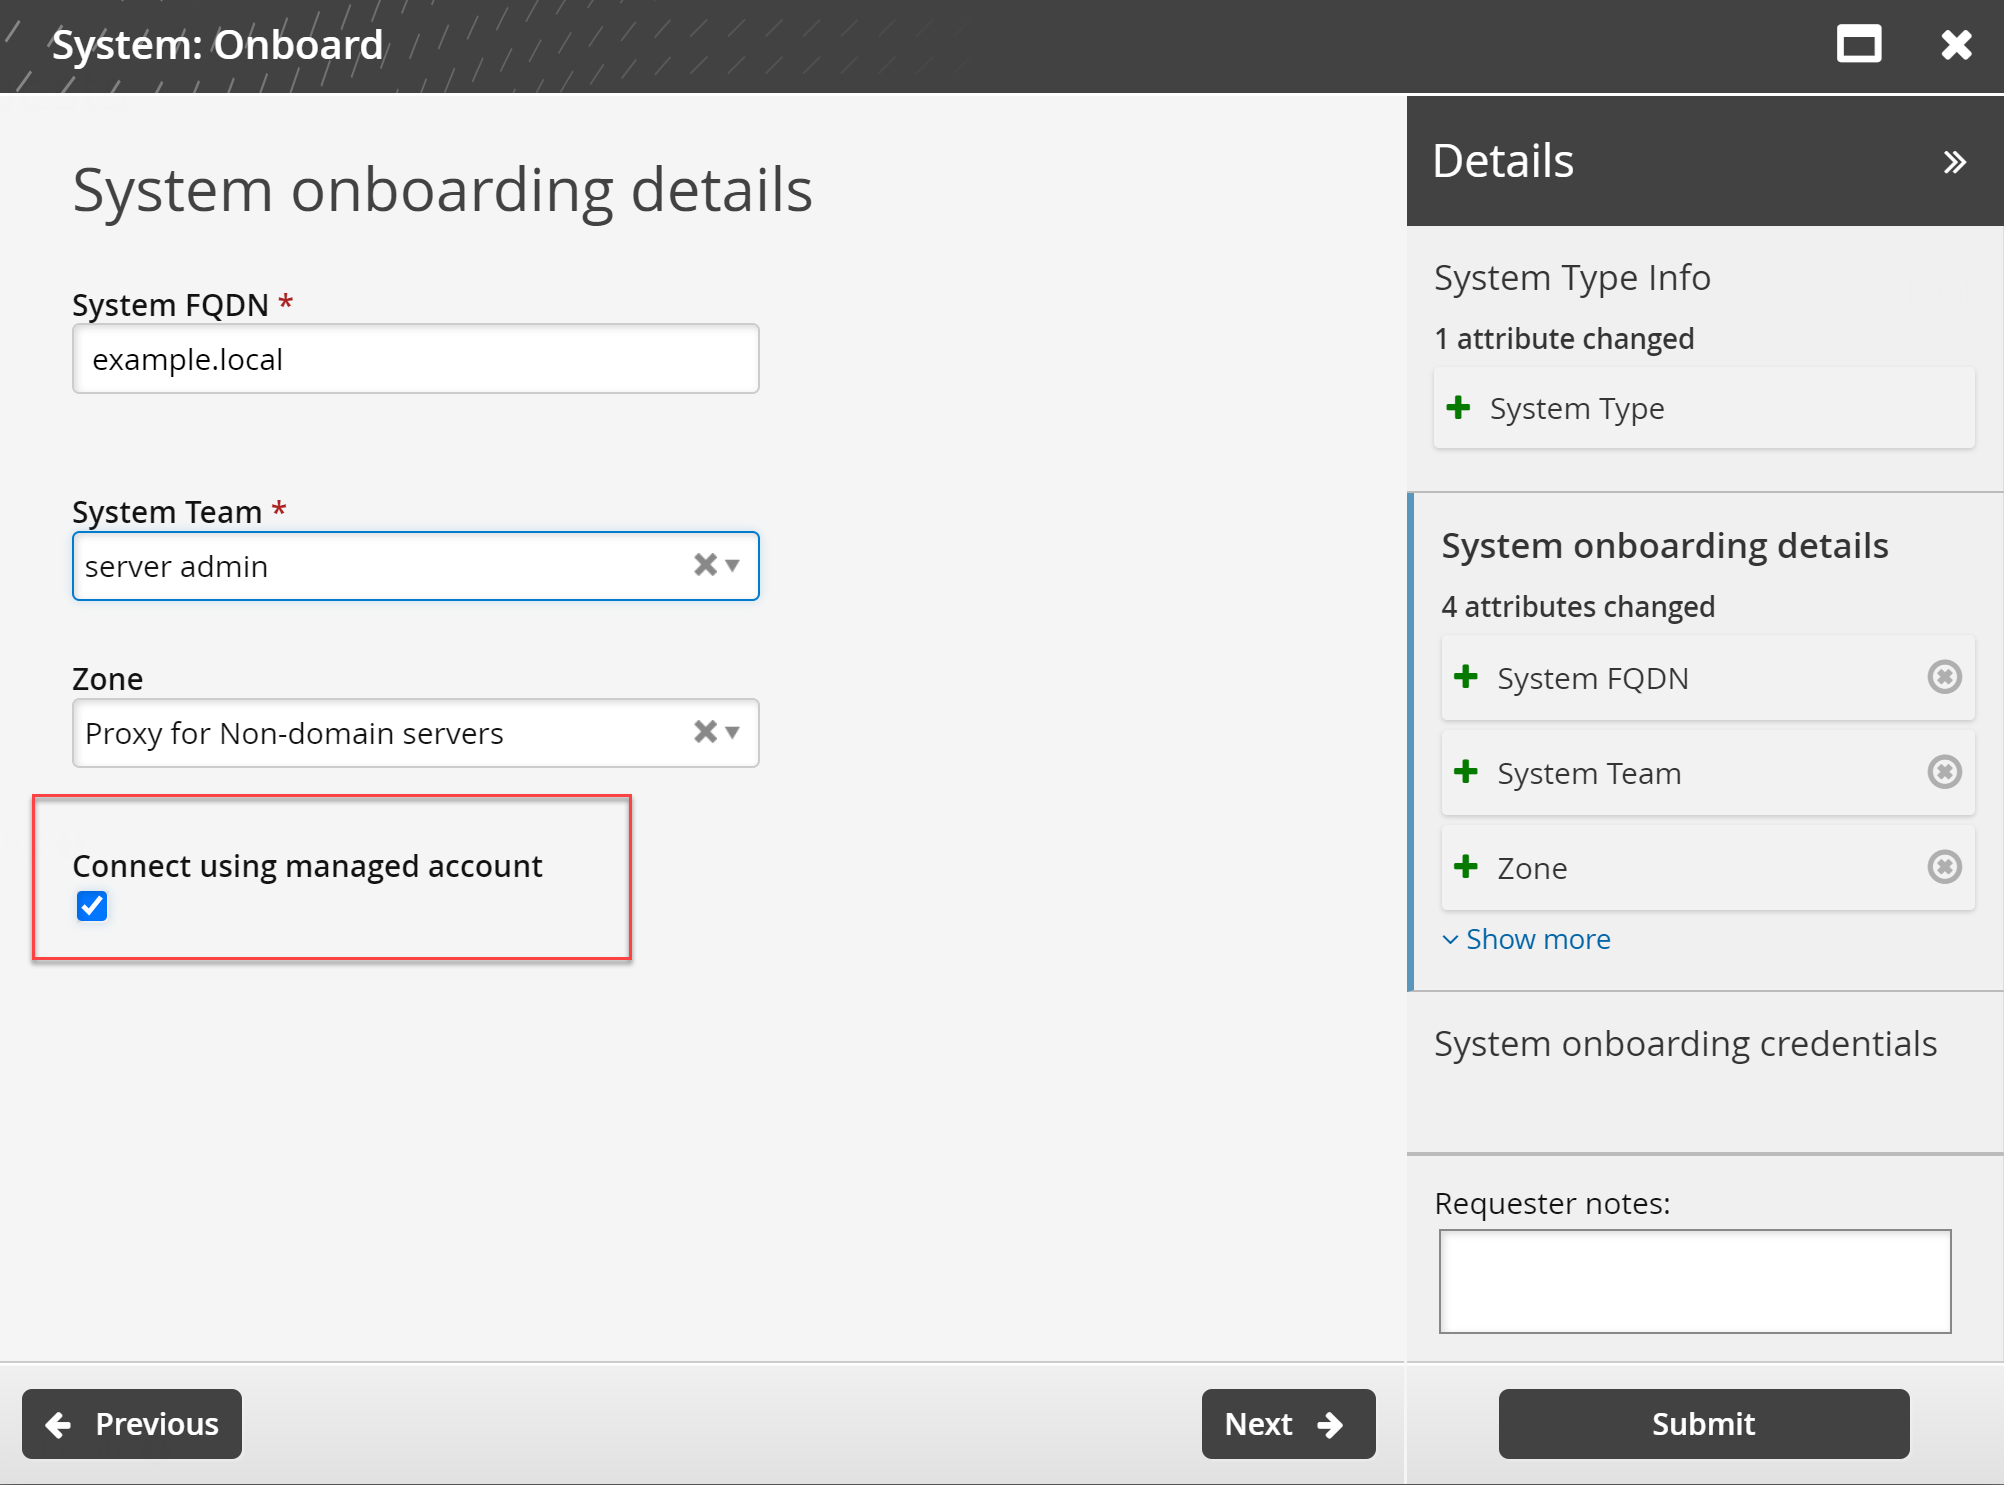
Select the System Type and click Next.
The option to select Connect using managed account is available.