Scheduling reports
You can schedule a report to run at a later time, with options to email or export the output. The scheduled job can be made recurring, and can be modified at any time.
Click below to view a demonstration.
To schedule a report:
Click Manage reports > Reports.
Bravura Security Fabric generates a list of available reports. If this is the first time that you have visited the page, this process may take several seconds.
Select a report category.
Reports belonging to that category are displayed.
Select the report that you want to run.
Optional: Specify your search criteria if you don’t want to see all results.
You can use wildcards as search criteria in many text fields. Available options are described in the sections that follow.
Optional: Configure Display options.
For example select Hide repeating cell values for large data sets.
Optional: Configure Email report settings if you want to email the report.
Optional: Configure settings to Save configuration and output on server if you want to save the report on the Bravura Security Fabric server.
Optional: Configure settings to Export report output if you want completed reports saved to another server.
Configure settings to Schedule report.
Click Schedule to create the scheduled job.
Viewing and modifying scheduled reports
Once a scheduled job is created, you can use the Scheduled reports tab to modify, enable, disable, or delete a scheduled report. You can also view other users’ scheduled reports. You cannot remove or modify a pre-defined request that uses the report output from this menu.
When viewing reports, if the DISPLAY TIMEZONE option is enabled, the scheduled time displayed may differ by an hour if the server or the user profile follows Daylight Savings Time and the other does not.
When the report has been run, you have several options for displaying the data.
Option | Description |
|---|---|
Visible columns | A drop-down list of the available columns that can be displayed. |
Items per page | The number of items to be displayed in the table. Default is 10 items. |
Highlight | Will highlight text in the table that has been typed. |
Hide repeating cell values | When a large data set is generated, this will help reduce data to be more easily read. |
Default ordering | Will return the table to the default sort ordering. |
You can sort data by clicking a column header to sort the column in ascending or descending order. Only one column can be sorted at a time. Return to the default sorting can be done at anytime by selecting the Default ordering option.
Sorting data only applies to the report output in the web user interface. The sorting is not preserved when the report is saved or sent in an email.
Ensure the email configuration is successfully tested and working. If the size of the report exceeds 10MB, then the report is not sent. Instead, an email message is sent which informs the recipient that the report was too large, and that they may want to change the search criteria to generate a smaller file size. This limitation is hard-coded, not configurable, and some SMTP servers will have a smaller attachment or global email body limit, causing such large email reports to fail to reach their destination even if they leave the Bravura Security Fabric server.
Option | Description |
|---|---|
To | Type comma-separated email addresses to which to send the report and the report selection criteria. Alternatively, type %RECIPIENT_EMAIL% to use that value. Note: If you need to use more than one address in the To, CC or BCC fields, ensure they are separated with just a comma, not comma-space, or the email gateway may not send to all addresses listed. See the SMTP RFC for details. |
Cc | If required, type comma-separated email addresses to which to send a carbon copy of the report. Alternatively, type %RECIPIENT_EMAIL% to use that value. |
Bcc | If required, type comma-separated email addresses to which to send a blind carbon copy of the report. Alternatively, type %RECIPIENT_EMAIL% to use that value. |
Subject | Type a subject for the email. |
Message | Type a message for the body of the email. |
Attachment type | Select the export format: CSV, HTML, or PDF. |
The values in this section are overwritten when scheduling a report.
Option | Description |
|---|---|
Saved report name | Type the name to be used for the downloadable file. You can view the saved report in Manage reports > Saved reports. |
Expiry days | Specify expiry period for the saved reports in days. The value must be between 1 and 999. The default value is 60. You can modify the default using the SAVED REPORTS EXPIRY DAYS setting on the Manage the system > Modules > Manage reports (RPT) menu. |
Never expire | Use this to make the saved report never expire. Expiry days field is hidden when this option is checked. |
Notes | Type notes to be saved with the report. |
Option | Description |
|---|---|
Network path (UNC) | Type a UNC path destination for the exported report. The path must be to a target system. It can map to a real FS share (e.g. \\server\some_path\share_1) or a domain DFS share (e.g. \\domain\namespace\share_1). If you do not want to list users or perform other operations on the system you want to export to, you can set up a NULL type target system simply to store the administrator credentials. In this case, ensure that the listing options are disabled for the target system. If you are mapping to a network drive ensure you enter the credentials using down-level logon name format; for example, DOMAIN\UserName. |
File name | Type a name for the exported report. |
File type | Select the export report format: CSV, HTML, or PDF. |
Target system to use for credentials | Search for and select the target system ID for credentials. |
Administrator ID | Select an administrator ID from the target system. |
Option | Description |
|---|---|
Job | Type an ID for this scheduled report. When a scheduled report is run, you can view it in the Saved reports list. The report name is <job> appended with the timestamp. |
Email address to send scheduled report warnings to | Type an email address to receive notification of problems with scheduled reports. If not specified the RECIPIENT EMAIL address is used. |
Enabled | Select this when you are ready to run the report at the next schedule time. |
Expiry days | Specify expiry period to save the report in days. The value must be between 1 and 999. The default value is 60. You can modify the default using the SAVED REPORTS EXPIRY DAYS setting on the Manage the system > Modules > Manage reports (RPT) menu |
Never expire | Use this to make the saved report never expire. Expiry days field is hidden when this option is checked. |
Notes | Type notes to be emailed with the report. |
Job time range | Specify if you want your job to always run, to run for a specific length of time, or for a specific number of iterations by selecting one of the following from the drop-down list:
|
Last day of the month | For monthly to annual schedules, use this setting to avoid missed run times. For example, if you schedule a job quarterly, with a start date of August 31, the next run time after August 31 would be November 31, which does not exist. With this setting enabled, the next round would start on the last day of the month, November 30. |
Repeat type | Select the frequency of the scheduled job using the drop-down list. Depending on the repeat type, set scheduling options:
|
Period mode | For jobs that are repeated quarterly, semi-annually, and annually, choose either: Start date - then Period start date and time Month/week/day - then select the first month, week of the month, and day of the week to perform the task. The Choose the first month to perform this task setting is based on the current calendar year. For example if you set the first month for a quarterly job to January, and the current month is February, the task will start in April. |
Date and time to run / Time to run | All scheduled jobs time to run is local to the server that runs the job. Except for jobs that are run once, the default time to run is set by Manage the system >; Modules > Options > DEFAULT SCHEDULED TIME. |
Example: Schedule report on accounts
This example shows you how to run a one-time Accounts report, and then schedule a regular report.
For this example it is assumed that:
Bravura Security Fabric and Connector Pack are installed.
An Active Directory target system is added as a source of profiles.
To view and save a one-time report:
Log in to Bravura Security Fabric as
superuserwith password .Click Manage reports > Reports.
Bravura Security Fabric generates a list of available reports. If this is the first time that you have visited the page, this process may take several seconds.
Click Users > Accounts.
Click the search icon
 in the Target system ID field to select checkbox for the AD target system.
Click Select .
Expand the Save configuration and output on server section.
In the Saved report name field, type AD Accounts.

Click Run at the bottom of the form to see the results.
You may need to click Refresh to reload the page and display the results.
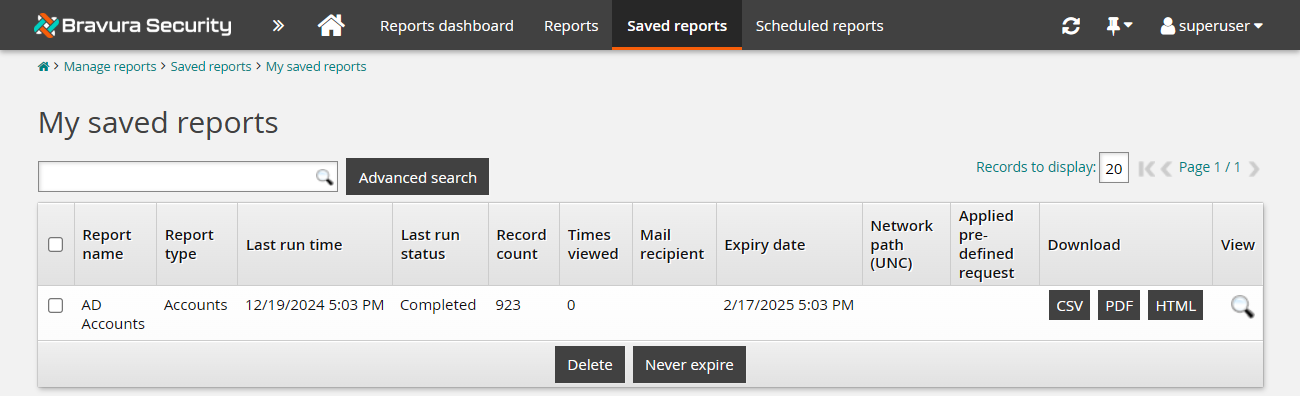
Click the Saved reports tab.
Click My saved reports.
Your report should be listed on the My saved reports page.
To schedule and save a regular report:
Click Manage reports > Reports > Users > Accounts again.
Click the search icon
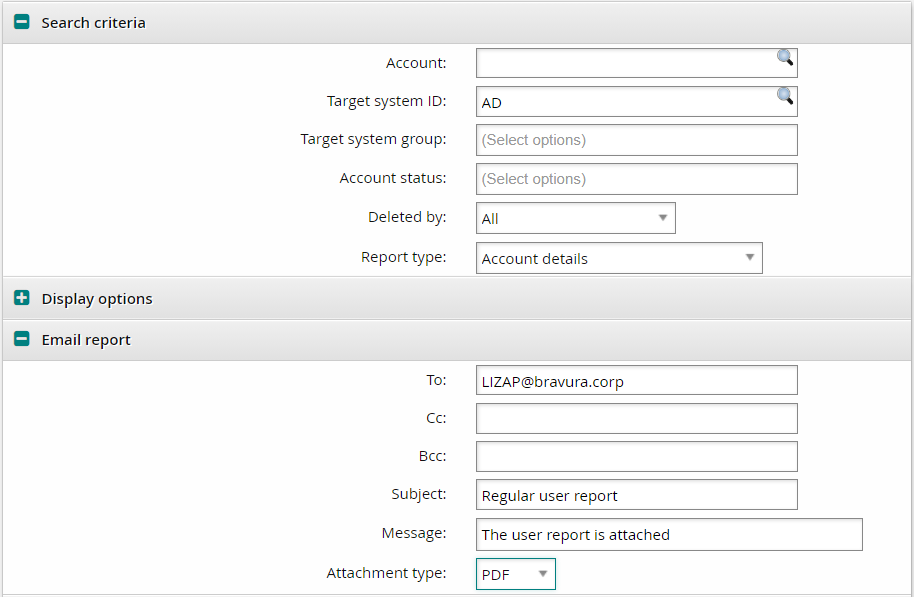
in the Target system ID field to select the AD target system.Click Select .
Expand the Email report section.
Enter the following values:
To <user>
Subject Regular user report
Message The user report is attached
Attachment type PDF
Expand the Schedule report section.
In the Job field, type
AD Accounts.Select the Enabled checkbox.
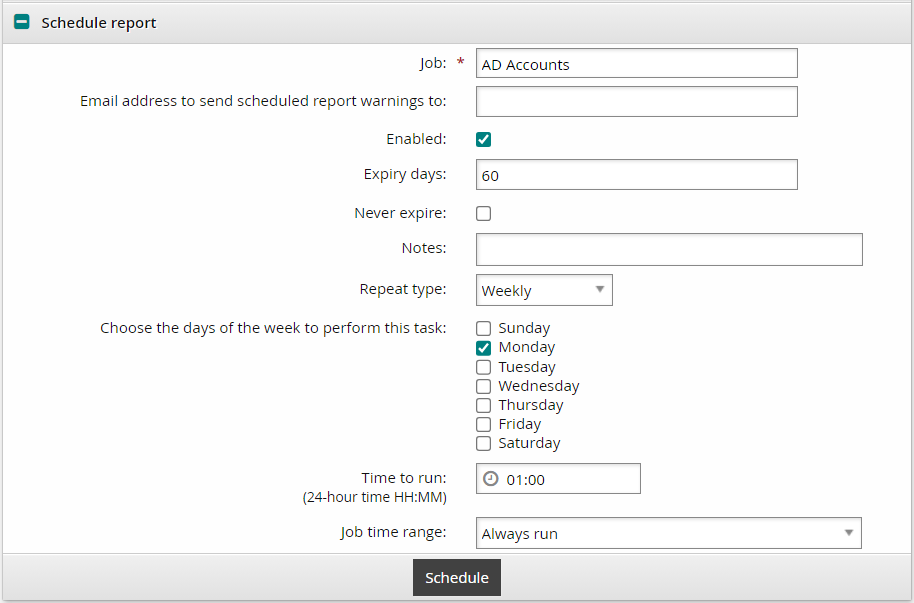
Click Schedule at the bottom of the form.
Click the Scheduled reports tab.
Click My scheduled reports.
Your report should be listed on the page. At the next scheduled runtime, the report will be emailed to <user>.
Once a scheduled job is created, you can use the menu to modify, enable, disable, or delete a scheduled report.
When a scheduled report is run, you can view it in the list. The report name is <Job> appended with the timestamp.