Use cases and examples
This section outlines demonstrations of how session monitoring may be implemented.
Monitor access to a privileged application using BravuraPrivilege Auto-Connect Plugin
In this use case, Bravura Privilege is actively managing the credentials for a privileged financial application running on a Oracle server database normally only accessible by high-level employees in the Finance department.
A problem has occurred on the system that requires investigation by an Oracle server administrator. In order to diagnose the issue, the Oracle server administrator requires system access. System access leaves the sensitive financial information vulnerable.
In order to ensure that any attempts to view and/or copy the sensitive information are recorded, the company has deployed session monitoring for this resource.
The process flows as follows:
Administrator checks out access to Oracle System credentials.
The command-line-based auto-connect plugin is used to launch a SQL*Plus session.
Session monitoring logic begins as soon as the plugin is launched; no pre-existing client software required.
As the administrator does his work, keystrokes, copy-and-paste items, textual UI elements and screen captures are collected for the SQL*Plus instance and sent to a central server.
The administrator finishes his work and closes SQL*Plus; the session monitoring terminates.
Since all information regarding the session's activities was recorded, it is possible for an auditor to view the session to ensure that the administrator was not stealing information.
Rogue Administrator attempts to tamper with session monitor
In this situation, a rogue administrator – who is aware of the fact that session monitoring is installed – attempts to prevent recording in order to perform illicit activities:
The rogue administrator checks out credentials to a sensitive system in order to steal information.
The administrator sets a proxy that routes all traffic bound to the session monitoring data collection server to ”/dev/null”.
The administrator uses the Bravura Privilege terminal services auto-connect plugin to log in to the system. This triggers session monitoring to begin.
Before launching the terminal-services connection, the session monitor attempts to contact the data collection server. Since the server cannot be contacted, the auto-connect plugin refuses to launch the terminal services client.
The administrator’s efforts are blocked, preventing access to the sensitive resource.
Auditor investigating security breach on monitored resource
In this situation, a security breach has been detected on a protected resource. The security investigation team knows that the breach occurred over the past month, but a number of people have had access to the server. The breach consisted of the release of three bank account numbers.
Because the resource was protected with session monitoring, the security investigation team can track down the source of the security breach:
The security investigator logs in to Bravura Privilege and performs a request to search for monitored sessions.
The investigator enters the time frame and resource name into the search criteria. Since the involved account and suspect are unknown, these fields are left blank.
The request to search is sent to the appropriate authorizers and they either approve or deny this request.
Once approved, the investigator uses the session monitoring interface to further narrow the search results. He searches for one of the bank account numbers using the available meta-data search parameters.
This query returns two matching sessions for different individuals. In order to see which of these individuals had malicious intent, the investigator requests a video and full meta-data to be generated for both sessions.
This request is sent to another set of authorizers for approval.
Once approved, the video and meta-data are generated and an email with download details is sent to the investigator.
Using the data, the investigator is able to pinpoint the source of the security breach and appropriate action can be taken against that individual.
Example: Configure session monitoring
Click below to view a demonstration:
This example demonstrates how to enable session monitoring and restrict the scope of the session recording so that only the Remote Desktop session is recorded; not the user's desktop.
Requirements
This example assumes:
Bravura Privilege Pattern is installed.
Global Team Groups and Privileges are set up
In order to configure and enable session monitoring, the Scenario.pam_sessmon_full component must be installed. To install the component:
Log in to the Bravura Security Fabric Front-end (PSF) as superuser.
Click Manage Components > Scenario.
Select
Scenario.pam_sessmon_full.Click Install component(s) from the Actions panel on the right.
You should see a Completed install for component message for the selected component in the TASK STATUS section of the Actions panel .
When session monitoring is enabled, it records any visible desktop around the open RDP session by default. This could be a privacy issue.
To restrict the recording only to monitor screens within the RDP session:
As superuser, click Home
 .
.Click Manage external data store > pam_session_monitor_policy.
Click the Edit icon
 next to the following existing rule in the table:
StageNumber 1
RuleNumber 80
Comment Capture Everything
Change the RestrictScopeEnabled value to True.
Click Done.
Click Update.
When onboarding managed accounts, the option to include session monitoring is offered. In this example they were not turned on when accounts were onboarded. To enable these session monitoring options for Windows managed accounts, the existing managed accounts must be modified using the team trustee.
Open another browser tab to Bravura Security Fabric .
Log in to the Front-end (PSF) as CORDEH , since she is the trustee for the Windows Account Admins team.
In the REQUESTS section of the main menu, click Manage Resources .
Select Account: Update .
Select the WINNT:wkstn1.bravura.corp: Administrator account.
Click Next .
Skip the page by clicking Next.
Skip the page by clicking Next .
On the page select the checkboxes to opt into Clipboard, Keystroke and Screen recording .
Click Submit.
View the request and ensure the operation was successful.
Example: Check out a monitored account
Click below to view a demonstration:
This example demonstrates how users request to check out a monitored account, approve the request and then check out the account using the remote desktop disclosure option.
Open another browser tab to Bravura Security Fabric .
Log in to the Front-end (PSF) as the standard user BILLIG .
On the main menu click Privileged access.
Click Accounts under the PRIVILEGED ACCESS heading from the Filter panel to see available accounts.
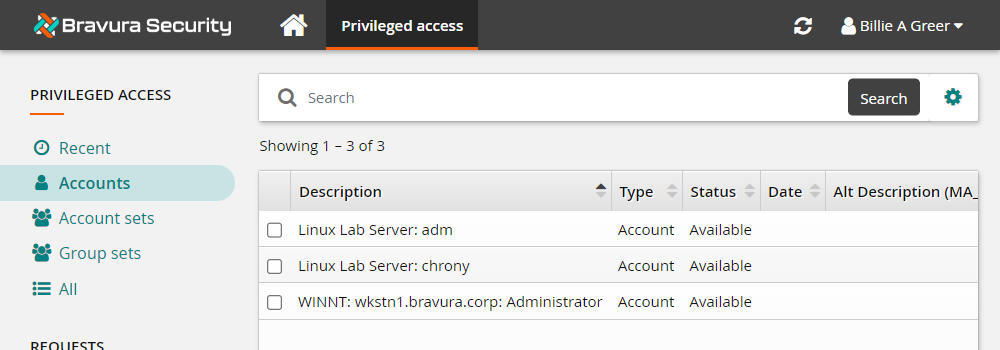
Select the WINNT:wkstn1.bravura.corp: Administrator account.
Click Request check-out from the Actions panel .
Click the Submit button at the bottom of the request details form.
Open a new browser tab to Bravura Security Fabric .
Log in to the Front-end (PSF) as harolr.
Authorize the Windows Administrator account check-out request.
Return to the browser tab where you are acting as BILLIG.
Click Refresh , or, in the Privileged access app, click Ready to check out under REQUESTS in the Filter panel .
Select the WINNT:wkstn1.bravura.corp: Administrator account.
Click Check out from the Actions panel .
Click on the Remote desktop disclosure option.
This will open an RDP session window to the Windows server.
Create a text file on the desktop of the server and type something in it.
Log off the server by closing the remote desktop session window.
Leave the Administrator account checked out for the next lab.
Keystroke data is compiled into a
keystroke-data.xmlfile. The default path for this file is<install path>\smon\text. This can be changed in Manage the system > Modules > Recorded session management (SMON) > SMON TEXT STORAGE PATH.To help limit storage and network bandwidth requirements, screenshots are aggregated into hour-long videos, which are stored in the path set by Manage the system > Modules > Recorded session management (smon) > SMON SCREENSHOT STORAGE PATH. The default location is
<install path>\smon\package\.