External program
An external program plugin can generate customized authentication chain modules, based on available chains, CGI parameters, and user information.
Input
Input parameters can be used to determine the modules that are presented to the user if configured to do so. The input parameters can be the chains that are available for the user (”chains” KVGroup), CGI parameters passed in from the browser (”cgi” KVGroup), parameters received from the user (”parameters” KVGroup), or user account/profile/request attributes for the current user (”viewer” ”user” KVGroup).
  "" "" = {

        "can_use_response.pss" = "true"
        "cfgid" = "DEFAULT_LOGIN:1"
        "chain" = "DEFAULT_LOGIN"
        "module" = "psf"

        "sessionid" = "<session ID>" # The session ID of the viewer


        "chains" "" = { # Supported chains
             "<chain id>" = "1"
             "<chain id>" = "1"
             "<chain id>" = "1"
             ...
        }


        "cgi" "" = { # HTTP HEADER information
             ...
        }


        "parameters" "" = { # HTTP Post information
        }

        "viewer" "user" = {
             # User account/profile/request attribute information
        }
   }
Output
The output KVGroup can be constructed within the script to determine the specific authentication modules that may be presented for the user logging in. One or more dialogs can be generated.
"" "" = {
    "errmsg" = "" # error message, if any
    "retval" = "0" # 0 on success; non-zero on failure
    "status" = "<SUCCESS|FAILED|NEED_TOKENS|FAILED_NEED_TOKENS|IGNORE_STATUS|SERVICE_CHANGED|SYSTEM_ERROR>"
    "parameters" "" = {
        <name> = <value>
        "NEW_SERVICE_NAME" = "<chain id>" # Required only for SERVICE_CHANGED status
    }
    "dialog" "" = {
        "id" = "<id>" # unique dialog id
        "subtitle" = "<subtitle" # subtitle of the dialog
        "title" = "<title>" # title of the dialog
        "entry" "" = {
            "description" = "<description" # entry prompt description
            "name" = "<field_name>" # entry field name in html
            "type"= "<PASSWORD|TEXT|DATE|DROPDOWN|HIDDEN|RADIO|CHECKBOX|IMAGE|BUTTON|SUBMIT|LABEL>"
            "value" "" {
                description = "<description>" # value description
                value = "<value>"
            }
        }
        # additional entry KVGroups may also be added here
    }
    "redirect_url" = "<URL>" # redirect to specified url
}
Status
The status key must be set to one of the following values:
SUCCESS | The credential has been successfully validated. Authentication chain execution will resume according to its configuration under this case. |
FAILED | The credential was found to be incorrect. Authentication chain execution will resume according to its configuration under this case. |
NEED_TOKENS | More information is required from the user to validate their credential. The dialog described in the dialog KVGroup will be displayed, and the results will be passed back into this plugin. The dialog KVGroup is mandatory if this status is returned. |
FAILED_NEED_TOKENS | The credential was found to be incorrect. If the user is authenticated via this plugin again, a new dialog should be displayed to the user. This status has the same effect as NEED_TOKENS except that the lockout counter (if applicable) is incremented. |
IGNORE_STATUS | This authentication module is not relevant and should be ignored. Authentication chain execution will resume with the next service. If there are no more services in the chain and the authentication has not yet succeeded or failed conclusively from another service, this status will be treated the same way as SYSTEM_ERROR. |
SERVICE_CHANGED | This authentication module is not relevant, but authentication should resume with the authentication chain specified in the NEW_SERVICE_NAME parameter. The specified authentication chain must be enabled and selectable in the current authentication chain. If the service specified in NEW_SERVICE_NAME would directly cause a cycle in the chain execution flow by directing authentication to a module that has already executed, this status is treated the same way as SYSTEM_ERROR. |
SYSTEM_ERROR | There was a fatal error during the authentication process. Authentication chain execution will stop immediately as though it had failed, but the lockout counter will not be incremented. The value of the errmsg key will be displayed to the user as an error. |
Parameters KVGroups
The parameters KVGroup can be used to determine the modules that are presented to the user after successful authentication.
JUMPTOCGI | Jump the user to specified module |
LINK | Specify a link on the CGI page |
PREQID | Specify a pre-defined request |
SESS_ANON | Create an anonymous session when set to 1 |
USERID | Used to change the initial login user to a different user |
The following example will send the authenticated user to the IDR page and allow them to enter a new user pre-defined request.
"parameters" "" = {
    "JUMPTOCGI" = "IDR"
    "LINK" = "NEWUSER"
    "PREQID" = "NEWUSER"
    "SESS_ANON" = "1"
}
See also
Redirect to URL
The external authentication chain can redirect the user to specific URL. parameters can be defined in the URL address or within the parameters section.
The following example will redirect a user to the specified site.
"" "" = {
    "parameters" "" = {
        "user" = "someuser"
    }
    "redirect_url" = "http://site/cgi.exe?ok=true"
    "retval" = "0"
    "errmsg" = "SUCCESS"
}
This example will redirect the user to http://site/cgi.exe?ok=true&user=someuser
Dialog KVGroups
The dialog KVGroup will allow the creation of a custom dialog box for the user to enter information.
The entry types for custom dialogs can be specified as one of the following:
PASSWORD | A password field |
TEXT | A plain text field |
DATE | A date selection field |
DROPDOWN | A dropdown list of items |
HIDDEN | A hidden field |
RADIO | A list of radio buttons |
CHECKBOX | A list of checkboxes |
IMAGE | An image shown on the page |
BUTTON | A button with customized text for the button label |
SUBMIT | A standard submit button for the current page |
LABEL | A simple label to be added on the page |
The “value” KVGroup, outlined in the Output section, is configured differently depending on the type of dialog:
The following entry types only require one “value” KVGroup to be included: PASSWORD, TEXT, HIDDEN, IMAGE, BUTTON, SUBMIT, LABEL
The “description” field for the BUTTON entry type adds custom text to the button.
The DROPDOWN, CHECKBOX, and RADIO entry types require one “value” KVGroup for each checkbox or drop-down item that you want to include; for example:
"value" "" = {
  "value" = "val1"
  "description" = "desc1"
}
"value" "" = {
  "value" = "val2"
  "description" = "desc2"
}
"value" "" = {
  "value" = "val3"
  "description" = "desc3"
}
In the example above, the “description” fields for desc1, desc2, and desc3 are displayed as either drop-down list items, checkboxes, or radio button options.
The “value” field of the IMAGE entry type contains a path to an image file; “description” is for the hover text. For example:
"entry" "" = {
  "name" = "image_field"
  "description" = "Image Field"
  "type" = "IMAGE"
  "value" "" = {
    "value" = "assets/images/company_logo.png"
    "description" = "test image"
  }
}
You can customize the user interface for these views by modifying the !!!AUTH_VIEW_* tags in the authchain.m4 file, then recompiling the skins. For example:
Use the !!!AUTH_VIEW_INPUT_ <entrytype> _VALUE_ <dialogid> tag to make modifications to the image entry type, where <entrytype> refers to "type" = "IMAGE" and <dialogid> is represented by the “id” field in the “dialog” KVGroup (authplugin in the sample authplugin.psl script).
Add the following to !!!AUTH_VIEW_INPUT_IMAGE_VALUE_auth plugin to change the height and width:
<!--@container()-->
  <!--@image(text="%ENTRY_VALUE_DESC%" data-src="%ENTRY_VALUE%" height="50%" width="50%")--><!--@endimage()-->
<!--@endcontainer()-->
The above tag is specific to the auth plugin dialog ID. If this tag is only specified as !!!AUTH_VIEW_INPUT_IMAGE_VALUE, then it only applies to the plugins that use this tag.
See also
The
authchain.m4file for additional authentication chain tag modifications
authplugin
The authplugin.psl sample script, found in the samples directory, provides a simple demonstration of a customized authentication chain. The script generates a dialog for password authentication to the Front-end . The output KVGroup will include a status that is set to NEED_TOKENS to indicate that a response is required for the dialog. The sample script will then verify the password that is entered against a value defined within the script.
Output KVGroup for the sample authplugin.psl:
  "" "" = {
     "errmsg" = ""
     "retval" = "0"
     "status" = "NEED_TOKENS"
     "dialog" "" = {
       "id" = "authplugin"
       "subtitle" = "Please provide a valid password"
       "title" = "Verifying password"
       "entry" "" = {
         "description" = "Password"
         "name" = "response_field"
         "type" = "PASSWORD"
         "value" "" = {
           "description" = ""
           "value" = "<your password>"
         }
       }
     }
   }
reCAPTCHA
Bravura Security Fabric includes a component, Scenario.hid_authchain_recaptcha, which allows you to use the reCAPTCHA program as part of an authentication chain. The reCAPTCHA program is a web service that provides an image-based authentication method.
Bravura Security Fabric also includes the Scenario.hid_authchain_recaptcha_v3 component that supports reCAPTCHA v3 for score-based reCAPTCHA authentication. reCAPTCHA v3 acts similarly to v2 invisible, in that when you log in, the page will reload as it invisibly evaluates the user’s activity.
All images are generated and graded by the reCAPTCHA servers. Adding reCAPTCHA to your authentication chains creates another layer of security for your authentication process without adding the cost of running image generation scripts on your servers. See http://www.google.com/search?q=recaptcha for more information.
To configure Bravura Security Fabric to include an authentication chain using the reCAPTCHA plugin:
Generate the site and secret keys using v3 Admin Console.
Install
Scenario.hid_authchain_recaptchaorScenario.hid_authchain_recaptcha_v3then modify the RECAPTCHA settings in the hid_global_configurationextdbtable.
Generate the site and secret keys using v3 Admin Console
To generate the site and secret keys using v3 Admin Console:
Visit the reCAPTCHA Administration Portal at http://www.google.com/recaptcha/ .
Click the v3 Admin Console header / link.
Enter a current username and password. Create a new username and password if you do not have one.
The Register a new site page loads if you have not yet added any sites. If you’ve registered one or more sites, then the page loads with a list of your registered sites.
Click the + icon to add a new site.
For reCAPTCHA type, choose:
Challenge (v2) then one of the options for the v2 type when using the Scenario.hid_authchain_recaptcha component.
or
Score based (v3) when using the
Scenario.hid_authchain_recaptcha_v3component.
Enter a Label for your site that will make it easy for you to identify the site in the future.
Enter the name or domain name of the Bravura Security Fabric server in the Domain field. For example:
servername.bravurasecurity.com
or
bravurasecurity.com
Click Submit.
This generates site and secret keys for the fields within the Scenario.hid_authchain_recaptcha or
Scenario.hid_authchain_recaptcha_v3 component.
Install hid_authchain_recaptcha or hid_authchain_recaptcha_v3
Install the Scenario.hid_authchain_recaptcha or Scenario.hid_authchain_recaptcha_v3 component, then modify the RECAPTCHA settings in the hid_global_configuration external data store (extdb) table to populate the SITE_KEY and SECRET_KEY fields with the keys generated from the reCAPTCHA website . The MIN_ALLOWED_SCORE field can also be added to set the minimum passing score for recaptcha v3.
namespace | RECAPTCHA |
setting | SITE_KEY |
value | <site key value> |
description | The Site Key provided by Google ReCAPTCHA. |
ComponentOwnerFQN | Scenario.hid_authchain_recaptcha or Scenario.hid_authchain_recaptcha_v3 |
namespace | RECAPTCHA |
setting | SECRET_KEY |
value | <secret key value> |
description | The Secret Key provided by Google ReCAPTCHA. |
ComponentOwnerFQN | Scenario.hid_authchain_recaptcha or Scenario.hid_authchain_recaptcha_v3 |
namespace | RECAPTCHA |
setting | HTTPS_PROXY |
value | https:// <proxy server IP> : <port> / |
description | The optional HTTPS proxy. |
ComponentOwnerFQN | Scenario.hid_authchain_recaptcha or Scenario.hid_authchain_recaptcha_v3 |
namespace | RECAPTCHA |
setting | MIN_ALLOWED_SCORE |
value | Numeric value for the minimum passing score for recaptcha v3 |
description | Default value is 0.5 when left blank or the setting is not present. The authentication chain will fail when the user's recaptcha score is below the threshold. |
Caution
Ensure that users cannot login using nothing more than the reCAPTCHA plugin. This would effectively allow anyone access to Bravura Security Fabric . The reCAPTCHA plugin should only be used in combination with other authentication methods, not as an alternative to a password or other default methods.
After updating the hid_global_configuration table with the SITE_KEY and SECRET_KEY, it can take some time before reCAPTCHA can be used. It may take 5-10 minutes for the skin to rebuild in the background.
Troubleshooting reCAPTCHA
After upgrading Bravura Security Fabric or on secondary nodes, the reCAPTCHA plugin may not render properly with the "Human or Robot?" checkbox.
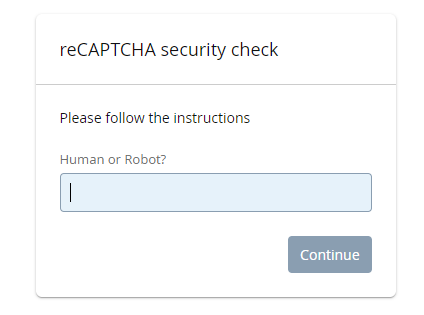
Wait 10 minutes, or 20 minutes on secondary nodes. It can take some time for skin changes to take affect.
If the problem is not resolved check the external data store (
extdb) table to see if SITE_KEY and SECRET_KEY fields are restored with "POPULATE ME" values. If they are, fix them, update and replicate. Wait 20 minutes.If the problem is not resolved, reload the component files and generate the skin files.
From the \<instance>\script\ directory, run the following command:
manage_components.py load --patch
This process can take some time. The
manage_components.pyscript loads the component files and generates skin files for them.Wait a few minutes for changes to get to non-primary servers.
Recompiling the skins may also be attempted on the secondary nodes to resolve the user interface issues, for example by running the
make default en-usandmake install default en-uscommands for the default skins.See Generating and installing skins for more information.
Close browsers if you have them open and then re-open them to test the changes.
If you do not see changes as expected, try clearing the browser cache before re-opening the browser.
This might also be required if the page is not being shown correctly and a cached version of the javascript is currently being used and has not yet been updated.
httpauth
Bravura Security Fabric includes a generic tool, httpauth, for web server authentication integration. The httpauth.exe program is both a CGI executable and an authentication plugin. Once the tool is properly set up on a web server to run as an protected CGI executable, it will detect the user logging on the web server via the REMOTE_USER environment variable, and issue a one-time pass for the user to login to Bravura Security Fabric transparently, or with other Bravura Security Fabric authentication methods.
See Use case: Adding Smart Card authentication for a use case incorporating smart card authentication.
To configure Bravura Security Fabric to include an authentication chain using httpauth:
If execution is made on a remote IIS server, install and configure
httpauth.exeon the web server that is to provide the user authentication service for Bravura Security Fabric .Copy httpauth.exe from the plugin directory, and
idmsetup.inffrom the <instance>\psconfig\directory to a protected directory on the web server. The two files must be located in the same directory.Configure the web server to run the
httpauth.exeas a CGI program.The
idmsetup.inffile is required to provide the communication key (or Master Key) and the BASE_IDSYNCH_URL and VIRTUALDIR values. Configure the web server to deny any web access toidmsetup.inf. Alternatively, you can manually remove unused setup information from the file and leave the following items:DATAKEY
COMMKEY
INSTANCENAME
BASE_IDSYNCH_URL
VIRTUALDIR
Verify the installation by pointing to
httpauth.exeon the remote server with a browser.The browser should be redirected back to Bravura Security Fabric with the authenticated user ID, remote web server name, and a temporary PASSID which is a non-reusable hash that expires within an hour. Note that Bravura Security Fabric presents a login error until it is configured to authenticate the user with this information. A common error message is that the plugin failed to run.
Optional – Use a PSLangscript to modify the default behavior of
httpauth.exewhen it runs as a CGI.A sample script,
httpauth.psl, is located in the samples directory. Copy the script to a plugin\ sub-directory, within the directory containing httpauth.exe on the Bravura Security Fabric server. Modify the script as required.
Enable the HTTPAUTH authentication chain to verify information returning from the web server with
httpauth.exeinstalled.Verify the configuration by using a browser to point to
httpauth.exeon the remote web server.The authenticated user should be able to login to Bravura Security Fabric transparently.
Customize the authentication menu to include a link to the URL that runs
httpauthon the web server.The
authselect.m4file in the samples directory provides an example of how to do this.
When a user attempts to login:
The user selects the link to the remote web service from the authentication menu, or is directed there, for example, by an authentication chain selector module.
The remote web server executes
httpauth.exeas a CGI, using REMOTE_USER and SERVER_NAME to redirect the browser to the Bravura Security Fabric server.If a URL has not been specified by the plugin, the default URL redirect is as follows:
BASE_IDSYNCH_URL + "/" + VIRTUALDIR + "/" + "HOSTID=" + <SERVER_NAME> + "&" +
    "PASSID=" + <GENERATED HASH> + "&" + "USER_IDENT=" + <REMOTE_USER> + "&" +
    "PSF_EXT=HTTPAUTH" + "&" + "TRANSACTION=F_OPTION"
For example:
http://myserver.com/idmsuite/?HOSTID=example.com&PASSID=<generated hash>&"USER_IDENT=USER1&PSF_EXT=HTTPAUTH&TRANSACTION=F_OPTION
The HTTPAUTH custom authentication chain runs the
external.pssmodule to execute httpauth.exe as a plugin.The plugin validates the PASSID hash, generated by the cgiexecution, to ensure the USERID= <REMOTE_USER> value has not been changed during the browser redirect.
The user is granted a one time pass to proceed to either access Bravura Security Fabric , or continue with authentication.
 "" "" = {
      "environments" "" = {
          <available common gateway interface environment variables>
          ...
      }
      "parameters" "" {
          <parameters received from user>
      }
} "" "" = {
"errmsg" = "<error messages if any>"
"retval" = "<#>" # 0 on success; non-zero on error
"userid" = "<profile ID>" # set the USERID parameter
"accountid" = "<account ID>" # overrides the USER_IDENT parameter
"hostid" = "<target system ID>" # overrides the HOSTID parameter
"url" = "<redirect URL>" # optional
"export_envs" = "<environment variables name>; ...""
} Troubleshooting httpauth
If Bravura Security Fabric returns a login failure, or the user is prompted for Bravura Security Fabric password input, it is likely that:
The target system name is not matching the returning HOSTID on the redirect URL.
The authenticated web server user account does not exist on the account list of the target system. Check that auto-discovery has been run to import the web server user account list into Bravura Security Fabric .
The target system is not in the identification priority list.
authanonreg
Bravura Security Fabric includes a sample plugin, authanonreg, that allows anonymous users who do not have pre-existing credentials to create a new user profile using a pre-defined request.
The anonymous user authenticates using a CAPTCHA, and Bravura Security Fabric redirects them to the pre-defined request for a new user account. The CAPTCHA ensures that profiles are not created by automated programs.
To configure Bravura Security Fabric to include an authentication chain using authanonreg :
Copy the
authanonreg.pslfile from the samples directory to the plugin directory.Create a new user on the source-of-profiles target system to be the designated anonymous user account; for example, ”Guest” or ”Anon”.
Create a new user class, and select the new user from step 2 as an explicit user in the class. (Manage the system > Policies > User classes)
Create a new pre-defined request for anonymous login (Manage the system > Workflow > Pre-defined requests):
Intended recipients: New Users
Operations > New Account: Enable “Create account” and click Update. Also click Select and choose a template.
Attributes: Select “BASEATTRIBUTE” and click Select. Ensure that “EMAIL” attribute is not optional.
Access control: Select the user class from step 3 and set Participant mapping to “REQUESTER”.
Create a new authentication chain and configure it for reCAPTCHA. See reCAPTCHA .
Create a new authentication chain with two modules for anonymous log-in:
External program:
Control type: required
External program: authanonreg.psl
Interface communication protocol: Authentication plugin
Description: “Anonymous Login”, for example.
Authentication chain selector:
Control type: required
Available chains : the reCAPTCHA chain (from step 5).
Interface communication protocol: Authentication plugin
Disable and modify the DEFAULT_LOGIN authentication chain:
Control type: required
Run this plugin to automatically select a sub-chain: authanonreg.psl
Available chains : Anonymous chain (from step 6), Use PSFEXT_VALUES
Interface communication protocol: Authentication plugin
Enable the DEFAULT_LOGIN authentication chain.
Modify the
authanonreg.pslfile to include the following:var $ ANONYMOUS_USER_ID= "<anonymous user ID>" ; var $ ANONYMOUS_AUTHCHAIN= "<anonymous authentication chain ID>" ; var $ ANONYMOUS_PREQID= "<anonymous pre-defined request ID>" ;
When a user logs in:
The anonymous user attempts the first authentication stage using the reCAPTCHA module. If the response is validated, then authentication proceeds.
The anonymous user enters the information and credentials required to create a new account, and submits the request.
You can configure email notification in order to send the user an activation email containing a link to a page that allows him to activate his own account. By default, activation emails are not sent.
By default, the activation link expires 24 hours after the request is submitted. The value for the length of expiry is controlled by the registry key “AnonymousRequestExpiry” DWORD value.
authuserattr
Bravura Security Fabric includes a sample plugin, authuserattr, that allows users to authenticate using profile attributes.
To configure Bravura Security Fabric to include an authentication chain using authuserattr :
Copy the
authuserattr.pslfile from the samples directory to the plugin directory.Copy an m4 script from the samples directory into the custom directory and regenerate the skins:
Copy
authuserattr.m4from the samples directory to the custom directory.Rename authuserattr.m4 to
authchain.m4. Ifauthchain.m4already exists, append the content of authuserattr.m4 to authchain.m4.Generate and install a new set of skins (make default en-us and make install default en-us for English).
Create profile attributes for user to validate against.
The sample requires the DOB and EMAIL profile attributes. These attributes will need to be populated by the user before they can be used.
Create a new custom authentication chain:
External program:
Description: "Attribute authentication”, for example.
Control type: required
External program: authuserattr.psl
Interface communication protocol: Authentication plugin
Disable and modify the DEFAULT_LOGIN authentication chain:
Control type: required
Available chains : Attribute authentication, Use PSFEXT_VALUES.
Enable the DEFAULT_LOGIN authentication chain.
When a user logs in they will attempt to authenticate using their date of birth and email address. If the response is validated, then authentication proceeds.
fedidp_response
The fedidp_response.py plugin is called by the fedidp-assert authentication chain module, and generates a SAML assertion using a Mako XML template. This plugin is used by the Scenario.hid_saml_idp component as part of SAML federated login .