Example: Create a group
This example shows you how certain users can use the Groups app to create a group on the Active Directory target system.
Assumptions
This example assumes:
Bravura Workforce Pattern is installed.
The "AD" Active Directory target system is configured as a source of profiles.
Group owners in AD are configured as group managers in Bravura Identity .
Click below to view a demonstration of this example.
Remove authorizers from the target system
Requests to create groups requires authorization from the target system authorizers and any group owners involved in the request. For this demonstration , we are lowering the requirement to just the group owners by setting the required authorizers on the Active Directory target to zero:
Log in to the Bravura Security Fabric Front-end (PSF) as superuser .
Click Manage the system > Resources > Target systems > Manually defined > AD .
Click the Authorization tab.
Change the following entries:
Minimum number of authorizers
0Number of denials before a request is terminated
0
Click Update.
Give a user permission to create groups
Users must belong to the built-in user class called _GROUP_CREATE_USERS_ that allows them to access the Create group request. For this example, add a single explicit user to the _GROUP_CREATE_USERS_ user class:
As superuser, click Manage the system > Policies > User classes .
Search for and select the _GROUP_CREATE_USERS_ user class.
Click the Explicit users tab.
Click Select… .
Select the checkbox for an end user; in this example it is ABBIEL.
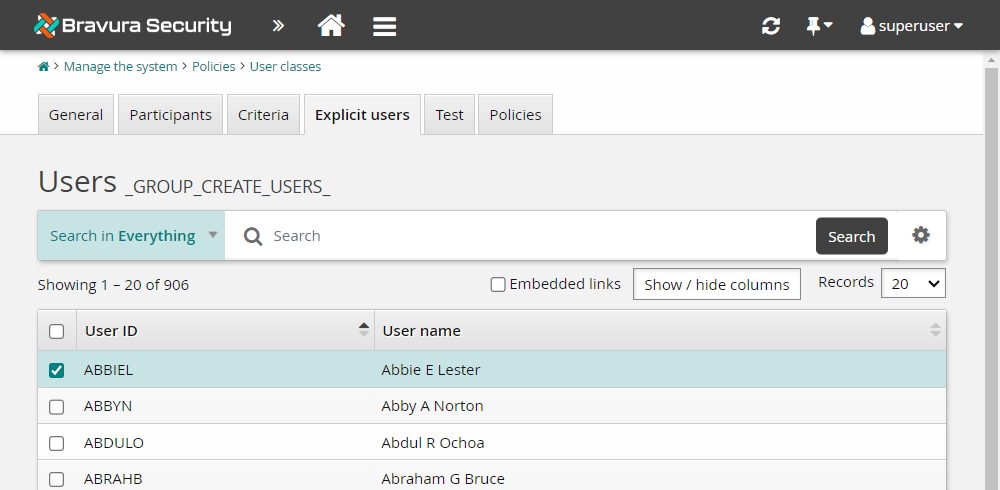
Click Add.
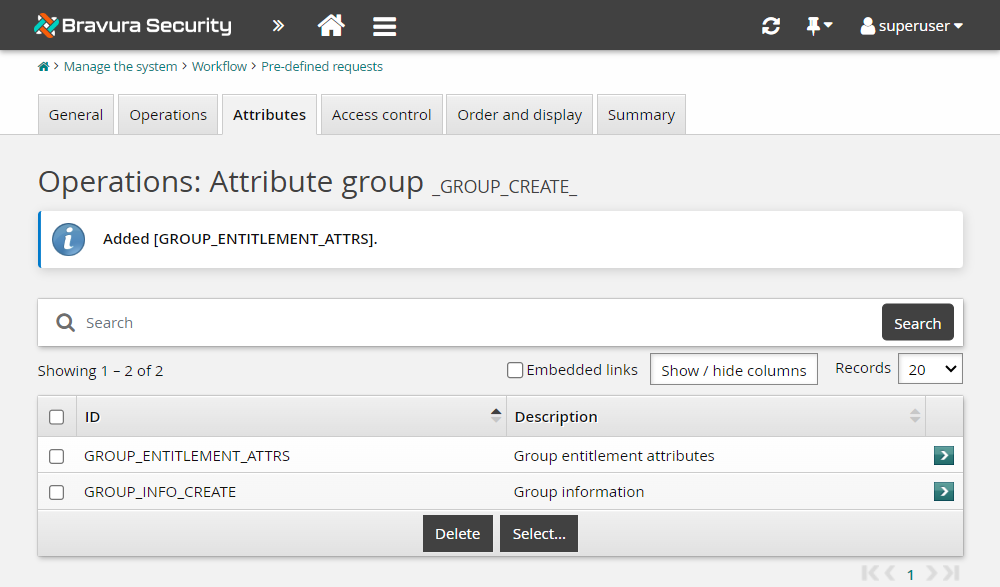
Add the group entitlement attributes to the pre-defined request
Now we will add the attribute group created in the previous example to the _GROUP_CREATE_ pre-defined request. This will then allow an expiry date to be set for members when they are added to the group during group creation. You could also add this new attribute group to other pre-defined requests such as _GROUP_UPDATE_MEMBERS.
Click Manage the system > Workflow > Pre-defined requests .
Search for and select the _GROUP_CREATE_ pre-defined request.
Click the Attributes tab.
Click Select…
Select GROUP_ENTITLEMENT_ATTRS.
Click Select .
Configure default values for the GROUP_OU attribute
Adding a default value for the group ou will reduce the chance of human error and ensure the group is created in the correct location in Active Directory.
On the Attributes tab for the _GROUP_CREATE_ pre-defined request, select GROUP_INFO_CREATE.
In the OU field, enter ou=Groups,ou=Demo,dc=<Exampledomain>,dc=corp as the default value.
Click Update.
Create a group
Log in to the Front-end (PSF) as end user.
Click Groups under the heading.
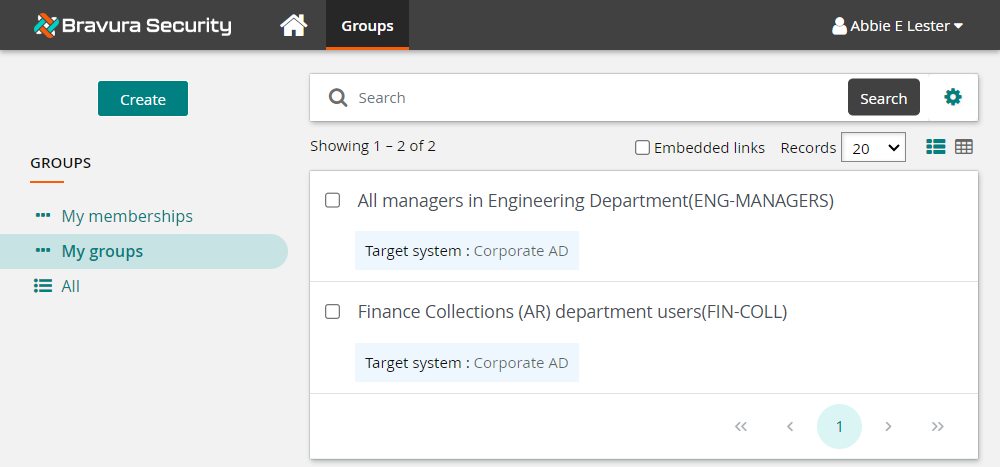
Click the Create button at the top of the Filter panel.
Note that the OU field is filled in for you.
Define group information:
Group ID
ENG-TEMPGroup description
Temporary Engineer HiresTarget system
AD
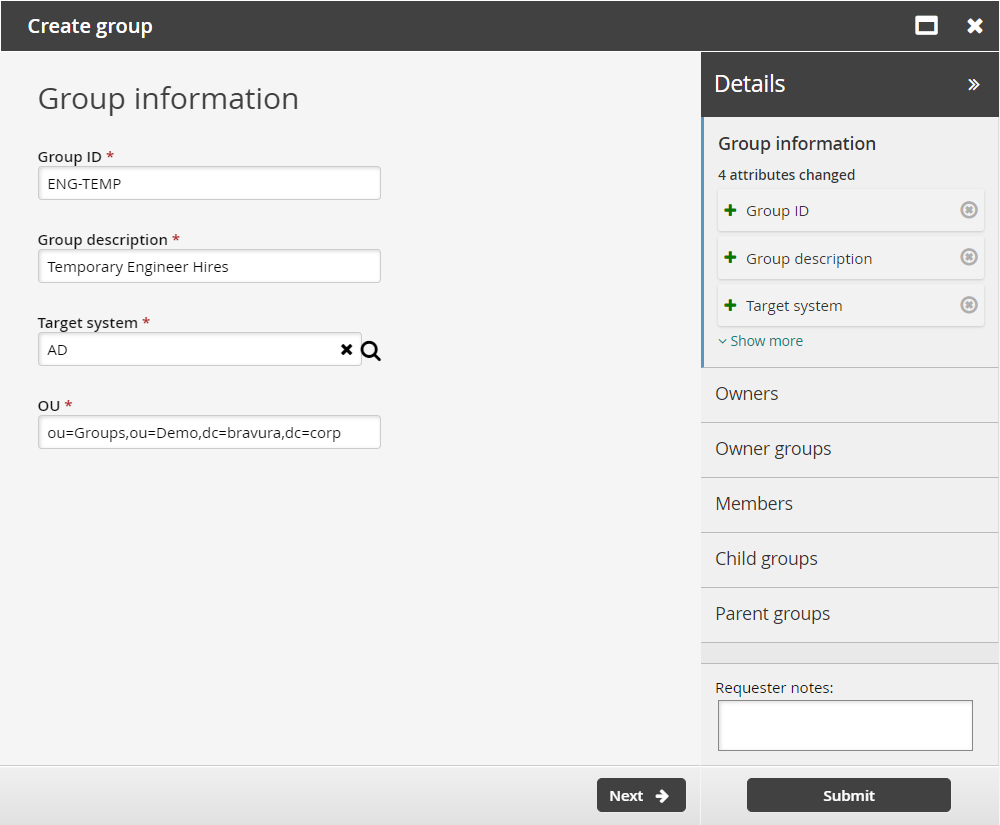
Click Next .
On the page, click Next .
On the page, search for and select the checkbox for ENG-MANAGERS-owners.
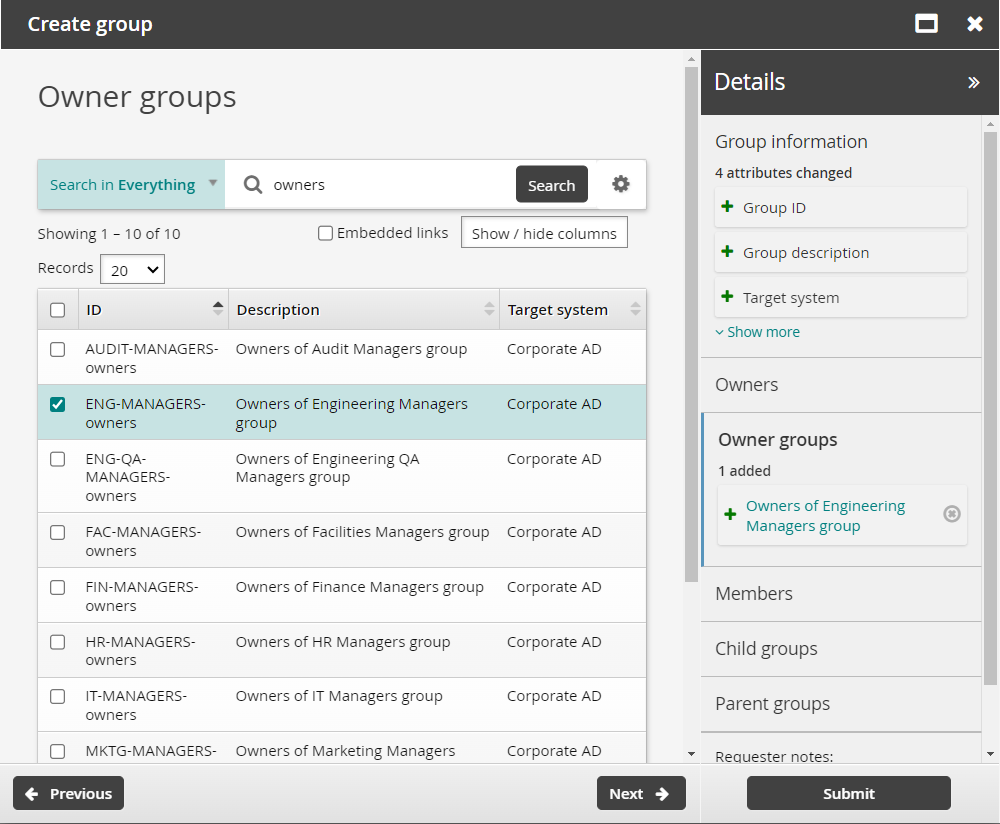
Click Next .
Search for and select Adam Gibbs
ADAMG0on the page.ADAMG0will be a temporary member of this group so we will set the expiry date entitlement attribute.Click on the Expiry date of an entitlement field next to ADAMG0 to display the calendar.
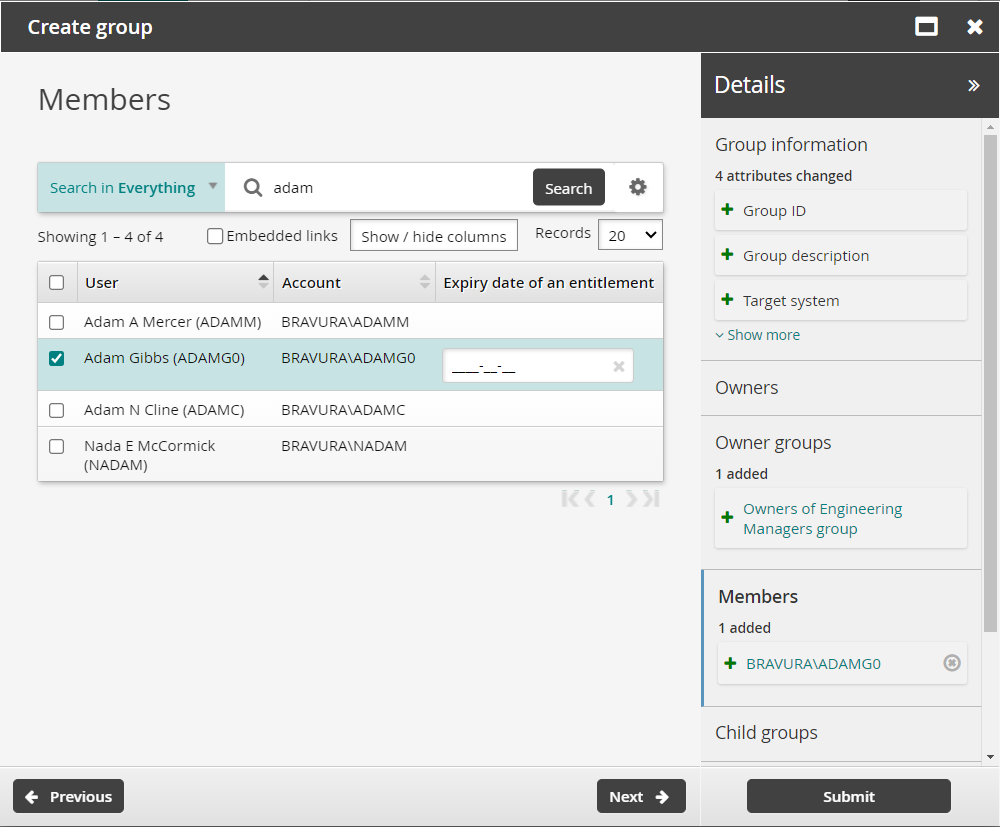
Select a future date for Expiry date of an entitlement.
Click Next .
On the page, click Next .
On the page, search for and select the checkbox of the TEMPS group.
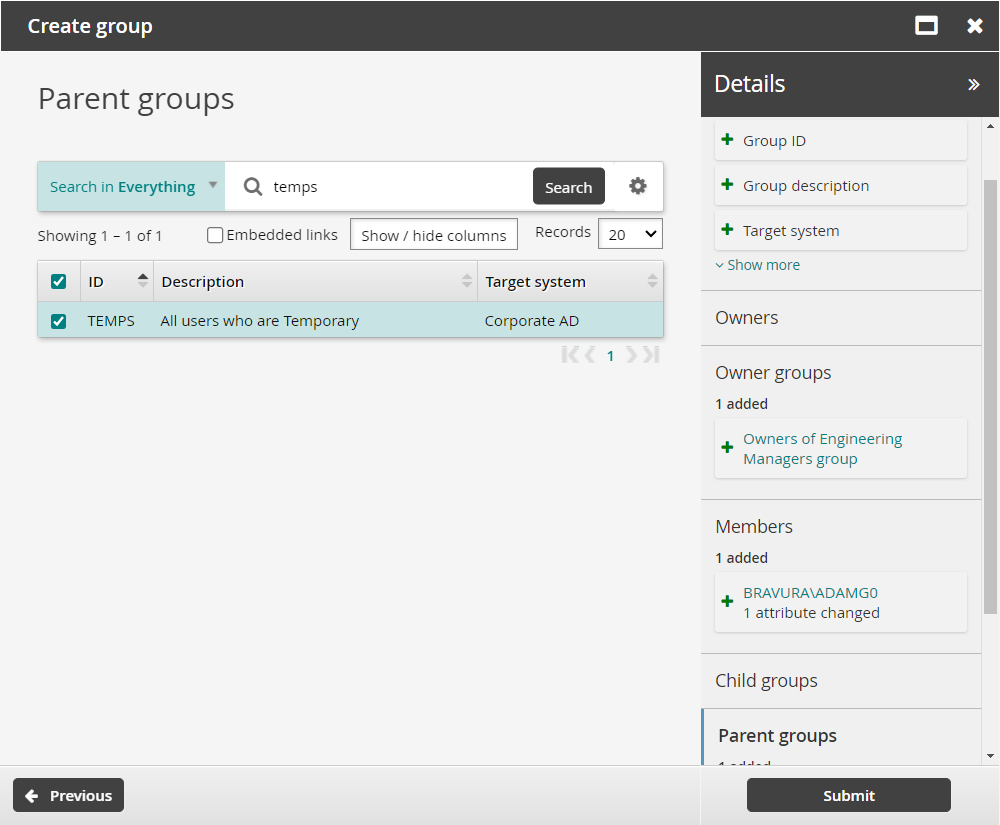
Click Submit.
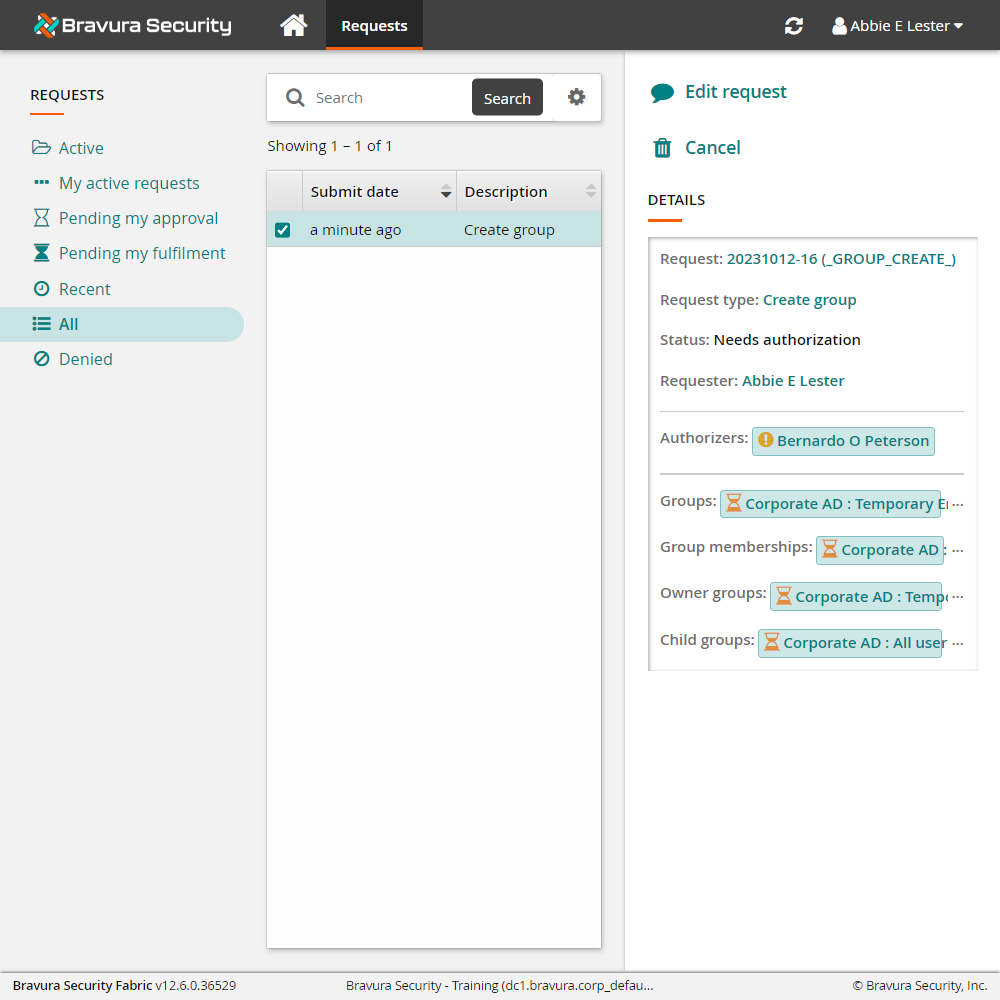
Click the View request link at the top of the page to check the status of the request.
Approve the request
To approve the request:
Log in to the Front-end (PSF) as a group owner; in this case the user is a member of the ENG-MANAGERS-owners group.
Click the link: There are 1 request(s) awaiting your approval.
The Requests app opens.
Select the request you want to review; Create group.
Bravura Security Fabric displays the details in the Actions panel on the right.
Review the request details.
Click Approve and confirm the approval by clicking the Approve button below the Comment field.
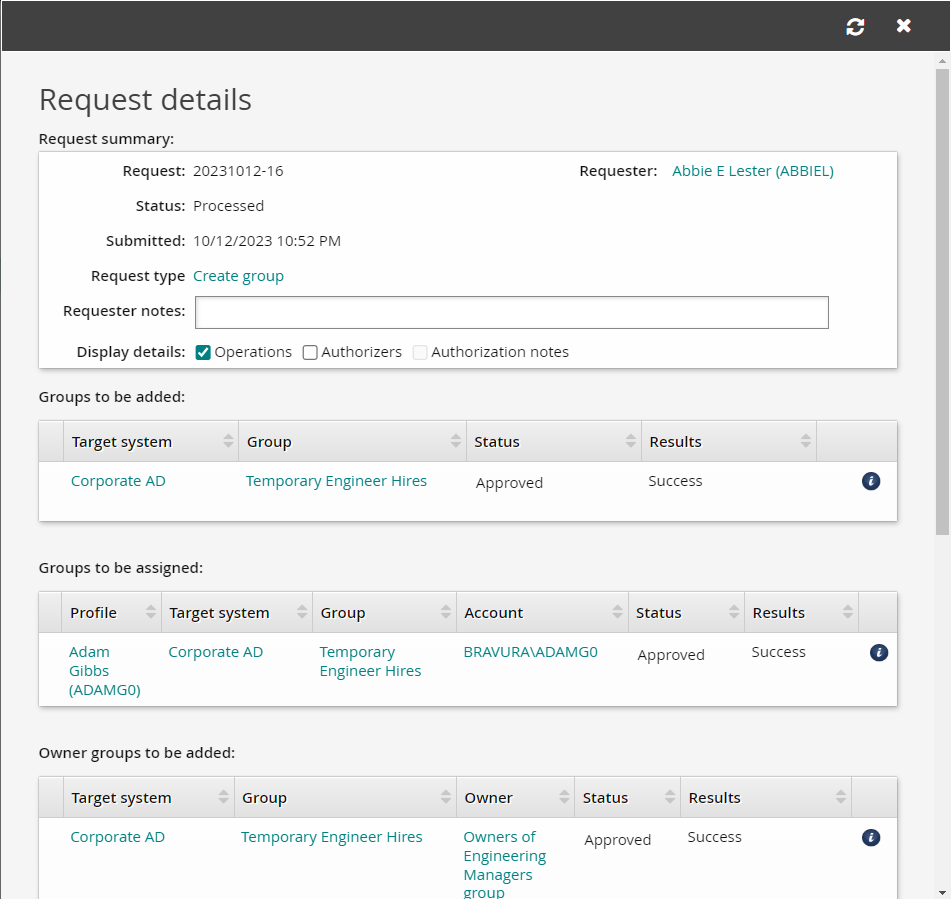
Track the results of the request
Return to your browser tab where abbiel is logged in and refresh the request details for the new group.
The request status will change to "Processed".
If the values of the Results columns in Request details tables are all "Success", you will know you have successfully completed the group creation.