Replace the native password program
To effectively intercept all password changes made using the regular password program on Unix (/usr/bin/passwd), you can install a replacement password program and a matching configuration file (psunix.cfg) on every Unix server where users might change their local or NIS/NIS+ passwords. See notes about synchronization in an NIS / NIS+ environment .
The Bravura Security password replacement program (pspasswd ) applies password strength rules defined on the Bravura Pass server to all new password selections. It uses the old, renamed, password program to implement the password change locally on the Unix server, and then forwards a request for synchronization to the Bravura Pass server.
Install pspasswd on the Unix trigger system
To install Bravura Security password replacement program:
Note the communication key (or Master Key).
The CommKey value is encrypted in Bravura Security Fabric . If you did not record the key in a secure location, copy the
idmsetup.inffile from <instance> \ psconfig \ on the Bravura Security Fabric server to the same location as the installer. The installer will extract the Communication Key value from the file.Note the product administrator and password to connect to the API SOAP Service.
Note the URL of the API SOAP Service.
If you did not select the Unix Installation Packages when you installed the Connector Pack, install the
psunixinstallation package .Run the installation shell script in:
Install pspasswd interactively
Installing interactively takes less preparation and allows you to specify settings during installation. You can use the idmsetup.inf configuration to pass through some of the information as defaults.
To interactively install pspasswd on the Unix system:
Run the shell script
install.shfrom the root of the installation package:sudo sh install.sh [ -inf <path>/
idmsetup.inf] [ -inst <instancename> ]where:
Option
Description
-inf
Specifies the path to the
idmsetup.inffile. If omitted, you must enter communication key (or Master Key) and other information when prompted.-inst
Specifies the instance name for location of the psunix files. If omitted, files are copied to the /usr/local/psunix/default instance .
Follow the instructions displayed by the installer script.
In the installation process:
Allow system files to be backed up.
Select the "Passwd Transparent Synch" installation option.
If you want to use the configuration options that exist in /etc/psunix.cfg, type
Ywhen asked. If you want to change the values, typen.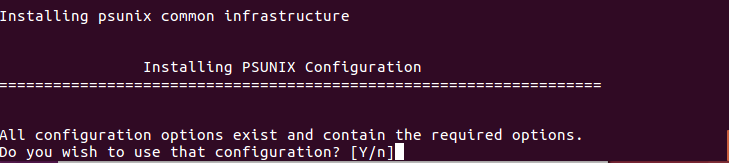
See Unix Configuration Scripts for more information about the Unix listener.
Enter the target ID of the target used to target this system.
Enter the URL of the API SOAP Service.
Enter a proxy URL if you are using a proxy. Press Enter if you are not using a Proxy.
Enter the proxy user name if you are using a proxy. Press Enter if you are not using a Proxy.
Enter the proxy user name’s password if you are using a proxy. Press Enter if you are not using a Proxy.
If you are using SSL, enter the path holding the CA certificate(s). Press Enter if you are not using SSL.
If you are using SSL, enter the certificate details. Press Enter if you are not using SSL.
Define the [libcurl] path or press Enter to use the system default libcurl library.
Define the [ignore] or press Enter to use the default value.
Define the user name for login to the IDAPI service.
Define the password for the IDAPI user.
The installer renames the old password program to <program name>.bin and replaces it with pspasswd .
Install pspasswd non-interactively
The installer’s non-interactive mode allows you to perform unattended installations. This would be advantageous where you want to install on many systems over SSH, for example. This mode requires you to write a response file that is used with a command line option.
To install pspasswd non-interactively:
Edit the following sections of the
psunix-responsefile.cfgin the root of the installation package:###################################################################### ## general options # Prior to installing PSUNIX, the installer allows the option to # backup files affected by the installation process. pre-backup = "Y"; # By default, if pre-existing configuration file(s) contains all the # required options, do not replace them. use-preexisting-cfg = "Y";
Edit < psunix-root>/conf/
psunix.cfgto define the communication key (or Master Key) that matches the one set during installation on the Bravura Security Fabric server; for example:commkey = "<encrypted commkey value>";
Optionally, you can pre-configure other options in this file if you want different behavior from the default. See the Unix Configuration Scripts for details.
Run the shell script
install.shfrom the root of the installation package:sh install.sh -c 2 -ni [ -inst <instancename> ]
where - inst specifies the instance name for location of the psunix files. If omitted, files are copied to the /usr/local/psunix/default instance.
pspasswd and non-default instances
The psunix local instance name, defined by the -inst option when running the install.sh script, is not connected to the main Bravura Security Fabric instance name. If specified, it designates a sub-target.
During install/setup, if the instance name is the default, the installer symbolically creates a link from:
/usr/local/psunix/<instance>/psunix.d to /etc/psunix.d, and
/usr/local/psunix/<instance>/psunix.cfg to /etc/psunix.cfg
The pspasswd binary (due to the fact that only one version can be installed in /usr/bin or /bin) always looks for /etc/psunix.cfg.
If you want to install pspasswd to run in a non-default instance, you must manually create the symbolic links to /etc/psunix.d and /etc/psunix.cfg.