Installing the global Connector Pack
It is recommended, but not required, that you install install Bravura Security Fabricprior to installing the Connector Pack . This allows you to choose between an instance-specific or global Connector Pack . You can install Bravura Security Fabric instances after the global Connector Pack has been installed.
The global Connector Pack may be useful if you have multiple instances of the Bravura Security Fabric installed on a server, and you want them all to use the same group of connectors.
Caution
If a server is hosting multiple proxy instances of Bravura Security Fabric , it is recommended that you do not install the global Connector Pack . The multiple instances may use different versions of the Connector Pack . Unexpected results may occur when the proxies try to synch their connectors with the master servers.
The Connector Pack is installed using the setup file distributed with the connector-pack-x64.msi.
To install a global Connector Pack :
Log in to the host Windows server as a member of the Administrators group.
Run
setupfrom the main software installation package.The setup program displays the page.
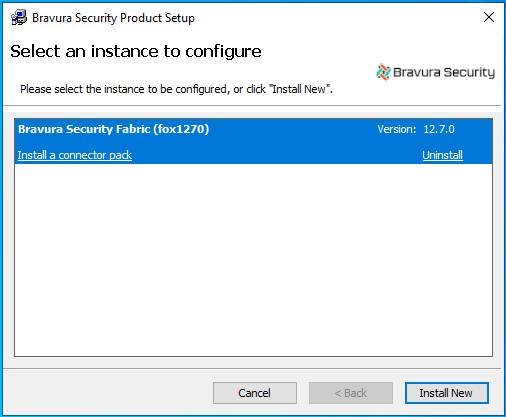
Click
Install New.The setup program displays the page.
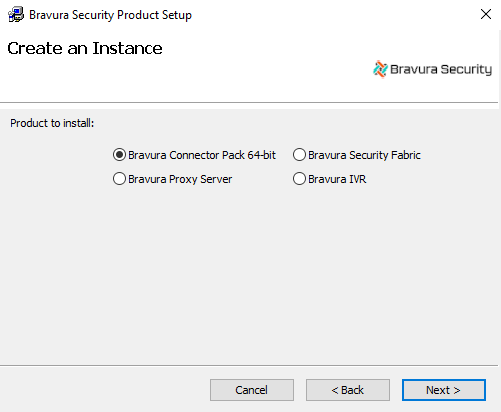
Choose Connector Pack.
Click Next.
Choose Global Connector Pack.
Click Next.
The setup program performs a pre-installation check and verifies all of the installation requirements. If either Visual C++ Runtime (x64) and Visual C++ Runtime (x86) are missing, setup attempts to install them.

If all checks are successful, click Next to proceed with the installation.
If any of the pre-install checks produce warnings or errors, click Report for details.
The setup program displays the page.
Click Next.
Read and accept the license agreement.
Click Next.
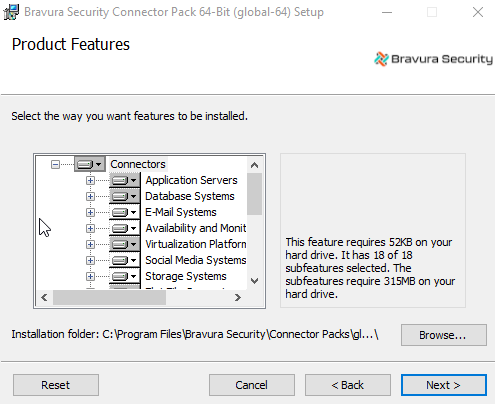
Choose the setup type that best suits your needs:
Typical to install all connectors, but no sample files.
or
Complete to install all connectors and sample files.
or
Custom to select which connectors, sample files or other programs to install.
Select only the items you want to install. All connectors are selected by default. Sample files are not selected by default.
Note
Ticket management connectors (interface programs) are listed under IT Service Management Systems, with titles suffixed by (Ticket).
Click Next.
Click Install to start the installation.
Wait until you receive the message that the Connector Pack (global) has been successfully installed.
Click Finish.
The post-installation tasks begin. Once the post-installation tasks are complete, you can click Report to see a list of connectors that have been installed by the Connector Pack, including any customized connectors.
Caution
Do not stop the post-installation tasks. The installer is loading connectors. Wait until the status changes to success, then click Finish. If you stop this process, or if it is unsuccessful, see Manually loading the connectors .
The installer automatically generates and installs new skins.