Automatic account attachment examples
The following use cases show you how to configure targets systems and a scenario component to achieve automatic account association.
Account name on the secondary target matches the user profile ID
In this example, Active Directory is configured as a source of profiles and a Linux system is configured as a secondary (non-source of profiles) target system. The Active Directory account name is "johndoe", and the Linux target account name is "johndoe".
No additional configuration is required for this scenario. Run auto discovery to associate accounts with user profiles. Click Manage the system > Maintenance > Auto discovery > Execute auto discovery.
Account name on secondary target matches account attribute on source of profiles
In this example, Active Directory is configured as a source of profiles and LDAP is configured as a secondary target. Active Directory accounts have an email address stored in the "mail" account attributes, whereas LDAP target uses the same email address as an account name.
AD account name: johndoe
Email address stored in the "mail" attribute of the AD account: john.doe@organization.com
LDAP account name: john.doe@organization.com
Configure the AssocID attribute
Log in to the Bravura Security Fabric Front-end (PSF) as superuser .
Install the Scenario.im_corp_loaddb component .
From the main click Manage external data store.
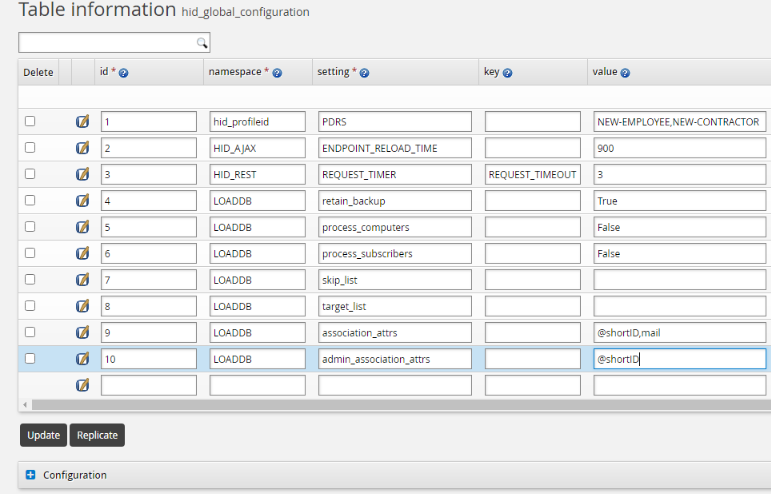
Configure the assocID attribute in the hid_global_configuration extdb table as shown below.
Configure the Active Directory mail account attribute
Navigate to Manage the system > Resources > Account attributes > Target system > AD > Defaults.
Find the "mail" account attribute.
Click Override.
Enable the Load attribute values from target system option.
Click Update to save the changes.
Run auto discovery to associate accounts with user profiles. Click Manage the system > Maintenance > Auto discovery > Execute auto discovery .
Account attribute on the secondary target matches an account attribute value on source of profiles
In this example, Active Directory is configured as a source of profiles (non-source of profiles) and LDAP is configured as a secondary target. Active Directory accounts have an employee ID stored in the "employeeID" account attribute, whereas the LDAP target has the same attribute value in the "employeeNumber" account attribute.
AD account name: johndoe
Employee ID stored in the employeeID attribute of the AD account: 123456
LDAP account name: jdoe
Employee ID stored in the employeeNumber attribute of the LDAP account: 123456
Configure the AssocID attribute
Log in to the Bravura Security Fabric Front-end (PSF) as superuser .
Install the Scenario.im_corp_loaddb component.
From the main click Manage external data store.
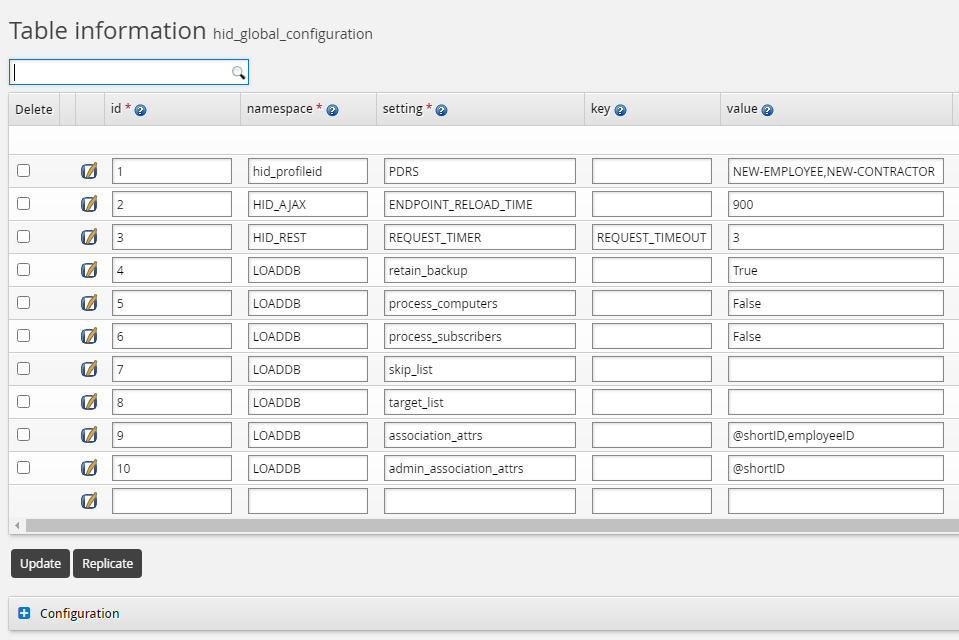
Configure the assocID attribute in the hid_global_configuration extdb table as shown below.
Configure the mail attribute on Active Directory
Navigate to Manage the system > Resources > Account attributes > Target system > AD > Defaults.
Find the "employeeID" account attribute.
Click Override.
Enable the Load attribute values from target system option.
Click Update to save the changes.
Configure the employeeNumber attribute on LDAP
Navigate Manage the system > Resources > Account attributes > Target system > LDAP.
Click Add new on the Target system level overrides tab.
Set the attribute ID to
employeeNumber.Enable the Load attribute values from target system option.
Click Update to save the changes.
Configure the LDAP target association setting
Navigate to Manage the system > Resources > Target systems > Manually defined > LDAP.
Set the Account attribute to automatically attach accounts to user profiles parameter to
employeeNumber.Click Update to save the changes.
Run auto discovery to associate accounts with user profiles. Click Manage the system > Maintenance > Auto discovery > Execute auto discovery .
Troubleshooting automatic account assignment
In any of the above scenarios, if account association fails for any reason after running auto discovery, use the following command "force" the account association recalculation. From the util directory:
dbcmd -call -p LoaddbResyncAdd -param "\"A\" \"AD\" \"\" \"\" \"\" \"\" \"\" \"\""
Note that the command is not supposed to return any message, unless there was an error.
This command should be used only once; it should raise an internal flag for the Bravura Security Fabric to clear any caches and skip any standard performance optimization logic the next time it runs the auto discovery. if after the next auto discovery account association is not established, contact Bravura Security support.