Product considerations for migration
Carefully analyze configuration parameters and files to determine what will be affected. Consider the following:
Databases
Each significant version of Bravura Security software is likely to have different requirements for its database tables, table schema or data encoding.
Below is a compatibility matrix that should be taken into consideration when upgrading Connector Pack and Bravura Security Fabric in regards to MSSQL database requirements:
Latest version requirements
Additional considerations
Data migrations from Standard to Enterprise editions of MSSQL will require adding partitions to some of the database tables. Contact support@bravurasecurity.com if you are in this situation.
Migrating to Datacenter or Developer editions of MSSQL, as well as to database clusters or other database-replicated configurations that lock down the database schema are not supported by default. Please contact your account manager if you would like our Professional Services to do the migration for you.
Replication configuration
The easiest way to migrate an entire cluster is to migrate the primary node, then install new replication node/proxy servers in the new environment and resynchronize from the primary. See Replication and Recovery to learn how to add a replication node into a cluster.
This procedure only synchronizes data in the backend database. Any component prerequisites (such as IDMLib or target system requirements) must still be installed on each node before resynchronizing. After resynchronization, you need to run updinst to synchronize files and registry settings .
Migrating just the primary node may result in some data loss from the nodes that are not migrated. Alternatively, you could migrate all nodes to ensure data preservation, but this may result in some synchronization problems.
The updinst program synchronizes files and registry settings between servers in a multiple-instance environment, or a replication environment. The program is run during auto discovery when the Maintenance > Options > PSUPDATE FILE REPLICATION setting is enabled. This is the default setting.
This program also collects and synchronizes proxy log files onto the instance server.
This program is used in conjunction with the File Replication Service (idfilerep).
To determine which files and registry settings updinst replicates, there are whitelists and blacklists that specify what data to include and what data to omit in the context of file/registry replication You can write an updinst.cfg file to provide additional configuration.
A sample of updinst.cfg is located in the samples directory. This configuration file must be placed in the \ <instance> \ psconfig \ directory before it can be used by the File Replication Service. Use this configuration file to control which files and registry settings are replicated to other instances (whitelist) and which are not replicated (blacklist). The whitelist settings override blacklist settings.
Warning
All file and configuration modifications should be done on the same server (the primary). When attempting to run updinst from a node other than the primary, an error will occur, and the operation will be aborted. In extreme circumstances there is an option to force external data store replication (-extdb -forcerun) from a secondary node; however that should be done only when that database was corrupted on the primary (and its backups that are created every time the external data store is updated, were also corrupted) but the database, or a backup, survived on a secondary node. If updinst is run from more than one server, or if file or registry changes are made on secondary nodes, it is possible for it to overwrite newer files or settings that exist on secondary nodes. If a server with missing files runs updinst, that will remove those same files on all other instances.
Caution
Do not attempt to replace Database Service (iddb) files using updinst or the File Replication Service. Updating the Database Service and related files (such as iddbmssql.dll) must be done manually on all instances. This only applies to the Database Service service. All other services can be updated using the File Replication Service. To update the Database Service files manually, shut down all services on the instance, back up all services, and then replace the Database Service files.
If a problem occurs during file replication then a notification email is sent to the administrator, and the FILE REPLICATION FAILURE event is triggered.
updinst.exe [-list] | [-showconfig] |
  [-synchfile] [-syncreg]  [-globalcp] [-serverid <serverid>...] [-dry-run] |
  [-extdb[-forcerun]] | [-getlogs] [-proxyfile <proxylist.csv>] [-removelogs]
Argument | Description |
|---|---|
-dry-run | Only show what would be done without making changes. |
-getlogs | Retrieve and synchronize all logs from all proxies configured onto the instance server. Logs will be under their respective \Logs\proxy_<proxy_IP> directory. |
-globalcp | Synchronize the global connector pack in addition to the current instance. Used in conjunction with the -syncfile argument. |
-list | List file replication services involved and exit. Display the status of each service, node ID, address, and port. If the service is unreachable, check the connection of the Database Service for each server. |
-proxyfile <proxylist.csv> | Retrieve and synchronize all logs from proxies listed in the \<instance>\psconfig\proxylist.csv file. Logs will be under their respective \Logs\proxy_>proxy_IP< directory. Where proxylist.csv contains a list of proxy IP addresses and their ports. This is only used in conjunction with -getlogs. |
-serverid <serverid> … | Synchronize to specified servers; can be used with multiple server IDs. The server ID can be found using the -list argument. If no server is specified, all servers are updated. |
-showconfig | Show built-in configuration and exit. |
-syncfile | Synchronize files to other servers. |
-syncreg | Synchronize registry settings to other servers. |
-extdb | Synchronize the extdb tables. |
-forcerun | Forces the current node to synchronize the extdb tables. |
-removelogs | Remove all previously fetched logs from all proxies. Can be used in conjunction with -getlogs to remove logs that no longer exist on the remote server. |
-filedir <filedir> | Specific file path from which files are synchronized to other servers. This is the relative path under the instance’s main file folder. |
-registrydir <registrydir> | Specific registry path from which settings are synchronized to other servers. This is the relative path under the instance’s main registry folder. |
To show the default configuration file:
updinst -showconfig
To show a list of all file replication services that are running:
updinst -list
To synchronize all files and registry settings on all servers:
updinst -syncfile -syncreg
To synchronize a specific file directory on all servers:
updinst -syncfile -filedir <filedir>
To synchronize multiple file directories on all servers:
updinst -syncfile -filedir <filedir1> -filedir <filedir2> ...
To synchronize a specific registry setting on all servers:
updinst -syncreg -registrydir <registrydir>
To run a dry-run on a specific server:
updinst -serverid <server id (guid)> -syncfile -syncreg
To update global Connector Pack files:
updinst.exe -globalcp -syncfile
To collect and synchronize logs from all proxies:
updinst.exe -getlogs
To collect and synchronize logs from all proxies listed in the proxylist file:
updinst.exe -getlogs -proxyfile <proxylist.csv>
Where the proxylist.csv contains:
::proxy, port::
10.0.39.111, 3344
10.0.39.121, 3344
To synchronize the extdb tables:
updinst.exe -extdb
To remove all previously fetched logs:
updinst.exe -removelogs
To remove logs that no longer exist on the remote server:
updinst.exe -removelogs -getlogs
In the updinst config file, all file paths are rooted at the backslash immediately after the instance_name directory.
Each item in the lists contained in the file is a regular expression (regex).
While the sample .cfg file contains some entries from the default values built into the updinst binary (for regex illustration purposes), it's recommended that the cfg file actually used contain only new/custom values, which do not show up in the four lists when checking the configuration with no updinst.cfg file in the psconfig directory (it saves on comparisons, and the instance contains many files and directories to compare with each declared regex string).
If the file to add an exception for is script\somefile.py , the most precise regex expression for it is:
^\\\\script\\\\somefile.py$
The starting ^ represents the beginning of the string, so it would not match, for example:
\samples\script\somefile.py
Similarly, the trailing $ represents the end of the string, so it won't match, for example, an extension like .pyg
To exclude a whole directory, you can leave the $ off and the expression will match everything in that directory: files and other directories with their files. This default option for example matches all auto-discovered target list files:
psconfig\\\\discovered
Each backslash is escaped with a backslash, so \ becomes \\, and since it is inside a KVG string, \\ becomes \\\\ (\s would simply escape the s).
Below is an example that adds blacklisted registry entries and file entries (meaning that they will not be sent from the primary to secondary application nodes).
# KVGROUP-V2.0
"updinst" "cfg" = {
# Registry path blacklist.  Registry paths that match the regular
# expressions here are not considered for replication, unless they
# appear in regWhitelist.  All paths are relative to the instance
# registry root.  Registry keys (and value names) are separated by
# double-escaped backslashes (\\\\).
 "regBlacklist" = { "^IDAPISOAP\\\\endpoints";
                     "SENDER_EMAIL";
                     "ServerAddress" };
  # File path blacklist. Filesystem paths that match the regular
  # expressions here are not considered for propagation, unless they
  # appear in regWhitelist (see above). All paths are relative to the
  # instance root directory. Directories and files are separated
  # by double-escaped backslashes (\\\\).
  "fileBlacklist" = { "^\\\\psconfig\\\\.*\\.db$";
                      "plugin\\\\debug\\\\.*";
                      "design\\\\src\\\\ui.build\\\\.*";
                      "design\\\\src\\\\ui\\\\node_modules\\\\.*"
                  };
}
In the above:
Blacklisting these entries ensures that the SENDER_EMAIL and ServerAddress are not propagated from the primary to the secondaries. These two entries will be unique to each server.
SENDER_EMAIL system variable, so that each node can be given a separate "From:" field in outgoing emails, to be able to quickly distinguish what node originates what email.
ServerAddres s bypasses the automatic computer-name detection on each node (for example, when
iddbdetects only the hostname in a node whose OS is not joined to a domain, and Bravura Privilege needs to register FQDNs instead - so that link passing between nodes, as in downloading recording archives, can succeed the TLS check in IIS)
The entry blacklisting the IDAPISOAP\endpoints registry key exists by default in the configuration file, in case each node has to provide different SOAP endpoints (directly to the hostname, or for zoning purposes).
Most registry changes are system variables listed in the registry section at Manage the system >Maintenance > System variables.
psconfig\*\*.db is where Bravura Privilege keeps list files from discovered systems in 12.0.0+; by default, those files are useful only on the primary node and sending them to replica nodes is a waste of resources, especially at the end of each auto discovery.
For the same reason, check the output of updinst -showconfig to make sure that the psconfig\*.db files are also blacklisted (and if not, add a blacklist rule for ^psconfig\\\\*.db)
Filtering the logs for
psupdateorupdinstdurations can suggest what other large files can be excluded from auto discovery if they take too long.
plugin\debug \ is where (mostly componentized) Python scripts using IDMLib-based logging place their input/output KVGs and like other log files, those are usually not needed on secondaries from the primary.
design\src\ files should never change after patching. They are Angular app requirements and there is no need for them to be propagated to secondary servers, let alone proxies.
Whitelists trump blacklists. This means if the same item is matched both by a blacklist regex and a whitelist one, the whitelist wins and the item is propagated.
If an entry is not blacklisted (or if it was by default blacklisted, but is modified with a whitelist entry):
It copies any files changed on the primary inside the instance folder and subfolders, and it overwrites any changes. In other words, it deletes any new files created on the secondary nodes and if files are modified on secondaries, the changes are reverted and not backed up.
It copies any registry changes made on the primary node and overwrites any changes on the secondary nodes (removes them if they were not on the primary).
The main Bravura Security Fabric installer only installs/checks for the 64-bit VC++ redistributables. The Connector Pack MSI will install/check for 32-bit and 64-bit, so do not depend on file propagation to copy all the connector pack files to other nodes and proxies.
Logging during migration
You should leave the logging service running, on the server on which you are running migration utilities, in order to capture the events generated during the data migration process.
To capture event run-time errors which are not captured by the logging service, redirect output to a text file. For example, to log the output of fixdb run:
fixdb > fixdb.txt 2>&1
If you get pop-up errors, copy the text inside and add it to the text file, or take a screenshot. If you get any errors (other than uppercase failures from fixdb), stop the process and send the text files to the support representative you have contacted for your migration.
Scripts, plugins, and configuration files
When configuring Bravura Security software, various files may have been added or modified to implement various features or customizations.
Carefully analyze and test all scripts, plugins, and configuration files; for example:
Customized auto discovery scripts
Target integration configuration files
External interface program configuration files
Plugin scripts
Language and user interface modifications
Customized password strength dictionary file
Filters
Access controls, including user classes
Service configuration
Note the following for custom scripts, plugins, and configuration files:
The directory structure may have changed between versions; verify any hard-coded directory PATH details.
The names of Bravura Security Fabric programs may have changed; verify all references to those programs.
The command line usage of Bravura Security Fabric programs may have changed; verify all arguments being passed into those programs.
Scripts written in the PSLang language are being migrated to Python scripts. You may want to examine any scripts to determine if new build-in functions or versions written in Python are available to optimize your code.
The capability of connectors and external interface programs may have been enhanced (possibly by changes to the target address line or additional options in its configuration file); you may need to review your integrations to reflect those changes.
New built-in connectors may have been written for integrations you previously scripted using flexible connectors; you may want to re-implement those targets using the new connector.
Multiple connectors may have been consolidated into a single connector (for example, the Domino and Lotus Notes connectors were combined in connector pack 1.3); you will need to redo any integrations using either of those connectors.
If you have your own compiled binaries for custom interfaces, plugins or authentication chains, you must recompile them as 64-bit.
The SearchFilter plugin interface was completely overhauled in 12.3.0. Components using add_expression or manually altering query will need to be rewritten using the new builder interface.
This overhaul may cause problems with older implementations of this plugin during upgrades See the Knowledge Base article https://support.hitachi-id.net/hc/en-us/articles/4414643138583 for more information. You will need Bravura Security portal access to view this article.
Changes to wfreq plugins as of 12.0.0 mean almost any custom wfreq extensions likely need to be re-written or have logic changed to meet new restrictions on when the plugin runs.
Custom loaddb or
idtrackscripts written prior to 12.0.0 should be tested. Care has been taken to maintain backwards compatibility but some edge cases may not work or require refactoring; for example, differential listing works differently to older versions.Changes to the EMAILPIN component as of 12.0.0 means existing entries in the PSLSTORE table pertaining to the EMAILPIN are no longer valid in v12+. All PSLSTORE entries with the namespace EMAILPIN must be cleared prior to the upgrade to ensure the EMAILPIN component remains functional after the upgrade.
File Locations
When you install any Bravura Security product, the default path for program files is <Program files path>\Bravura Security\ as of 12.5.0.
Prior to 12.5.0, the path is <Program files path>\Hitachi ID\.
The directory name is not changed when upgrading.
Three main directories are created when you install Bravura Security Fabric instance, as detailed below.
It is recommended that you do not change these directory locations during the setup process. You cannot install any of the directories required for Bravura Security Fabric on a mapped drive.
<Program Files path>\Bravura Security\Bravura Security Fabric\<instance>\
Directories marked with  include files installed by Connector Pack .
Directories marked with include folders and files installed with the optional Analytics app.
Directories marked with  include optional files. They are only installed in a complete installation or if selected in a custom installation.
Directory | Contains |
|---|---|
| Files required for add-on software, such as Local Reset Extension and SKA. Some files, required to target Netegrity SiteMinder, are installed by Connector Pack . If you installed a global Connector Pack , these files are contained in the Connector Pack global directory. |
| Instance-specific user management connectors (agents). If you installed a global Connector Pack , user management connectors are contained in the Connector Pack global directory. |
| Analytics app specific folders |
| Contains * .rsd files which are Shared Dataset Definitions. These files are only used by SQL Server versions higher than Express. They contain datasets that are shared between reports. |
| Contains * .rdl files which are Report Definitions. These files are the drillthrough reports used by other reports. They are not visible to the end-user. |
| This folder contains other folders. Each folder in this folder is a category in the Analytics app. Within these folders are * .rdl files which are Report Definitions. The folders need to be added to the CUSTOM ANALYTICCATEGORIES system variable to be visible. These reports are then visible to the end-users in the Analytics app. |
cgi-bin | The user web interface modules (* .exe CGI programs). |
db | The Bravura Security Fabric database sqlscripts. |
db \ cache | Search engine temporary search results. These files are cleaned up nightly by |
db \ replication | Stored procedure replication queues, and temporary replicated batch data. |
| Files necessary to make modifications to the GUI. Some files are installed by Connector Pack . If you install a global Connector Pack , files related to connectors are located in the global design directory. |
dictionary | A flat file, Bravura Security Fabric uses this file to determine if new passwords fail dictionary-based password-policy rules. |
idapiservice | Files required to use the SOAP API. |
| Instance-specific ticket management connectors (exit trap programs). If you installed a global Connector Pack , ticket management connectors are contained in the Connector Pack global directory. |
lib | Contains the |
license | The license file for Bravura Security Fabric . |
plugin | Plugin programs executed by Bravura Security Fabric . |
psconfig | List files produced by auto discovery and the |
report | Files and programs for report generation. |
| Instance-specific sample scripts and configuration files. If you installed a global Connector Pack , connector-related sample files are contained in the Connector Pack global directory. |
script | Configuration files and scripts used by connectors, |
service | Service programs. |
sessdata | Session data. A scheduled program removed old data files nightly. |
skin | Compiled GUI files used at run-time (HTML and *.z). |
smon | Monitored session data. This location can be changed by Recorded session management (smon) module options. |
| Command-line programs and utilities. If you install a global Connector Pack , tools related to connector configuration are located in the global util directory. |
| The If you installed a global Connector Pack , this directory is created in the Connector Pack global directory. |
wwwdocs | Images and static HTML pages used by Bravura Security Fabric . |
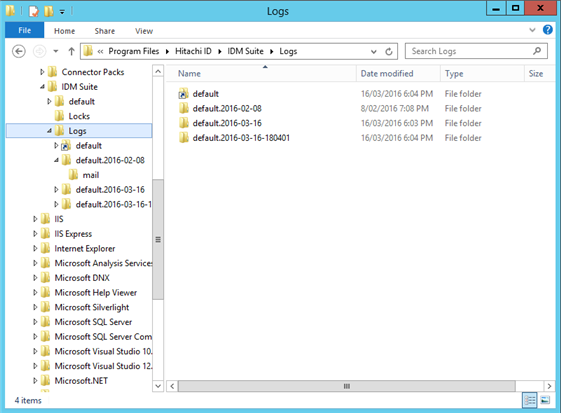
<Program Files path>\Bravura Security\Bravura Security Fabric\Logs\<instance>\
Any operation that is run by Bravura Security Fabric is logged. Those logs are invaluable when debugging an issue. The log directory by default is <Program Files path>\Bravura Security\Bravura Security Fabric\Logs\<instance>\ . Each instance of Bravura Security Fabric that is installed will have at least one sub-directory within this directory.
The rotatelog scheduled job, which runs on a nightly basis, rotates the logs into a new folder, to reduce disk space usage.
<Program Files path>\Bravura Security\Bravura Security Fabric\Locks
Certain target systems can only be accessed serially, such as Lotus Notes. This is a limitation of the API used to access the target system. In these cases Bravura Security Fabric drops a lock file in the locks directory when an operation is being performed that should only be performed serially. For this reason the locks directory must be the same for all instances of Bravura Security Fabric that are installed on the same server.
When you install Connector Pack , files are placed in different locations depending on type of Connector Pack .
For an instance-specific connector pack, the installer, connector-pack-x64.msi, installs connectors and supporting files in:
<Program Files path>\Bravura Security\Bravura Security Fabric\<instance>\
For a global connector pack, the installer, connector-pack-x64.msi, installs connectors and supporting files in:
<Program Files path>\Bravura Security\Connector Packs\global\
The table below describes the function of directories that are created when a Connector Pack is installed:
Directory | Contains |
|---|---|
addon | Files required to target Netegrity SiteMinder systems |
agent | User management connectors (agents) |
design | Connector Pack -related files necessary to make modifications to the GUI; for example target system address help pages. See the “Customization Guide” for details. |
interface | Ticket management connectors (exit trap programs) |
samples | Sample scripts and configuration files |
unix | The |
util | Tools to support the configuration of various target systems |
Blocking automation requests
Note
AUTOMATION ENABLED system variable implemented in Bravura Security Fabric 12.4.0.
There are several automation logic paths in Bravura Security Fabric, including:
Python idtrack (
idtrack.py)Base product idtrack (
idtrack.exe)Automatic resource provisioning (
autores)Role enforcement (RBAC)
psupdatepost-hook components (ie. scheduled termination, subscriber validation)
Each logic path uses their own set of configuration options, including different "switch off" settings. During migration, it is recommended to disable the automation logic in the production environment while the initial discovery is run, to start off with a good baseline. However, it is easy to miss disabling one or more settings during migration.
Use the AUTOMATION ENABLED system variable, to control whether automation requests should be issued, which applies to all automation logic paths. By default, this is set to Enabled.
It is important to note the status of the AUTOMATION ENABLED system variable throughout the migration process. If it was set to False, ensure that it is set back to True unless you want to continue preventing all automation requests from being issued.
To allow certain automation requests to proceed while AUTOMATION ENABLED is set to False, include the CIRCUMVENT_AUTOMATION_BLOCKAGE built-in request attribute with the request. This request attribute will circumvent the automation block when set to True; for example, it can be used by custom scripts to submit automation requests even if automation is disabled.
Reports
Saved reports will not be preserved when upgrading from earlier versions. After the upgrade, scheduled reports can be viewed on the Manage the system > Maintenance > Scheduled jobs page, but cannot be run or modified.
Reports in Bravura Security Fabric versions 9.0 or later are SQLite databases.
After upgrades or patches you can expect to see errors from loadreports on reports not covered in your product license.
Product customizations and fixes
In addition to configuration files, your Bravura Security Fabric instance may contain custom binaries and/or schema. These could include web modules, connectors, plugin programs, external interface programs, and so on.
Once custom binaries are identified, their purpose should be determined to decide whether they are still necessary. For example, if the custom binary was created to resolve a product deficit, the deficit was likely resolved in the base product. Similarly, if the purpose of the binary was to add custom functionality, it is also possible that the feature was added to the base product.
Read the Release notes to determine whether a custom binary is necessary. If it is still not obvious, contact support@bravurasecurity.com for assistance.
Only in very specific cases will an older binary be usable in a newer product. A previous service engagement or product fixes on an existing instance (including binary and/or schema) might require assistance from Support to either initiate a new service engagement, verify the fixes provided in a previous release, or indicate a new feature or functionality that supersedes fixes in older functionality.
The Windows registry
A careful examination of the registry in both the source and destination instance subkeys will reveal manually entered subkeys.
Like custom binaries, each subkey identified as manually entered should be evaluated on a case by case basis before choosing to export it to another instance. This is especially true of version migrations. See Release notes to determine whether the key needs to be migrated or whether product enhancements have been made to toggle these keys from the administration interface. Contact support@bravurasecurity.com for details about any specific registry subkeys.
If a key needs to be migrated, you can make the change directly using the Windows registry editor (regedit.exe) utility on the new instance, or by exporting from the old and importing to the new server using the same utility.
One key of vital importance in older product versions is the "MASTERKEY". This key was used for communication between various components of the software. For example, transparent password synchronization triggers use the key to communicate with the pushpass/idpm service, and some connectors use it to communicate with their associated agent installed on the target system. In new product versions, this key is now known as the "CommKey" (short for communications key.) This key cannot be copied and renamed as it is now stored in an encrypted format. To set the key, use the resetkey program .
Use the resetkey program if you need to reset the communication key (or Master Key), Connector encryption key, or IDMLib encryption key in the registry.
For example, if you have forgotten any of the encryption keys, or if you have a policy which requires you to change it on a regular basis.
Updating the registry must occur on all servers, including listeners, proxy servers, application instance servers, IDDB replication nodes, and transparent password synchronization triggers. If this change is not completed on all servers, then communication between these servers can fail. You can export the reset encryption keys to the idmsetup.inf file, which is used to load information during the initial installations on these servers.
resetkey.exe -type <keytype> -value <keyvalue>

resetkey.exe -type <keytype> -export [-value <keyvalue>] [-file <file>]
Argument | Description |
|---|---|
-type <keytype> | The key type for the encryption key that is being reset. Valid types are: commkey connectorkey idmlibkey restapikey (export only) |
-value <keyvalue> | The hexadecimal key to set for the new value for the key as specified for -type in the registry, |
-export | Copies the registry value for the specified encryption key, encodes it, and writes it to the inf file. |
-file <file> | Allows you to specify the name and location of an alternate inf file to which to export the encrypted key value. The default name and location is <instance>\psconfig\ |
To update the communication key (or Master Key), Connector encryption key, or IDMLib encryption key in the registry with a specified hexidecimal key, type:
resetkey -type commkey -value <64-character-key-value>
resetkey -type connectorkey -value <64-character-key-value>
resetkey -type idmlibkey -value <64-character-key-value>
To update the communication key (or Master Key) in a file named idm-copy.inf, located in the current directory, using the communication key (or Master Key) value from the registry, type:
resetkey -type commkey -export -file idm-copy.inf
The specified inf file must be a valid setup file that follows the format of
idmsetup.inf. It is recommended that you backup the inf file before exporting the current communication key (or Master Key) to the file.
Client tools
A new version of Bravura Security Fabric may need a newer version of the target system client software installed on the primary node.
As of 9.0, Bravura Security Fabric is completely 64-bit, so it requires any target tools (for example, database clients, SDKs or any software our product loads directly to integrate with targets), to also be installed as 64-bit versions. This means that for fresh installs (including replication migrations), the 64-bit clients must be installed, and for cloned migration, the 32-bit clients must be uninstalled and the 64-bit client installed.
Refer to Connector Pack documentation for details on any targets that require target clients or tools.
Licensing
When migrating instances, you must use an existing license (which is installed by default with the product). When you migrate using a fresh installation (rather than replication or cloning), the license will be the same as when you originally installed Bravura Security Fabric. If you have updated your license since first installing Bravura Security Fabric, ensure that you manually copy the most recent license.
Web interface modifications
All custom web interface modifications should be reviewed. Some existing modifications will require modification or deletion, while new modifications may need to be added.
The best method to address this issue is to go through every file in the custom directory in the source instance and confirm the same file exists in the destination instance src directory. If a file does not exist in the new instance, the custom version of the file can probably be deleted. If a file does exist, go through the entire file and search for each tag or KVGroup in the new instance. If the tag or KVGroup does not exist, it can probably be deleted from the file. If it does exist, compare the custom version to the default version in the new instance and figure out what if any modification will need to be made to the custom version.
Finally, test all the web pages and verify that the desired modifications have been migrated properly. Also look for new web interface constructs that may require new modifications.
See Customization for more information.
The web server configuration files
The Bravura Security Fabric server must have a running web server. Microsoft Internet Information Services (IIS) is supported for automatic configuration by Bravura Security Fabric’s installer.
IIS URL Rewrite module is also required. If it was not installed as part of your IIS web server install, install it from http://www.iis.net/downloads/microsoft/url-rewrite .
By default, the setup program of your new instance would have configured the web server so that the necessary virtual directories are created, the CGIs are all registered, and determined whether clients navigating to the base URL will get redirected to a specific instance. If you have customized the behavior of the web server on your old instance in some way, you will have to manually do the same thing for the new instance.
Supporting systems
As mentioned in Inventory of systems , there are a number of potentially related supporting systems to consider in addition to the Bravura Security Fabric servers themselves. These systems fall into two categories; systems with Bravura Security Fabric software components installed on them, and other technologies that support the Bravura Security Fabric server.
When upgrading, ensure that the server requirements for the new product version are met on the server. See the latest Server requirements. Attempts to upgrade or patch on under-provisioned servers are likely to fail.
In particular, each local service will require redeployment for workstations to allow reintegrating to the new instance.
Python
Verify the minimum Python requirements for the upgrade.
Bravura Security Fabric versions 12.0.0 to 12.3x require Python 3.7.3+ 64-bit.
Bravura Security Fabric versions 12.4+ and 12.5+ require Python 3.10.5+ 64-bit.
Bravura Security Fabric versions 12.6 requires Python 3.11.2+ 64-bit.
Python must be installed for all users.
The upgrade in support may cause issues with some scripts.
See also
Release notes
Review the latest Release notes to identify changes that might affect expected product behavior.
Pay particular attention to:
Script changes for plugins and exit traps.
Access controls.
Features that have been added or revoked.
Operating system updates
Verify there are no pending Windows updates to be installed, and verify that no server restarts are scheduled before starting the upgrade or patching process.
Product password
Ensure that you know the Bravura Security Fabric service user (psadmin) password. This will be required to upgrade existing systems.
Learn more about Changes to the service account (psadmin) with serviceacct.
Bravura Privilege
Review the following:
Managed system policies. Ensure that no single account belongs to more than one policy.
Warning
As of version 12.0.0, Bravura Privilege does not allow for a managed account to belong to more than one policy. If an account is a member of multiple policies at the time of the upgrade, it will be removed from all policies, except from the managed system’s primary policy.
Session monitoring privileges for both managed system policies and self-service rules.
Warning
Session monitoring privileges have changed as of 12.0.0. All managed system policy and self-service rules will be cleared upon upgrade. You will need to reconfigure them after the upgrade.
Bravura Privilege Pattern trustee privileges. Trustee privileges changed in 12.0.0. The upgrade script should maintain any existing rules so they work how they used to, but authmod rules should be reviewed in case different behavior is desired.