Upgrade steps queue flush
Carry out the steps described in the sections below when upgrading a Bravura Security Fabric instance from 12.4 or newer to 12.4 or newer, using the queue flush method.
Restrict access
Restrict access via a global load balancer
Restrict access via a global load balancer and direct people to maintenance page.
Restrict access to the IIS server
Restrict access to the IIS server to only a local IP address and the loopback interface by using the IP and Domain Restrictions IIS feature.
You may need to install the IP and Domain Restrictions security feature for IIS.

IP and Domain Restriction settings:
Mode | Requestor | Entry type |
Allow | 127.0.0.1 | Local |
Allow | Local IP address of IIS server | Local |
Deny | 0.0.0.0/32 | Local |
If a load balancer or round-robin DNS has been configured in front of the Bravura Security Fabric , remove all application nodes from availability to the load balancer to stop new user sessions from being created (and avoid interrupting them when services go down). Optionally, redirect users to a static web page that mentions the cause and duration of the outage (and can be updated with notes if the outage takes longer than expected).
Update components if required
Update custom components if they need to be upgraded to accommodate functionality in the upgrade version.
Upgrade proxy servers
Currently, you can only upgrade minor versions of the proxy server. For example, 12.4.1 to 12.4.3. Major version changes require an uninstall of the previous version and a new install of the new version.
To upgrade or patch a proxy server using the setup installer:
Run
setupwith the 12.x msi.Setup shows you the list of existing instances on the server. Select the one you want to upgrade or patch, then click the
Upgradelink for that instance.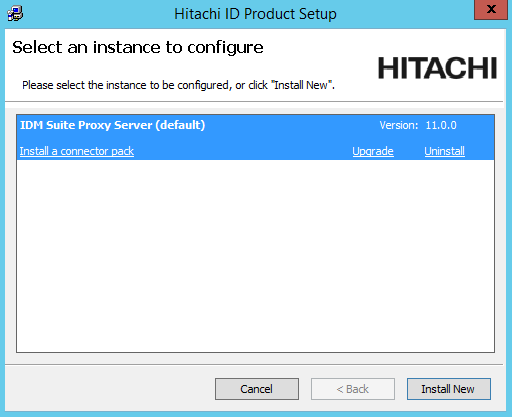
Click Yes to confirm.
Enter the password for the service account.
The setup program performs a pre-installation check and verifies all of the requirements for the installation.
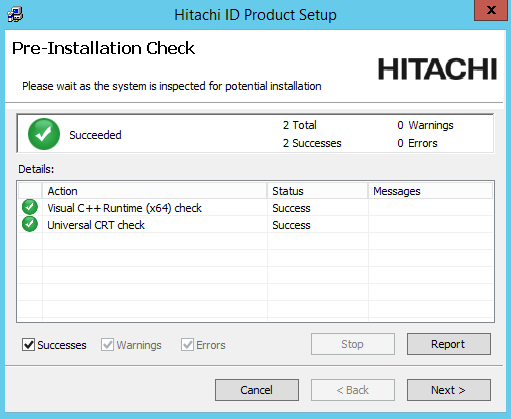
If all of the checks are successful, click Next to proceed with the upgrade or patch.
Click Next .
Click Finish to exit once the proxy server has been upgraded or patched.
Ensure IIS is off on each node after the proxy server upgrade.
Upgrade Connector Pack
Upgrade Connector Pack if necessary.
This step may not be necessary if no connector changes are made. It is not necessary for a build patch.
If custom connectors are used, they may need to be manually reloaded.
See Upgrading Connector Pack .
If Connector Pack is 3.1.x or older, you need to uninstall the old Connector Pack , and install a new one.
Note
The loadplatform program may fail, since the Database Service has been stopped; however the program will run as part or the post-installation tasks once Bravura Security Fabric has been upgraded.
Ensure services and IIS are off on each node after the Connector Pack upgrade.
Start setup on the primary node
Start setup on the primary node
To run the installer:
Run
setupas an Administrator with the latest MSI.The
setupprogram shows you the list of existing instances on the server.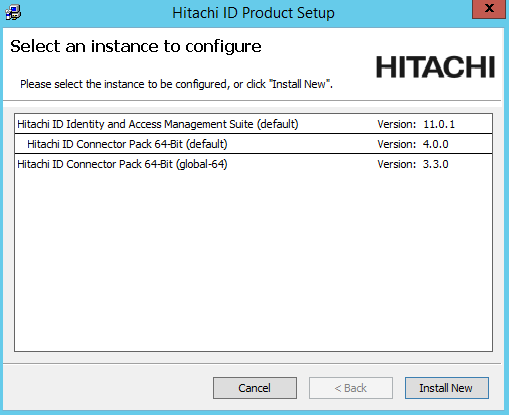
Select the instance you want to upgrade or patch, then click the Upgrade link for that instance.
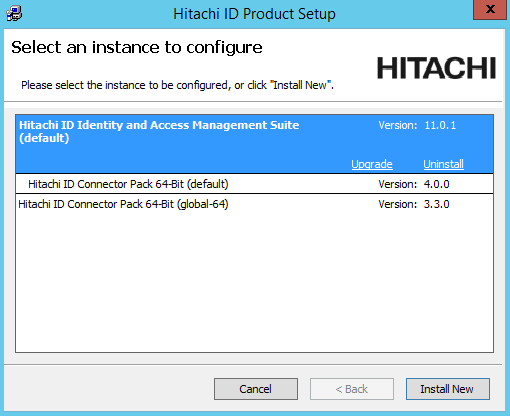
If the instance you want is not listed, refer to Run installer for pre-upgrade checks.
Read the product setup warning and click Yes to continue.
Enter the psadmin credentials.
Select Perform a standard upgrade by flushing queues beforehand (this may take some time).
Complete pre install checks.
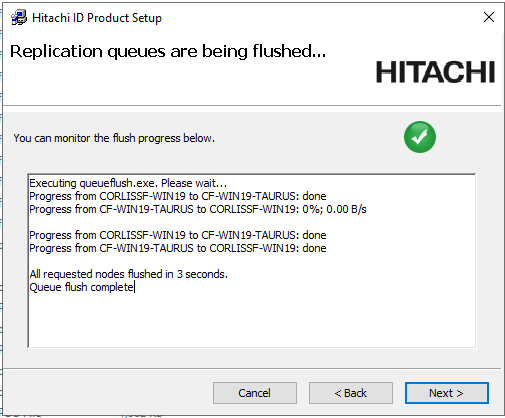
Wait for the
Queue flush completeconfirmation.
Back up all nodes and proxies
Back up all nodes and proxies.
Virtualized servers If you are using a virtualization solution to run your Bravura Security Fabric nodes as virtual machines, create a snapshot of each of node. Create a snapshot of each node’s corresponding database server if the application and database are not on the same server.
Physical servers If you are running the application and database nodes on bare-metal, image the server disks, including all disks where Bravura Security Fabric and its backend database files are stored. To determine the paths, you can check in the Windows registry:
HKLM\SOFTWARE\Bravura Security\Bravura Security Fabric\<instance>\PsInstallDir
HKLM\SOFTWARE\Bravura Security\Bravura Security Fabric\<instance>\PsTempDir
Backup the database.
Regardless of the chosen backup strategy, create an explicit SQL backup. A database backup provides additional flexibility in some recovery scenarios. It can potentially allow an administrator to quickly re-run a patch after fixing issues that may have caused it to fail.
If the database is hosted on a SAN or a shared database cluster where a snapshot or disk image is impossible, create a database backup to accompany the snapshot or disk image made for the application.
Continue installation on the primary node
Click Next after the pre-installation check.
Select Backup files if you want the installer to backup the files.
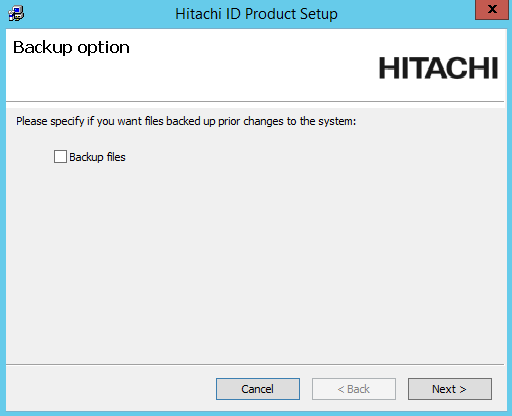
Choose if you want the installer to backup the database before the upgrade or patch.
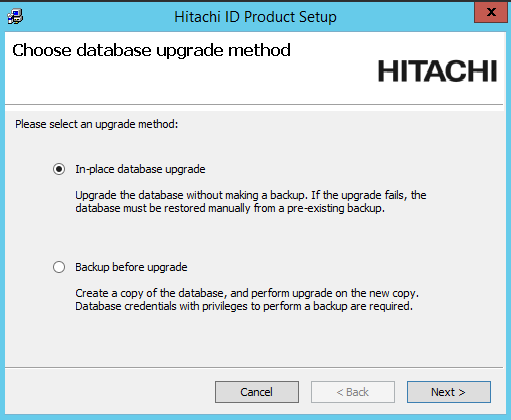
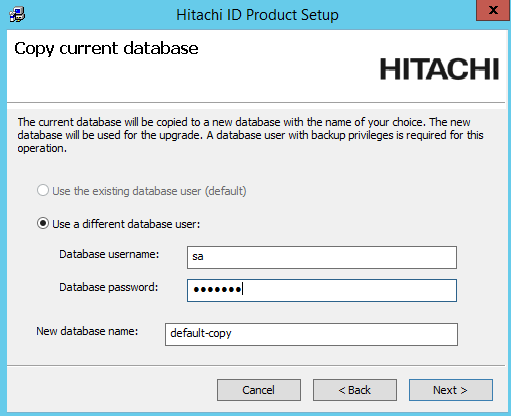
If you chose to do a database backup, enter the database user’s password and a name for the backup database.
During the upgrade, if prompted, update or add new encryption keys.
Bravura Security Fabric uses several encryption keys to ensure your data is secure.
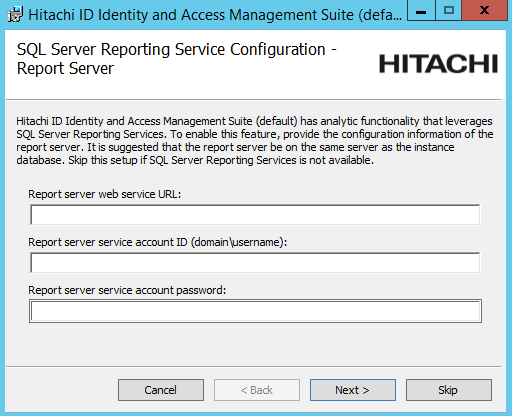
If you want to install the Analytics app, configure options to connect with SQL Server Reporting Services (SSRS) .
Click Skip if you do not want to install this feature now. Skip to Step 7.
If you skip SSRS setup now you can set it up after installing Bravura Security Fabric software, as documented in Reports.
You must have access to SQL Server Reporting Services to use this feature.
Enter a valid license for the upgrade if prompted.
Click Install to start the upgrade or patch.
The installer begins copying files to your computer. The Completed the Bravura Security Fabric (<instance>) Setup Wizard page appears after the Bravura Security Fabric features have been successfully installed.
Remain on the page until you run the installer on each secondary node.
Caution
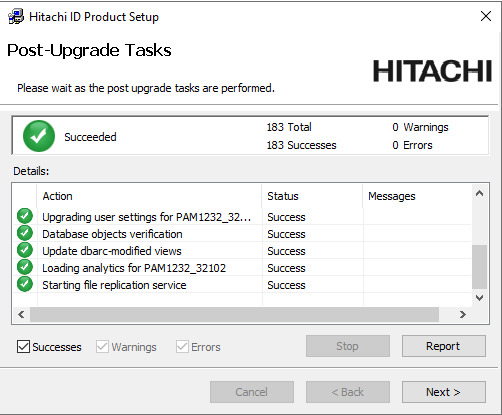
Do not stop the post-installation tasks. The installer is attempting to load connectors from the Connector Pack, language tags, and reports.
The Database service (
iddb) and File replication service (idfilerep) need to be running on the primary node for post upgrade tasks to properly sync files on secondary nodes.
Start upgrade on secondary nodes
After starting the upgrade on the primary node , upgrade the instance on each secondary node:
Run
setupas an Administrator with the latest MSI.Select the replication upgrade strategy.
After pre-installation checks, continue through upgrade steps.
Click Install to start the upgrade or patch.
The installer begins copying files to your computer. The page appears after the Bravura Security Fabric features have been successfully installed.
Remain on the page.
Caution
Do not stop the post-installation tasks. The installer is attempting to load connectors from the Connector Pack, language tags, and reports.
The Database service (
iddb) and File replication service (idfilerep) need to be running on the primary node for post upgrade tasks to properly sync files on secondary nodes.Repeat for each secondary node.
Start services
Start up services on the primary node
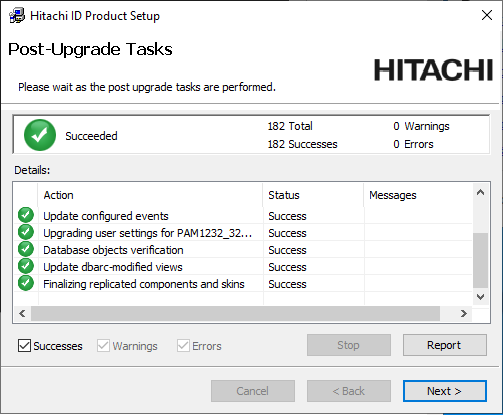
After you have run the installer on each secondary node, return to the primary node and continue past the Post-Upgrade Tasks page.
If any of the post-installation tasks produce warnings or errors, click:
Report for details on all post-installation tasks
or,
Messages... for details on a specific post-installation task
Otherwise, wait until the status changes to success, then click Finish.
If connectors (agents) were not installed successfully, see Troubleshooting Connector Pack installation.
Turn on IIS service
Before running the installer on the primary node, you turned of the IIS service. You should now remove the IIS server access restrictions to localhost, or re-enable completely.
Start up all services
Return to each secondary node to continue past the page in the installation process.
Do not enable or start services that were originally disabled before the patch or upgrade.
Add custom components
If you upgraded custom components, add them to the new instance.
Manually rebuild skins if required
The Bravura Security Fabric installer normally rebuilds user interface skins during post-upgrade tasks. If the skins failed to rebuild or there were issues, rebuild the skins manually.
See Customization for more information.
For secondary nodes, you have the option to resynchronize files from primary.
Manually reload connector pack if required
The Bravura Security Fabric installer normally loads connectors during post-upgrade tasks. If loading connectors failed or there were issues, reload connectors using the command:
loadplatform -target
See loadplatform usage for information.
Manually reload components if required
The Bravura Security Fabric installer normally reloads components during post-upgrade tasks. If component initialization fails or has issues during the upgrade:
From a command prompt, navigate to the instance directory.
Run the command:
instance.bat
Run the command:
script\manage_components.py load --upgrade
Confirm they succeed.
The API service (idapi) is required for this step.
Test replication
Carry out the following to test replication on the upgraded instance:
Test replication by making a change, for example, increment/decrement the DEFAULT EXPIRY SECOND S value, on one node and verify that the change is propagated on other nodes.
Verify that database replication queues all report running of stored procedures being replicated recently. This can be verified from the primary to make sure all nodes are reporting as replicating with each other.
Trigger file replication from the primary to secondary nodes. If any of the secondary nodes failed the "Finalizing replicated components and skins" post-upgrade task, run this command from the primary node command line:
updinst.exe -syncreg -syncfile -serverid <serverid>
If the primary node in each instance has the Connector Pack installed as global (no agents in the instance's agent\ directory), add the -globalcp option to the command.
File replication may take longer (an hour or two) since it has to interrogate the entire state of the secondary node and this notably depends on network latency to check the file system state.
Enable access via global load balancer to the primary node only
Enable access via global load balancer to the primary node only.
If you cannot do this, extend the system-wide outage until the secondary nodes can be added to the load balancer.
Re-enable schedule jobs
Re-enable scheduled jobs in the product, except for the PSUPDATE job.
From the main menu, click Manage the system > Maintenance > Scheduled jobs.
See Scheduling maintenance for more information.
Enable privilege access features
Carry out the following steps if privileged access features were configured in the old version.
Ensure correct nodes are doing password management.
Ensure the correct nodes continue to own managed system policies and drive randomization.
If any changes are required, do this after all nodes are replicating with each other so the primary is aware of the existence of the two secondary nodes via the servicelist table.
Enable automatic password randomization
You can temporarily disable password randomization for some or all managed system policies. This will override all other randomization settings, including scheduled randomization or randomization after an account is checked in. During this time, passwords that need to be randomized or overridden will be blocked and queued until password randomization is re-enabled.
Before upgrade, you temporarily disabled password randomization for all managed system policies. During this time, passwords that needed to be randomized or overridden were blocked and queued until password randomization is re-enabled.
To enable password randomization for all managed system policies:
Log in to Bravura Security Fabric .
Click Manage the system > Privileged access > Managed systems.
Scroll to the bottom of the policies list.
Select Allow policies to randomize passwords.
Click OK to confirm the selection.
Settings will be replicated to secondary nodes.
Note
Selecting this option will override the randomization setting of the individual managed system policies.
Warning
Make sure that you re-enable password randomization when it is safe to do so. Affected passwords may be immediately reset.
Disallow check-outs while randomization is disabled
Before starting the upgrade, you allowed check-outs while randomization is disabled.
To disallow check-outs for all policies while randomization is disabled:
Click Manage the system > Maintenance > System variables .
Set RES DISABLE RANDOMIZATIONS ALLOW CHECKOUTS to Disabled.
Click Update.
To disallow check-outs for selected policies instead of all policies:
Click Manage the system > Privileged access > Managed system policies.
Select the managed system policy.
In the General tab, deselect the checkbox for Allow check-outs when randomization is disabled.
Click Update.
Settings will be replicated to secondary nodes.
Note
If the Allow check-outs when randomization is disabled option for the managed system policy is deselected, the global setting RES DISABLE RANDOMIZATIONS ALLOW CHECKOUTS applies.
Enable RESOURCE AUTOMATICALLY RANDOMIZE PASSWORDS
Enable the system variable RESOURCE AUTOMATICALLY RANDOMIZE PASSWORDS (Manage the system > Privileged access > Options > Password randomization).
The setting will be replicated to secondary nodes.
Run smoke tests
Carry out the following tasks:
Test connection to target systems.
End users can authenticate.
Request to access a password - auto approved.
Request to access a password - with authorization.
Randomize password.
Override password.
Confirm passwords are replicating between secondary nodes and the primary.
Include additional test plan use cases to the smoke testing as needed.
Allow access
Remove global load balancer restrictions that you added before the upgrade.
Confirm end users can access from globally available URLs.
Next
Carry out further post upgrade steps as necessary.
